


3
1. Read all of the instructions before
installing the speaker system.
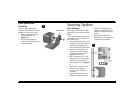
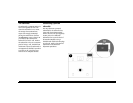
2. Attach the provided stand to the
Decoder Amplifier if you wish to
place the unit vertically. For more
details see “Decoder Amplifier
Placement” on page 12.
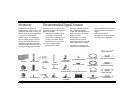
3. Connect the Satellites, Center
Speaker, and Subwoofer to the
Decoder Amplifier.
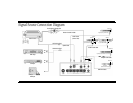
4. Connect the Dolby Digital output
of your digital program source to
the coaxial and/or optical Dolby
Digital input of the Decoder
Amplifier.
5. Connect your normal audio signal
sources via the Analog Line In
inputs. An owner of a Sound
Blaster Live! sound card with a
Digital DIN output should use the
supplied cable to connect it to the
Digital DIN input instead.
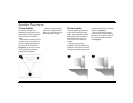
6. Using the placement instructions
as a guide, position the Satellites,
the Center Speaker and
Subwoofer. Install the Desktop
Stands and Floor Stands as
appropriate. If you wish to
substitute a powered subwoofer
for the subwoofer that comes
with
DTT3500 Digital
, read
“Substituting a powered
subwoofer” on page 11.
7. Connect the Power Adapter to the
Decoder Amplifier.
8. Turn on the power. Use the TEST
function on the Remote Control to
position and balance the
speakers.
9. You may wish to experiment with
speaker placement briefly before
concealing the connecting cables
and making the installation more
permanent.
10. The unit is ready for you to enjoy.
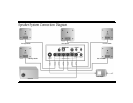
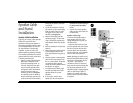
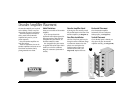
Speaker Connections
Insert one satellite’s plug into the
corresponding Speaker Output on the
Decoder Amplifier. Repeat this
process for the remaining satellites,
center speaker and subwoofer. For
more details see “Speaker Cable and
Stand Installation” on page 7.
If substituting a powered
subwoofer, connect it to the
Subwoofer Line Out. For more details
see “Substituting a powered
subwoofer” on page 11.
Power Adapter Connections
Insert the small DC connector into the
15V DC IN
jack on the back of the
Decoder Amplifier. Insert the Power
Adapter’s AC plug into an appropriate
receptacle.
Note:
Set the Decoder Amplifier to
standby mode before unplugging or
turning off the power supply.
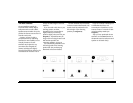
Installation Sequence
Speaker System Connections