UV8035
7
DETACHABLE CONTROL PANEL
• DO NOT insert the control panel from the
left side. Doing so may damage it.
• Do not put pressure on the display or
control buttons when handling the front
panel.
• Do not touch the electrical terminals on the
front panel or main unit.
• Remove dirt or foreign substances with a
clean, dry cloth only.
• Do not expose the front panel to extreme
temperatures or direct sunlight.
• Keep volatile agents such as benzene,
thinner or insecticides away from the front
panel.
• Do not disassemble the front panel.
• When taking the front panel with you,
please use the supplied carrying case to
protect the panel from dirt and damage.
• Make sure there is no dust or dirt on the
electrical terminals on the back of the panel
as this could cause intermittent operation or
other malfunctions.
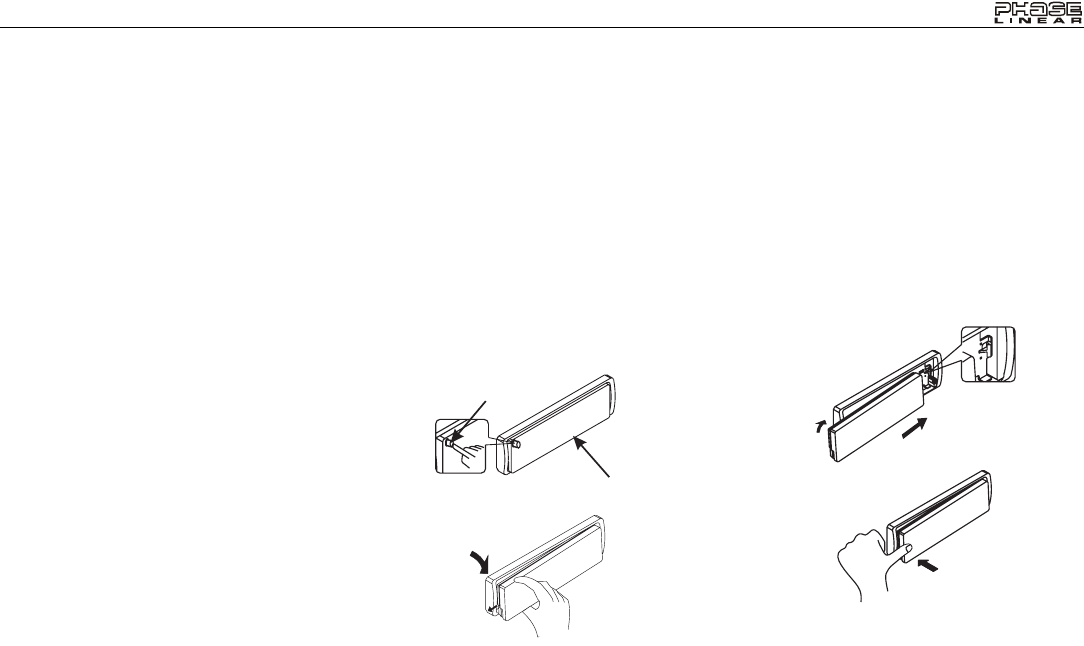
Removing the Control Panel
The front panel release button (3) releases the
mechanism that holds the front panel to the
chassis. To detach the front panel, perform the
following steps:
1. Turn the power off.
2. Press the release button.
3. Grasp the left side to release the front panel
and then pull it an an angle to remove the
right side from the chassis.
4. Store the front panel it in the supplied carry-
ing case to protect it from dirt and damage
and take it with you to prevent theft.
Attaching the Control Panel
Before re-attaching the front panel, make sure
the electrical terminals on the back of the panel
are free of dust and dirt, as debris could cause
intermittent operation or other malfunctions.
To attach the front panel:
1. Insert the right side of the control panel into
the main unit, making sure the panel is
attached at the T-joint (see diagram).
2. Push the left side of the control panel near
the middle until a “click” sound is heard.
Release
Button
Control Panel
2.
1.
PUSH


