


Black plate (45,1)
2
1
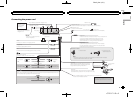
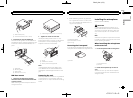
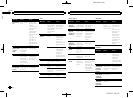
1 Side bracket (small)
2 Flush surface screw (5mm×6mm)
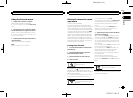
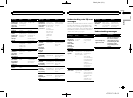
2 Install the unitinto the dashboard.
Insert the mountingsleeve into the dashboard.
And then securethe mounting sleeve by usinga
screwdriver to bendthe metal tabs (90°) into
place.
182
53
1
3
4
2
1 Dashboard
2 Mounting sleeve
3 Side bracket
4 Screw (2mm×3mm)
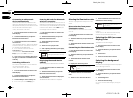
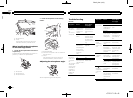
DIN Rear-mount
1 Determine the appropriateposition
where theholes on the bracket andthe side
of the unitmatch.
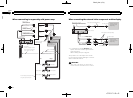
When installing ina shallow space, use thefol-
lowing screw holes.
1
1
1 Use binding screws(4 mm× 3mm) only.
2 Tighten two screwson each side.
Use any ofbinding screws (4mm × 3mm),
binding screws (5mm× 6mm) or flush surface
screws (5mm× 6mm), depending on the
shape of screwholes in the bracket.
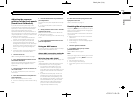
1
2
3
1 Screw
2 Dashboard or console
3 Factory radiomounting bracket
Note
In some typesof vehicles, discrepancy may
occur between theunit and the dashboard. If
this happens, usethe supplied frame to fillthe
gap.
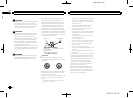
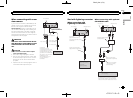
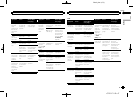
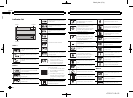
Removing the unit
Extend top andbottom of the trim ring outwards
to remove thetrim ring. And then loosenthe
screws (2 mm× 3 mm) to removethe mounting
sleeve.
! Whenreattaching thetrim ring, push the
trim ring ontothe unit until it clicks.(If the
trim ring isattached upside down, thetrim
ring will notfit properly.)
1
3
2
1 Mountingsleeve
2 Screw(2mm×3mm)
3 Trimring
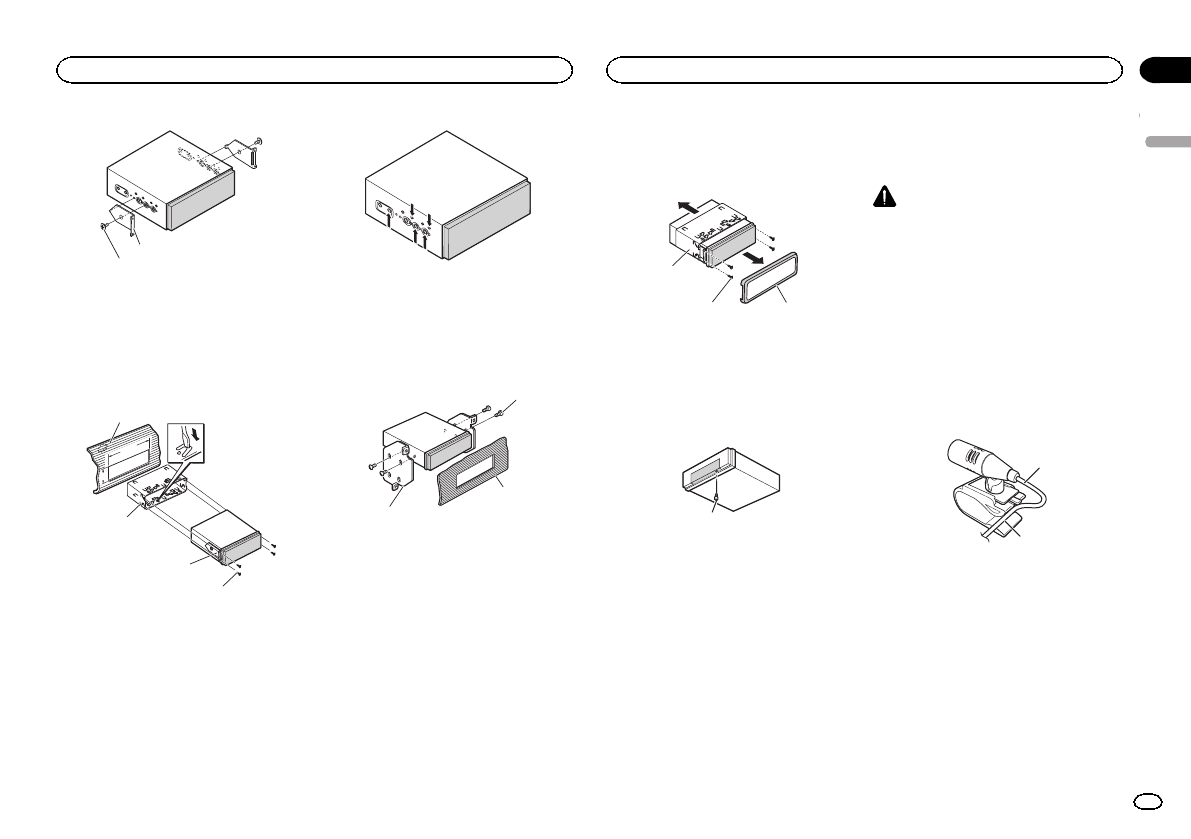
Fastening the front panel
If you do notplan to detach the frontpanel, the
front panel canbe fastened with supplied screw.
1
1 Screw
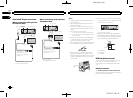
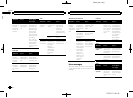
Installing the microphone
(Function of AVH-X7500BT)
CAUTION
It is extremelydangerous to allow the micro-
phone lead tobecome wound around the steer-
ing column orshift lever.Be sure to install the
unit in sucha way that it willnot obstruct driv-
ing.
Note
Install the microphonein a position and orienta-
tion that willenable it to pick upthe voice of the
person operating thesystem.
When installing the microphone
on the sun visor
1 Fit the microphone lead into thegroove.
1
2
1 Microphone lead
2 Groove
2 Install the microphone clip on the sun
visor.
With thesun visor up, install the microphone
clip. (Lowering thesun visor reduces the voice
recognition rate.)
English
Installation
45
Section
Installation
En
24
<CRD4711-B>45