A
D
J
U
S
T
I
N
G
&
T
U
N
I
N
G
Turning On The Amplier
The amplier automatically turns on a few seconds after you turn vehicle’s igni-
tion switch to ACC ON or turn on your auto sound system, depending upon how
you wired the system. The POWER indicator on the top of the amplier illumi-
nates when the amplier is on.
Important: Your amplier requires 90 amps or more of power from your vehicle’s
battery during operation. To protect your battery from your battery from dis-
charging, do not operate the amplier unless your vehicle us running.
Adjusting The Audio Level (“Gain Matching”) By Ear
For best performance, you must match the amplier’s input sensitivity to your
source unit’s maximum output level. The GAIN CONTROL (MIN / MAX) located
on the side of the amplier is designed to do this. It is Not a volume control. It
adjusts the incoming signal level so that the source unit and amplier reach
maximum output at the same time. This assures that maximum system is
achieved with minimal distortion.
1. Turn the GAIN CONTROL (MIN / MAX) fully counterclockwise to MIN.
2. Play full frequency music that has continuous high levels (FM pop music is a
good choice).
3. Turn up the source unit’s volume control until just before you hear the source
unit’s distortion or 90% of full output (which ever comes rst).
4. SLOWLY turn the GAIN CONTROL clockwise until just before you hear
amplier or speaker distortion, until you reach a maximum comfortable listening
level (which ever come rst).
5. Turn the source unit’s volume control back to a desire comfortable listening
level and enjoy.
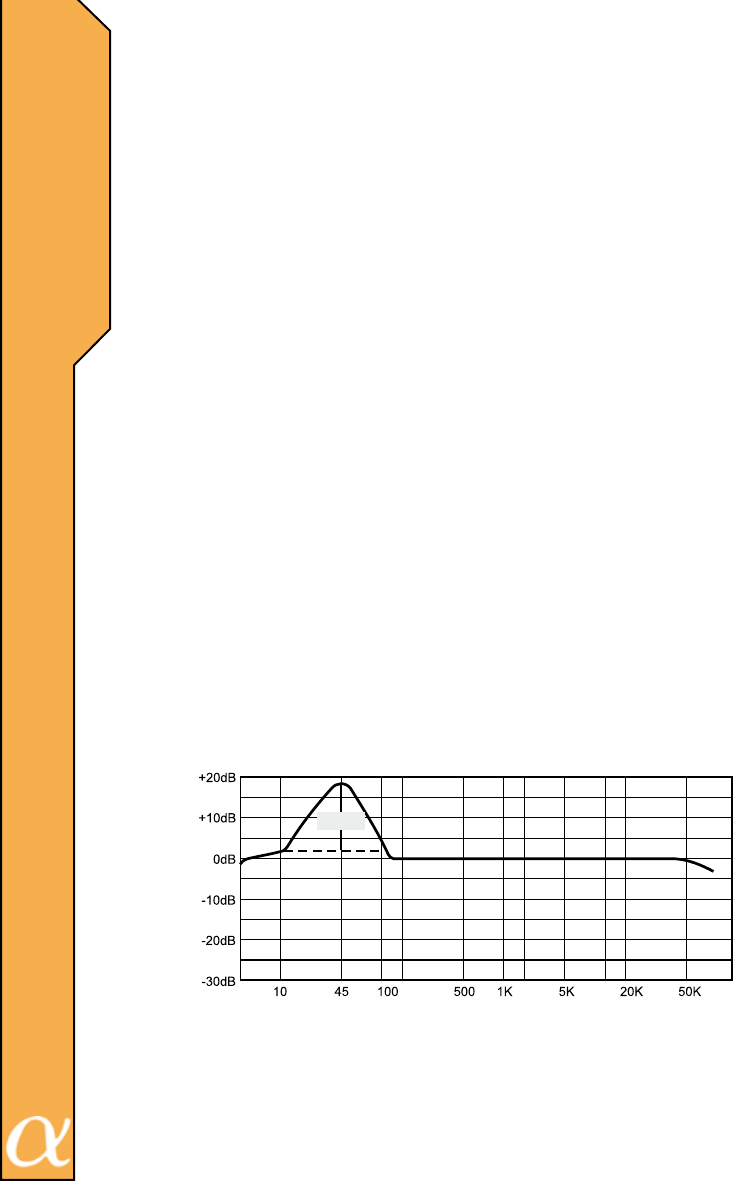
The BASS BOOST CONTROL raises the amplier output up to 18db at fre-
quencies tightly centered around 45 Hz. This “bump” can have a dramatic affect
on the bass system’s apparent volume. Use caution (!) when adjusting this
control as serious subwoofer damage may result from overpowering or overex-
cursion.
Plus 18dB
@45Hz
FREQUENCY RESPONSE
RESPONSE (dB)
FREQENCY (Hz)
23


