


-5-
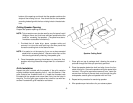
Speaker Cutting Detail
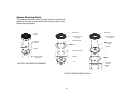
1. Place grille on top of package shelf, allowing the studs to
protrude through the holes you previously punched.
2. Place the speaker below the shelf and align it over the four
studs of the grille. Secure the speaker using four speed clips
included. If the grille requires screws and nuts, insert the
screws from the top of the rear deck, and through the grille
and speaker; secure grille and speaker with hex nuts.
3. Repeat entire procedure for remaining speaker.
4. Wire speakers per instructions for your stereo system.
bottom of the opening and check that the speaker matches the
shape of the existing cut-out. Also check that the four speaker
mounting holes align with the four existing holes in the steel sub-
liner.
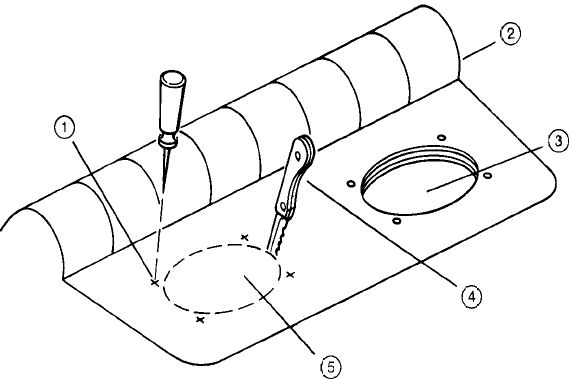
Cutting Speaker Opening
Prepare the speaker opening as follows:
NOTE: This procedure can also be used for any flat panel install
(Wagons, Vans, etc.) that have sufficient space behind the
panel for recessing the speaker. (The panel must be re-
movable or accessible from behind.)
1. Provided that all holes align, place speaker aside and
proceed to cut out the oval opening in the fiber panel that
covers the existing hole in the steel sub-liner.
NOTE: It is easier to cut the opening if you use a sharp serrated
steak knife in a sawing motion. Use care not to over-cut the
hole size by periodically checking the speaker grille.
2. Once the speaker openings have been cut, pierce the four
speaker mounting holes and enlarge them to a diameter of
3/16”.
Grille Installation
Inspect the grille included with the speaker. If the grille contains
existing threaded studs projecting from it , skip this section. If the
grille contains four threaded holes in it, locate the threaded rods
included with the speaker and screw them firmly into the holes in
the grille. The third grille type contains four holes for use with four
screws. Proceed with grille installation as follows: