


5 6
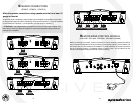
MOUNTING LOCATION
Before you start the installation, it will be necessary to find a mounting location for the ampli-
fier. Find a location in which the amplifier will receive adequate ventilation in order to
dissipate the heat it develops during operation. Two popular mounting locations are in the
trunk or under the seat.
Select the location in which you wish to mount the amplifier. Use caution when mounting
amplifier, there are many wires, gas lines, vacuum lines, brake lines as well as a gas tank
in the automobile. Make sure you know where they are when mounting the amplifier to
avoid puncturing lines, shorting wires or drilling holes in the gas tank. Once you are ready,
use a pencil to mark the mounting holes in the bottom panel. After you have marked the
locations of the holes move amplifier out of the way and drill small starter holes to make the
tapping screws easier to install. Use provided screws to tighten down the amplifier.
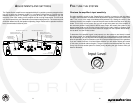
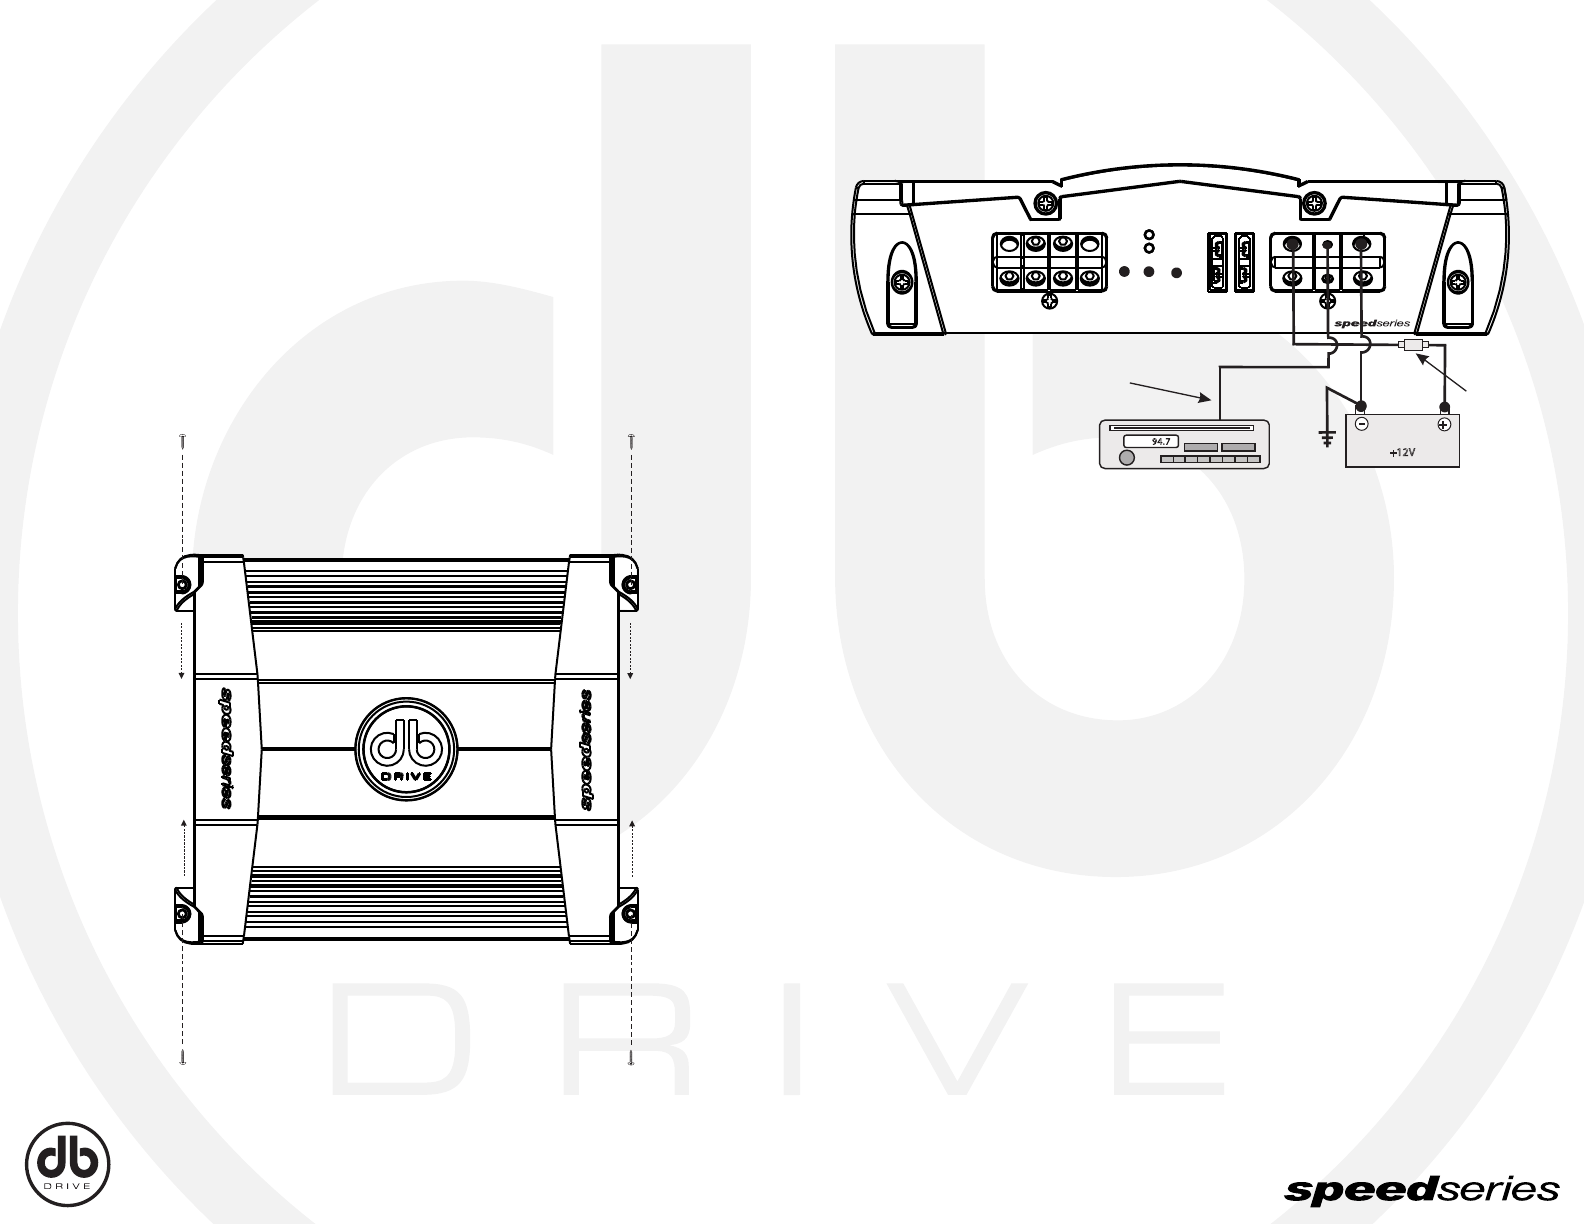
POWER CONNECTIONS
(SPA90.2 , SPA90.4 , SPA150.4 , SPA1000D ,
SPA1300D , SPA1600D , SPA1900D )
IMPORTANT! Before making any connections, disconnect the car’s battery until the instal-
lation is completed to avoid possible damage to the electrical system.
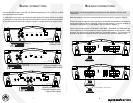
Connect the amplifier to the car’s battery
At times, the amplifier will need to draw large levels of current that cannot be provided by
any circuit in the car’s fuse box. We recommended using a 4 to 8 gauge power wire for your
connections depending on the amplifier and length of the wire. Strip one end of the wire to
connect to the terminal on the amplifier marked “batt+”. Loosen screw terminal and connect
bare wire and tighten. Use caution to make sure no stray wire strands come in contact with
surrounding terminals causing short circuits. Run the wire directly to the positive terminal of
the car’s battery. Make sure to use an in-line fuse within 12” of the car’s battery to protect
the electrical system and amplifier against short circuits and/or power surges.
Connect the ground terminal of the amplifier to the car’s chassis
For the ground connection, use a 4 to 8 gauge wire (black) to connect to the terminal
marked “ground” and then connect it to the car’s chassis. Try to keep the length of the cable
as short as possible, preferably less than 6”. Also make sure that the point on the car where
the connection is to be made is free of paint and dirt.
Connect the remote terminal of the amplifier to a switchable +12V source
This connection allows the amplifier to be turned on and off with the power control of the
radio. If the radio has a REMOTE output terminal, connect it to the amplifier’s terminal
marked “remote” (using a 16 gauge wire or heavier). Now when the radio is turned on, the
amplifier will automatically turn on. This connection can also be made to the radio’s Power
Antenna wire.
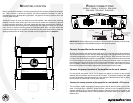
spa90.2
classAB 2 channel amplifier
350 watts
speaker output
power
fuses rem gnd+12v
protect
(-) ------ bridged ------ (+)
R (-) R (+) L (-) L (+)
+12V
-
+
Turn on Remote
94.7
In-Line Power fuse
Mounted Within 12”
From Battery
Recommended.
Battery