


DXZ535 13
English
12 DXZ535
English
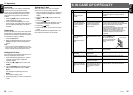
“Z+ OFF” ➜ “B-BOOST” ➜ “IMPACT” ➜
“EXCITE” ➜ “CUSTOM” ➜ “Z+ OFF” ...
• B-BOOST : bass emphasized
• IMPACT : bass and treble empha-
sized
• EXCITE : bass and treble empha-
sized mid de-emphasized
• CUSTOM : user custom
• Z+ OFF : no sound effect
Adjusting the tone
Press the [A-M] button and select the item to
adjust. Each time you press the [A-M] button,
the item changes as following order:
●When “B-BOOST” is set
“B-BOOST” ➜ “BAL 0” ➜ “FAD 0” ➜ Last
function mode.
●When “IMPACT” is set
“IMPACT” ➜ “BAL 0” ➜ “FAD 0” ➜ Last
function mode.
●When “EXCITE” is set
“EXCITE” ➜ “BAL 0” ➜ “FAD 0” ➜ Last
function mode.
●When “CUSTOM” is set
“BASS” ➜ “TREBLE” ➜ “BAL 0” ➜ “FAD
0” ➜ Last function mode.
●When “Z+ OFF” is set
“BAL 0” ➜ “FAD 0” ➜ Last function mode.
Adjusting the bass (Gain,
Frequency, Q-curve)
This adjustment can be performed when the Z-
Enhancer Plus is set to “CUSTOM”.
1.
Press the [A-M] button and select “BASS”.
2. Turning the [ROTARY] knob clockwise em-
phasizes the bass; turning it counterclock-
wise attenuates the bass.
∗ The factory default setting is “B<G 0>”. (Ad-
justment range: –6 to +6)
3. Press the [d] or [a] button to select “B<F
60>”.
Turninng the [ROTARY] knob clockwise or
counterclockwise to select the frequency.
∗ The factory default setting is “B<F 60>”.(Ad-
justment 60/100/200 Hz)
4.
Press the [d] or [a] button to select “B<Q 1>”.
Turninng the [ROTARY] knob clockwise or
counterclockwise to select the Q-curve.
∗ The factory default setting is “B<Q 1>”.(Ad-
justment 1/1.25/1.5/2)
5. When the adjustment is complete, press the
[A-M] button several times until the function
mode is reached.
Adjusting the treble (Gain,
Frequency)
This adjustment can be performed when the Z-
Enhancer Plus is set to “CUSTOM”.
1.
Press the [A-M] button and select “TREBLE”.
2. Turning the [ROTARY] knob clockwise em-
phasizes the treble; turning it counterclock-
wise attenuates the treble.
∗ The factory default setting is “T<G 0>”. (Ad-
justment range: –6 to +6)
3. Press the [d] or [a] button to select
“T<F 10>”.
Turninng the [ROTARY] knob clockwise or
counterclockwise to select the frequency.
∗ The factory default setting is “T<F 10>”.(Ad-
justment 10 kHz/15 kHz)
4. When the adjustment is complete, press the
[A-M] button several times until the function
mode is reached.
Adjusting the balance
1. Press the [A-M] button and select “BAL 0”.
2. Turning the [ROTARY] knob clockwise em-
phasizes the sound from the right speaker;
turning it counterclockwise emphasizes the
sound from the left speaker.
∗ The factory default setting is “BAL 0”. (Adjust-
ment range: L13 to R13)
3. When the adjustment is complete, press the
[A-M] button several times until the function
mode is reached.
Adjusting the fader
1. Press the [A-M] button and select “FAD 0”.
2. Turning the [ROTARY] knob clockwise em-
phasizes the sound from the front speakers;
turning it counterclockwise emphasizes the
sound from the rear speakers.
∗ The factory default setting is “FAD 0”. (Adjust-
ment range: F12 to R12)
3. When the adjustment is complete, press the
[A-M] button several times until the function
mode is reached.
Basic Operations
7. OPERATIONS
Basic Operations
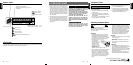
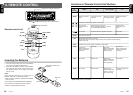
Note:Be sure to read this chapter referring to the front diagrams of
chapter “3. CONTROLS” on page 5 (unfold).
CAUTION
Be sure to lower the volume before switch-
ing off the unit power or the ignition key. The
unit remembers its last volume setting. If
you switch the power off with the volume up,
when you switch the power back on, the
sudden loud volume may hurt your hearing
and damage the unit.
Turning on/off the power
Note:
• Be careful about using this unit for a long time
without running the engine. If you drain the car’s
battery too far, you may not be able to start the
engine and this can reduce the service life of the
battery.
1. Press the [FNC] button.
2. The illumination and display on the unit light
up. The unit automatically remembers its last
operation mode and will automatically switch
to display that mode.
3. Press and hold the [FNC] button for 1 sec-
ond or longer to turn off the power for the
unit.
Note:
• System check
The first time this unit is turned on after the wire
connections are completed, it must be checked
what equipment is connected. When the power is
turned on, “SYSTEM” and “PUSH PWR” appear
in the display alternately, so press the [FNC] but-
ton. The system check starts within the unit.
When the system check is complete, press the
[FNC] button again.
Selecting a mode
1. Press the [FNC] button to change the opera-
tion mode.
2. Each time you press the [FNC] button, the
operation mode changes in the following or-
der:
Radio mode ➜ CD mode ➜ CD changer
mode ➜ MD changer mode ➜ DVD changer
mode ➜ TV mode ➜ AUX mode ➜ Radio
mode...
∗ External equipment not connected with
CeNET is not displayed.
Adjusting the volume
Turning the [ROTARY] knob clockwise in-
creases the volume; turning it counterclockwise
decreases the volume.
∗ The volume level is from 0 (minimum) to 33 (maxi-
mum).
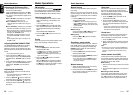
Switching the display
Press the [D] button to select the desired display.
Each time you press the [D] button, the display
switches in the following order:
∗ Once selected, the preferred display becomes
the display default. When a function adjust-
ment such as volume is made, the screen will
momentarily switch to that function’s display,
then revert back to the preferred display sev-
eral seconds after the adjustment.
∗ When you have entered a title in a CD, it ap-
pears in the sub display. If you have not en-
tered a title, “NO TITLE” appears in the title
display instead. For information on how to en-
ter a title, refer to the subsection “Entering
titles” in section “Operations Common to
Each Mode”.
Setting the Z-Enhancer Plus
This unit are provided with 3 types of sound tone ef-
fects stored in memory. Select the one you prefer.
∗ The factory default setting is “Z+ OFF”.
Each time you press the [Z+] button, the tone ef-
fect changes in the following order:
Main display
Sub display
Clock display
Main display