


8
© 2003 Directed Electronics, Inc.
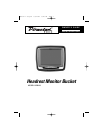
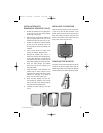
The HRB100 mounting adapter allows secure
installation of the Directed Video RVM Series
Removable Monitors by installing the mounting
assembly into the vehicle headrest or seatbacks.
The HRB100 will accommodate the Directed Video
5.6”, 6.8”, and 7.0” monitors.
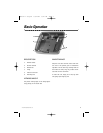
The HRB100 consists of two major pieces: the
receiver bracket and the headrest bucket.
1. Using the supplied template, center the
cut out area on the headrest or seatback
and mark the fabric area to be cut as indi-
cated. With a new razor knife, cut the fab-
ric as marked. Then cut the foam as indi-
cated on the template. Using the knife
remove as much of the foam padding as
necessary to allow clearance of the moni-
tor bucket.
WARNING! Be careful not to remove the headrest fab
ric past the line marked FABRIC CUT LINE.
If the fabric is removed past this line, the
headrest’s inner foam may be visible after
the completed installation.
2. Once the headrest has been marked and
cut to accommodate the monitor bucket
the metal support bar around the inside of
the headrest will be noticeable. The mon-
itor bucket will be secured to this bar.
3. Run the supplied din cable through the
bottom of the headrest. Leave enough
slack in the cable so the headrest still has
full movement during adjustment.
4. Secure the headrest bucket by tying the
supplied zip ties through the mounting
feet and around the metal support bars.
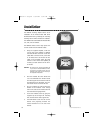
5. The RVM Monitor locks into the receiver
bracket until physically released. The
release mechanism is in the rear of the
bracket.
Installation
N87301 1-03.qxd 5/6/2003 8:47 AM Page 8