


www.rletech.com 20 970.484.6510
3 F110 Web Interface
color based upon where the temperature or humidity is in relation to the established high and
low thresholds.
If the temperature or humidity is between the high and low thresholds and more than five (5)
degrees from either threshold, the status icon will be green. If it is within five (5) degrees of the
high threshold, the status icon will be yellow. If it is within five (5) degrees of the low threshold,
the status icon will be blue. If the high or low threshold is exceeded, the status icon will be red.
If no thresholds are currently defined, the status icon will be gray.
The Status screen also displays the current status of any switch sensors connected to the F110.
If the status icon above the switch sensor is red, then that switch sensor is currently in an alarm
state. Below the status icon and switch sensor label, the current switch sensor state will be
displayed. If you are unsure as to which state (i.e. open or closed) to set for the switch sensor
alarm state and the switch sensor is not currently in an alarm state, set the alarm state to be the
opposite of what is displayed here. Refer to the manual of each sensor for information on the
normal state (open or closed) of the switch sensor in use.
Below the DHCP Name and time display are a number of radio buttons and form fields that
allow the display of the F110 web server interface to be modified. Changing the Display radio
buttons will toggle how inactive sensors are displayed, modifying the Update Every form field
will adjust the refresh time of the F110 web server interface and selecting the Celsius radio
button instead of the Fahrenheit radio button will display sensor values in Celsius.
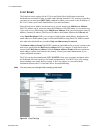
3.3. Settings Screen
The F110 Settings Screen is used to modify the F110 configuration. Here users can configure
Network, Email, SNMP, Alert Threshold, Security, and Advanced settings. When settings are
modified and saved, the F110 will automatically reset and start with the new configuration.
Note After you make a field change, click on Accept Changes at the bottom of the screen, then click
on Save Settings on the left hand column.
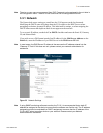
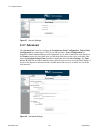
You will see an authentication security prompt appear once accessing the Settings Menu.
Default from RLE, there is no USER name and NO password assigned to the unit. A password
can be assign to the unit later during the configuration. There is no USER name assigned to the
unit, at this time.
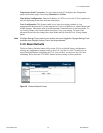
Figure 3.2
Authentication Security Prompt (no Username or Password)