


Important: Installation of automotive
stereo components can require
extensive experience performing a
variety of mechanical and electrical
procedures. Although these instruc-
tions explain how to install a GTi
component system in a general
sense, they do not show the exact
installation method for your particu-
lar car. If you don’t feel you have the
necessary tools or experience, ask
your authorized JBL car audio dealer
about professional installation
options.
Warning: Playing loud music in your
automobile can permanently damage
your hearing as well as hinder your
ability to hear traffic. We recommend
listening at
low volume while driving. JBL accepts
no liability for hearing loss, bodily
injury
or property damage
resulting from
use or
misuse of this product.
A Note About System Performance
For the best performance possible,
the
GTi components should be used with
a two-channel amplifier with output
power
of at least 50W RMS per channel.
The
passive
crossover contains impedance-
compensating
circuitry and has been
computer-optimized for the flattest
possible frequency response with the
tweeter flush-mounted, on-axis with
the listener. The combined responses
of the speakers and passive
crossover constitute a 4th-order
Linquitz-Riley
acoustic alignment and
cannot be duplicated
with any elec-
tronic crossover currently available
for car audio use. Consequently, bi-
amping a GTi
component system with an electronic
crossover is not recommended.
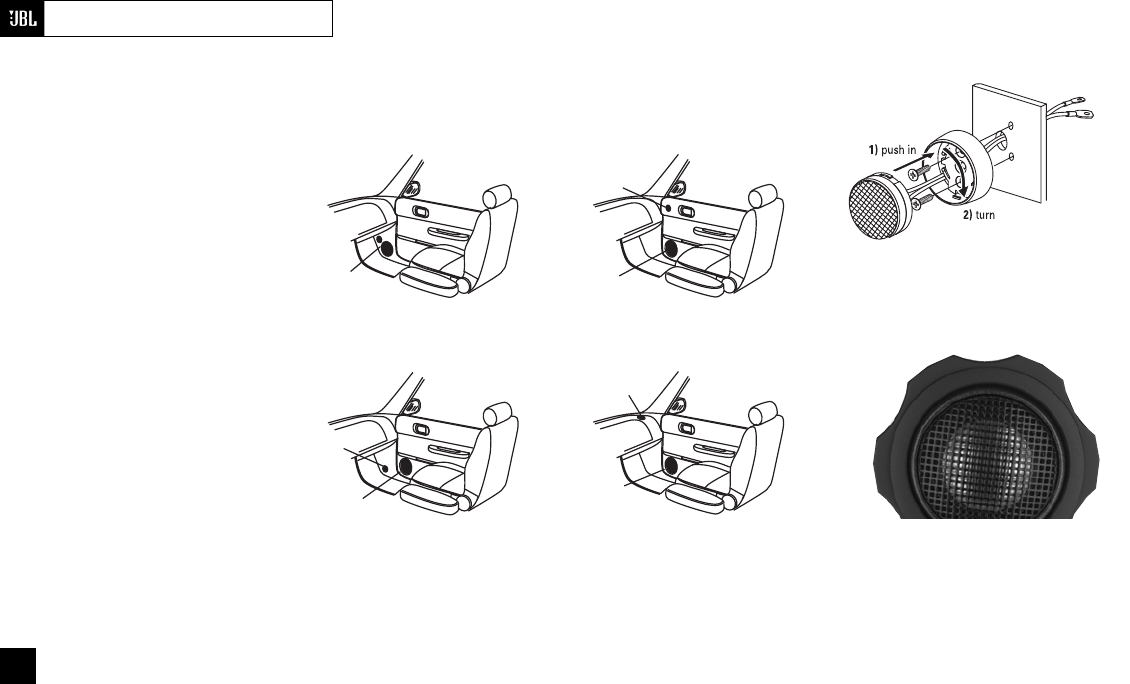
Speaker Placement
Figures 1–4 show possible speaker
placements in the order of most
desirable to least desirable. Kick-
panel mounting will provide the best
staging and imaging in most vehicles.
TWEETER
on dash
WOOFER
in factory-
door location
TWEETER
on kick panel
WOOFER
in factory-
door location
TWEETER
and
WOOFER
on kick panel
WOOFER
in factory-
door location
TWEETER
in high/forward
location on door
Fig 1
Fig 3
Fig 2
Fig 4
Figure 1.
Mounting the woofer and tweeter in
the kick panels
Figure 2.
Mounting the woofer in the door and
the tweeter in the kick panel
Figure 3.
Mounting the woofer and tweeter in
the doors
Figure 4.
Mounting the woofer in the door and
the tweeter in the dash
–
+
Figure 5.
Surface-mounting the tweeter:
first push in (1), then turn (2)
Figure 6.
Flush-mounting the tweeter:
first push in (1), then turn (2)
0