


15
VM9224
Touch the RADIO, DISC, USB1, USB2, SD, BT, NAV, AUX or CAMERA button
to select the corresponding source.
NOTE: If an iPod is attached to a USB1 port, “IPOD” appears instead of
the text “USB1.”
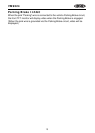
External Devices
External peripheral devices, including a game console, camcorder, navigation
unit, iPod, Zune, etc. can be connected to this unit via RCA output using an
A/V Media Adapter Cable (not included).
Connect the external device to the A/V Media Adapter Cable and then plug the
cable into the A/V INPUT connector (9) on the front of the radio. Select “AUX”
or “AUX IN” (when monitor is closed) mode to access auxiliary devices. You
cannot directly control external devices connected to the A/V INPUT. For
information regarding the use of USB devices, see “Inserting a USB Device or
SD Card” on page 39.
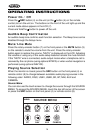
Volume Adjustment
Volume Increase/Decrease
To increase or decrease the volume level, turn the rotary encoder (7) on the
front panel or press the VOL-/+ buttons (15, 16) on remote control. When the
volume level reaches “0” or “40”, a beep sounds, indicating that the adjustment
limit has been reached. The TFT screen displays the volume level for 3
seconds.
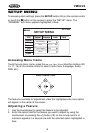
Programmable Turn-On Volume
This feature allows the user to select a turn-on volume setting regardless of
the volume setting prior to turning the unit off.
To program a specific turn-on volume level, turn the rotary encoder (7) to
adjust the volume to the desired turn-on volume. Push and hold the rotary
MUTE
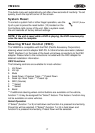
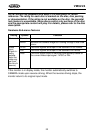
3.5mm A/V Cable (not included)
Video
Left Audio
Right Audio
Ground
1
2
3
4