


Continued on Next Page
SB-F-EDG/10W3v3_INSTR_SKU# 011254
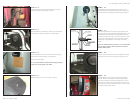
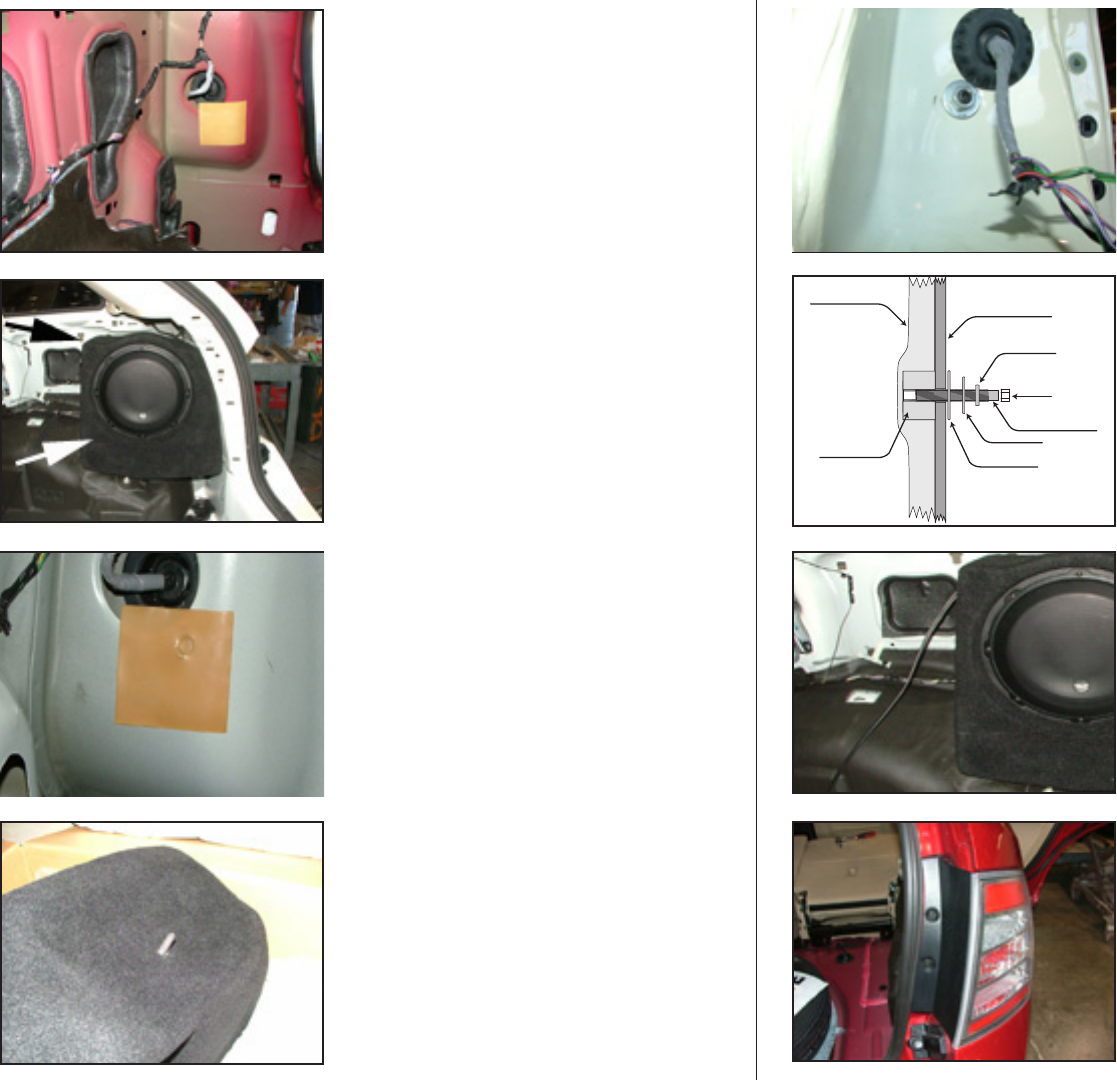
S T E P 1 5
Extend mounting stud 1 1/2 inch from enclosure.
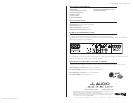
S T E P 1 4
Remove Stealthbox®. Drill 1/2 inch diameter hole through
wax square and sheet metal at stud impression.
Remove the wax square.
it is recommended that vehicle undercoating be applied
where the mounting hole was drilled.
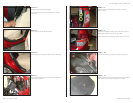
S T E P 1 3
Place Stealthbox® into location as shown, push stud against
wax square to make an impression in the wax square.
S T E P 1 2
Remove backing from wax square and place it on sheet
metal just below tail light wiring as shown.
Page 3 • JL Audio, Inc 2008
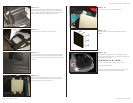
S T E P 1 7
Position the Stealthbox® into the mounting location. From
the outside of the vehicle (behind the taillight) place the sup-
plied fender washer, flat washer, lock washer and then nut
onto the exposed socket cup set screw. Use a long 3/8" open
end wrench or ratcheting box end to secure the mounting
hardware. Be sure Stealthbox is now solidly mounted to
vehicle.
Note: For added weather protection, it is recommended
that you apply a bead of silicone between the vehicle
and the fender washer.
S T E P 1 9
Reinstall taillight in reverse oder of removal as detailed in
steps 9,8. Make sure that bulbs go into the right locations
in the lens assembly by checking the brake lights, running
lights and, reverse lights. Be carefull of alignment of pins as
lens assembly is reinserted into fender recess. Secure mount-
ing with the factory 8mm screws.
S T E P 1 8
Connect the previously run wire to the Stealthbox® and test
the system to ensure that everything sounds good so far.
S T E P 1 6
Put Stealthbox® into final position with mounting stud
extended through hole drilled in tail light area. Secure with
nut, lock washer, and flat washer provided (see illustration).
STEALTHBOX WALL
VEHICLE SHEET METAL
THREADED INSERT
LOCK WASHER
FLAT WASHER
SOCKET CUP SET SCREW
HEX NUT
FENDER WASHER