Continued on Next Page
SB-POL-RNGR700 INSTR_SKU# 011295
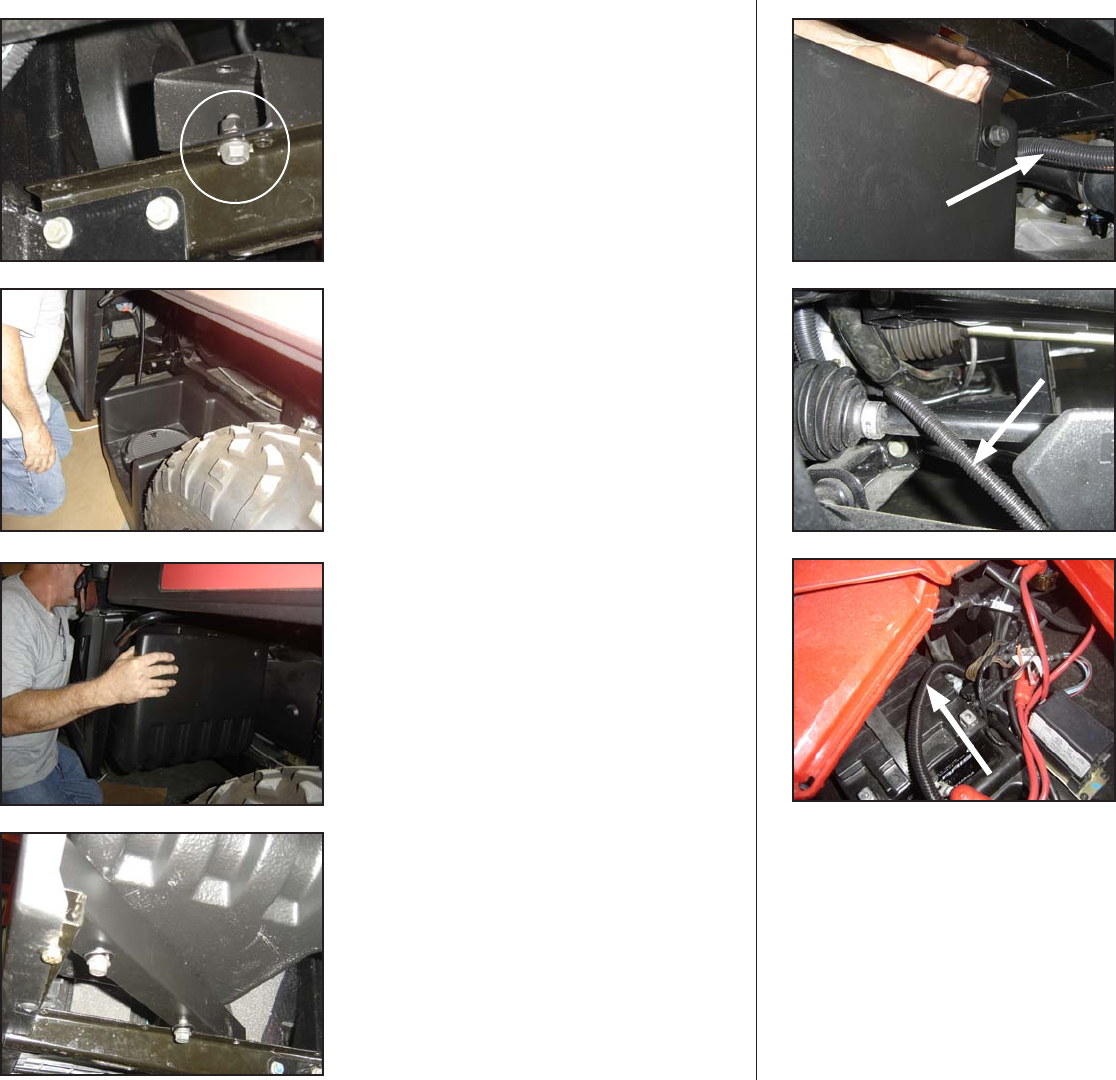
S T E P 6
From underneath the enclosure, start the hardware through
the holes in the bracket installed in
STEP 2.
DO NOT TIGHTEN AT THIS TIME.
S T E P 5
Lift the enclosure up onto the previously installed bracket.
S T E P 4
Set the enclosure on the ground in front of the drivers side
rear wheel oriented as shown.
S T E P 3
Looking from the front of the vehicle towards location #1
from the previous steps, notice mounting and, orientation
of Hex Head Bolt, Split Lock Washer, Hex Nut. Use the Long
gold colored bolt, Split Lock Washer and Hex Nut at location
#2 in the previous step.
Once all of this hardware is installed, It’s also safe to now
tighten this all of this hardware.
Page 2 • JL Audio, Inc 2009
S T E P 8
Looking from the front back through the front suspension,
you can see the tunnel that the braided flexible brake line
goes through as well as the big harness that was indicated
in
STEP7, Run the speaker wire alongside the large harness
(indicated by the arrow) to the front of the vehicle, secure as
neccessary using zip ties to ensure that there is no chance of
the speaker wire getting entangelled in anything ie: moving
parts for suspension, steering, hot exhaust...
S T E P 9
Run the speaker wire through the front of the vehicle, up
under the hood, coming out near the other harnesses (as
indicated by the arrow) secure as neccessary using zip ties
to ensure that there is no chance of the speaker wire getting
entangelled in anything ie: moving parts for suspension,
steering, hot exhaust...
Route the wire to your chosen amplifier mounting location,
secure and protect the wire as needed.
C O N G R A T U L A T I O N S !
You have completed the installation for this model!
Enjoy your new Stealthbox®!
S T E P 7
Install the “Zig- Zag” bracket as shown, line it up with the
upper seat rail and drill the upper mount hole. Install a
Hex Head Bolt, Split Lock Washer and Hex Nut,
Tighten
all of this hardware as well as the hardware installed
in STEP6. Re-install the previously removed seat bottom
cusion.
Run the speaker wire alongside the large harness
(indicated by the arrow) to the front of the vehicle (in this
installation, we ran the wire inside split loom (not included)),
secure as neccessary using zip ties to ensure that there is no
chance of the speaker wire getting entangelled in anything
ie: moving parts for suspension, steering, hot exhaust...


