


➔➔
➔➔➔
➔
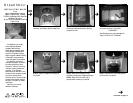
STEP 8:
Remove the four screws (two per
side) from the sides of the console.
STEP 13:
Reinstall the outside console over
the inner console and the Stealthbox with
eight 7mm bolts which were removed in
steps 6,7 and 8. Place the conlose/Stealthbox
back into the truck.
Cont.
From
age 1
Continued on Page 3 ➔
➔
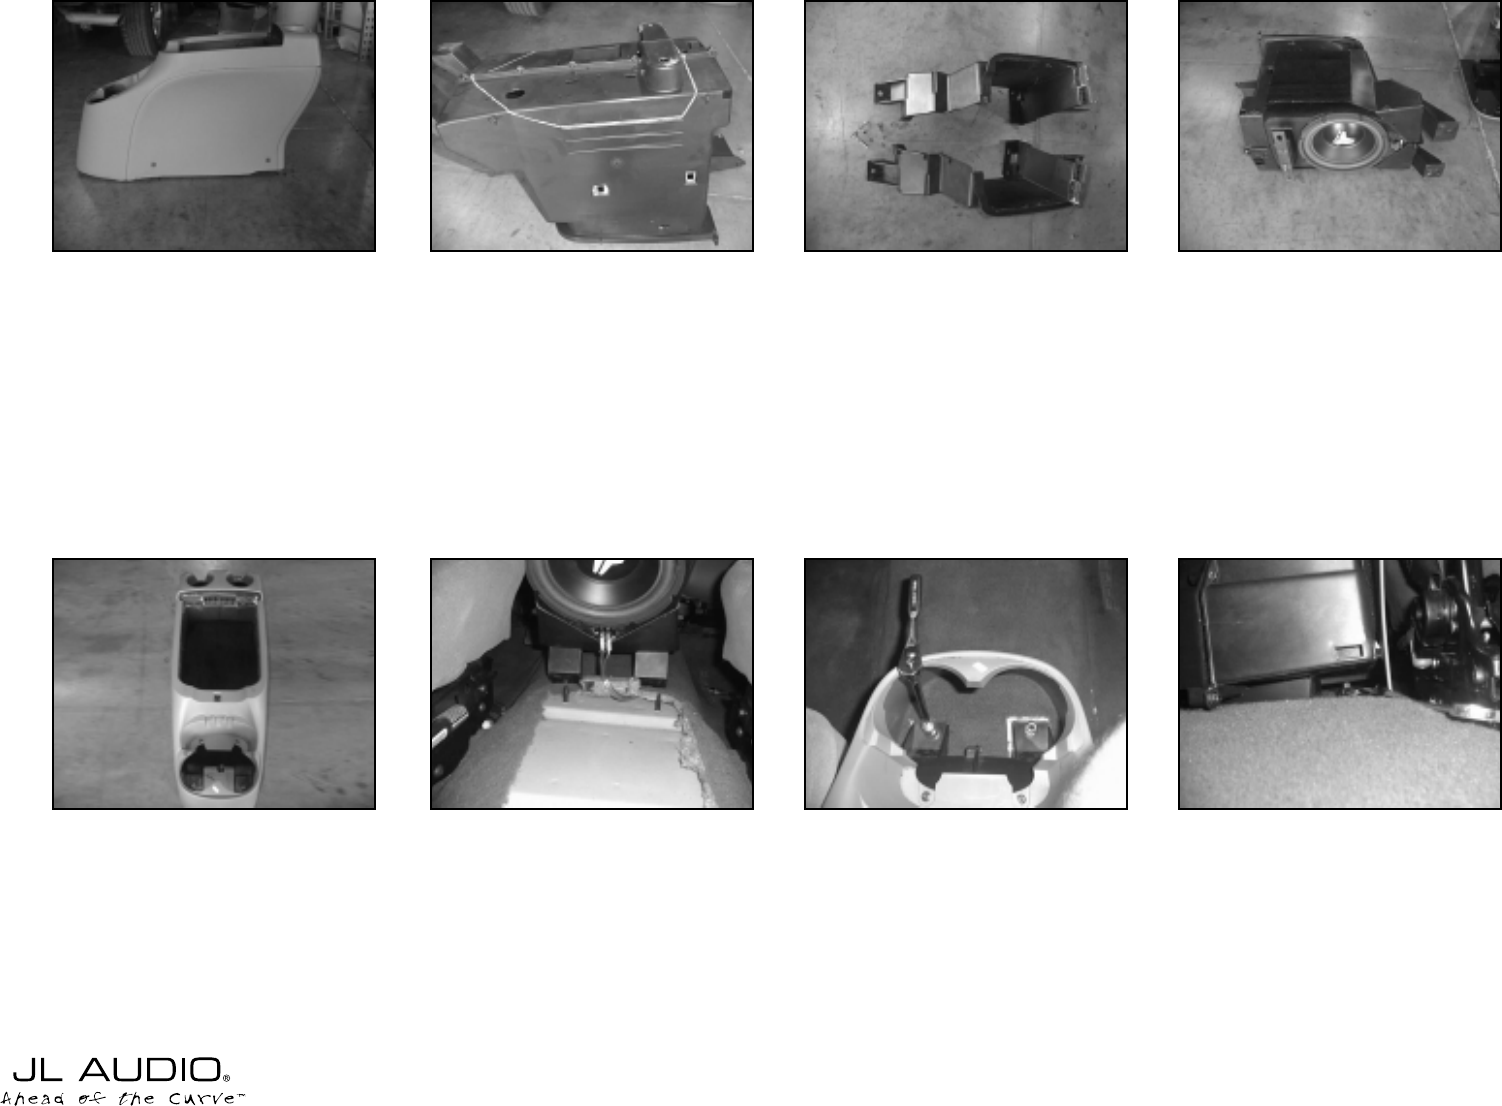
STEP 9:
A large section of the bottom of the
console must be removed. The cut travels
from side to side 3/4” in front of the bolt at
the rear the bottom of the console (point
#1). This cut then angles down to meet the
edge of the bottom rib on the side of the
enclosure (point #2). The cut travels to the
other end of the rib(point #3) and then
angles up the side and across the bottom so
as to meet a point 1/2” inside the bolt at the
front of the bottom of the console (point
#4). The same path is taken on the other side
of the console.
STEP 14:
Run speaker wire so that it is
accessible at the front of the enclosure,
connect it to the enclosure and test for
proper operation.
➔
STEP 15:
Using an an 18mm socket wrench,
secure the front of the console to the vehicle
with the 18mm bolts removed in Step 1.
STEP 16:
Using an an 18mm open end
wrench, secure the rear of the console to
the vehicle with the 18mm bolts removed in
Step 4.
STEP 17:
Snap rear panel (removed in step
4) back unto rear of console.
STEP 18:
Reinstall cup holders (removed in
Step1).
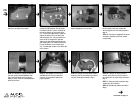
STEP 10:
Remove the nine remaining 7mm
bolts to separate the inner console.
STEP 11:
Sandwich the Stealthbox between
the two halves of the inner console and
secure using the nine 7mm bolts removed in
step 10.
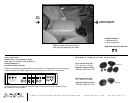
STEP 12:
Glue the two supplied 8”x8” pieces
of carpet to the sides of the inner console
(one per side).
➔
➔
➔
➔
➔
➔
➔
4
3
2
1
Bottom Rib