


Continued on Next Page
SB-S-LWAG/10W6v2_INSTR_SKU#011207
SB-S-LWAG/10W6v2_INSTR_SKU#011207
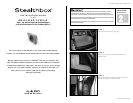
STEP 7
Thread the supplied socket cup set screw into the
Stealthbox
®
, leaving 1/4-inch of thread exposed.
STEP 6
Apply the supplied wax square into place. The left side is
lined up with the left edge of the pocket opening and above
the emboss portion of the inner lower corner.
STEP 5
Remove the taillight assembly from the wiring harness.
Pull the wire harness out of the pass through hole.
STEP 4
Remove the pair of screws that secure the passenger’s side
rear taillight.
Page 2 • JL Audio, Inc 2006
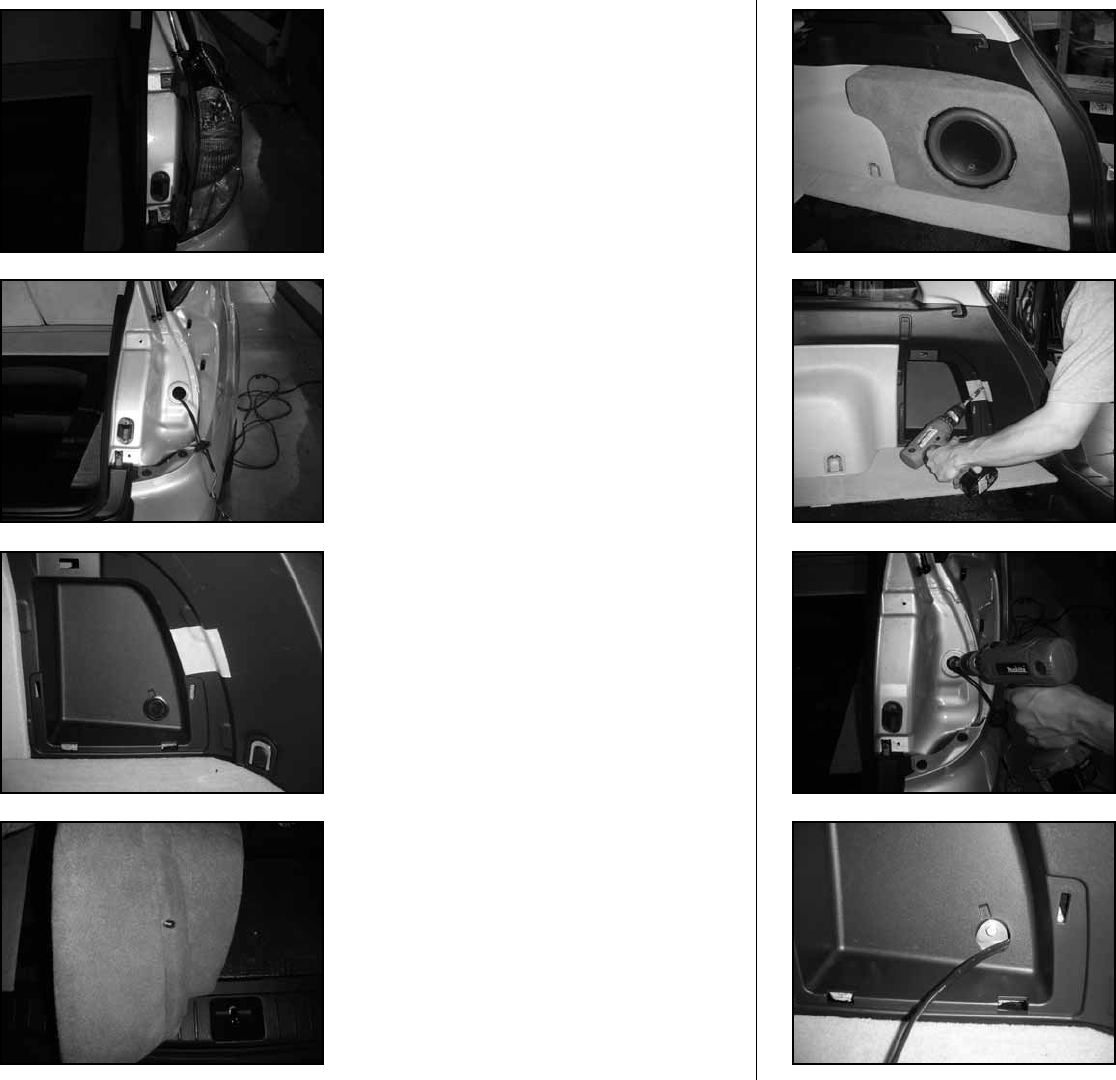
STEP 9
Note: Before drilling, make sure that you are not going
to be drilling into electrical wiring or anything else that
might cause a reduction in your weekly pay. Always
wear eye protection when drilling!
From inside the vehicle.
With a drill and a 1/4-inch drill bit, drill at the same angle as
the impression on the wax square. Drill through the plastic
panel and metal body. Remove the wax square.
With a 3/8-inch drill bit, enlarge the pilot hole.
STEP 11
Run speaker wire from the amplifier location to the
Stealthbox
®
location.
STEP 10
From the outside of the vehicle.
Place the 3/8-inch drill bit through the pass through hole,
enlarge the pilot hole.
STEP 8
Position the Stealthbox
®
in the mounting location and press
on it firmly.
Remove the Stealthbox
®
carefully, leaving the wax squares
in place. The socket cup set screws will leave impressions in
the wax.