3ENGLISH
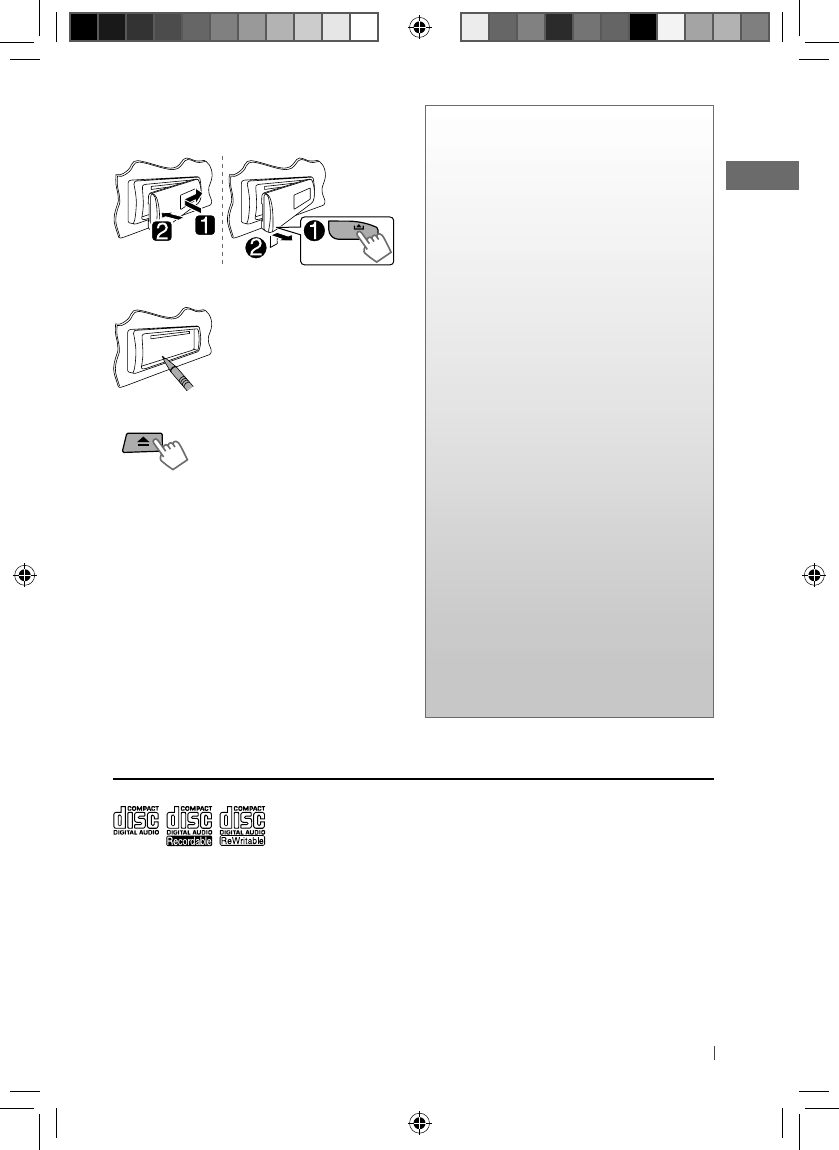
How to attach/detach the control
panel
How to reset your unit
Your preset adjustments will
also be erased.
How to forcibly eject a disc
• Be careful not to drop the disc when it ejects.
• If this does not work, reset your unit.
Maintenance
Cleaning the unit
Wipe off the dirt on the panel with a dry silicon
or soft cloth. Failure to observe this precaution
may result in damage to the unit.
Cleaning the connector
Wipe off dirt on the connector of the unit and
panel. Use a cotton swab or cloth.
CONTENTS
3 How to attach/detach the control
panel
3 How to reset your unit
3 How to forcibly eject a disc
3 Maintenance
3 About discs
4 Canceling the display
demonstration
4 Setting the clock
5 Basic operations
6 Listening to the radio
8 Listening to a disc
9 Connecting the other external
components
9 Listening to the other external
components
10 Listening to a USB device
11 Listening to an iPod/iPhone
(Available for KD-R521)
12 Selecting a preset sound mode
13 Menu operations
15 Using the remote controller
(For KD-R521/KD-R422/KD-R421: optionally
purchased)
16 Troubleshooting
18 Using Bluetooth ® devices
19 Specifications
[Hold]
About discs
This unit can only play the CDs with:
Discs that cannot be used:
• Discs that are not round.
• Discs with coloring on the recording surface
or discs that are dirty.
• You cannot play a Recordable/ReWritable
disc that has not been finalized. (For the
finalization process refer to your disc writing
software, and your disc recorder instruction
manual.)
• 3-inch CD cannot be used. Attempt to insert
using an adapter can cause malfunction.
Handling discs:
• Do not touch the recording surface of the
disc.
• Do not stick tape etc. on the disc, or use a disc
with tape stuck on it.
• Do not use any accessories for the disc.
• Clean from the center of the disc and move
outward.
• Clean the disc with a dry silicon or soft cloth.
Do not use any solvents.
• When removing discs from this unit, pull them
out horizontally.
• Remove the rims from the center hole and
disc edge before inserting a disc.
EN02-19_KD-R521_003A_f.indd 3EN02-19_KD-R521_003A_f.indd 3 10/13/10 12:45:33 PM10/13/10 12:45:33 PM


