


1
KW-XR616
Installation/Connection Manual
Manual Pemasangan/Penyambungan
ENGLISH / INDONESIA
0110DTSMDTJEIN
EN, IN
© 2010 Victor Company of Japan, Limited
GET0666-008A
[UN]
• To prevent short circuits:
– Disconnect the battery’s negative terminal and make all electrical connections before installing the unit.
– Cover the terminals of the UNUSED leads with insulating tape.
• Be sure to ground this unit to the car’s chassis again after installation.
• Replace the fuse with one of the specified rating.
• Connect speakers with a maximum power of more than 50 W (impedance of
4 Ω to 8 Ω). Otherwise, change the <AMP GAIN> setting. (See page 25 of the
INSTRUCTIONS.)
• The heat sink becomes very hot after use. Be careful not to touch it when
removing this unit.
• Untuk mencegah hubungan pendek:
– Lepaskan terminal negatif baterai dan lakukan penyambungan semua koneksi kelistrikan sebelum memasang
unit.
– Tutupi terminal lead yang TIDAK DIGUNAKAN dengan selotip.
• Pastikan untuk mentanahkan unit ini ke casis mobil kembali setelah pemasangan.
• Ganti sekering dengan sekering yang memenuhi pentarafan yang ditetapkan.
• Sambungkan speaker dengan daya maksimal yang lebih dari 50 W (impedansi 4 Ω hingga 8 Ω). Atau jika tidak,
ubah pengaturan <AMP GAIN>. (Lihat halaman 25 dari BUKU PETUNJUK.)
• Pendingin menjadi sangat panas setelah digunakan. Hati-hati untuk tidak menyentuhnya ketika memindahkan
unit ini.
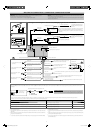
12 V DC, NEGATIVE ground / 12 V DC, tanahan NEGATIF
To the car system / Ke sistem mobilYou need the installation kits which corresponds to your car. / Anda memerlukan
perlengkapan pemasangan yang sesuai dengan mobil Anda.
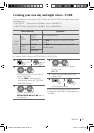
Check the battery system in your car /
Periksa sistem aki mobil Anda
WARNINGS / PERINGATAN
Heat sink / Pendingin
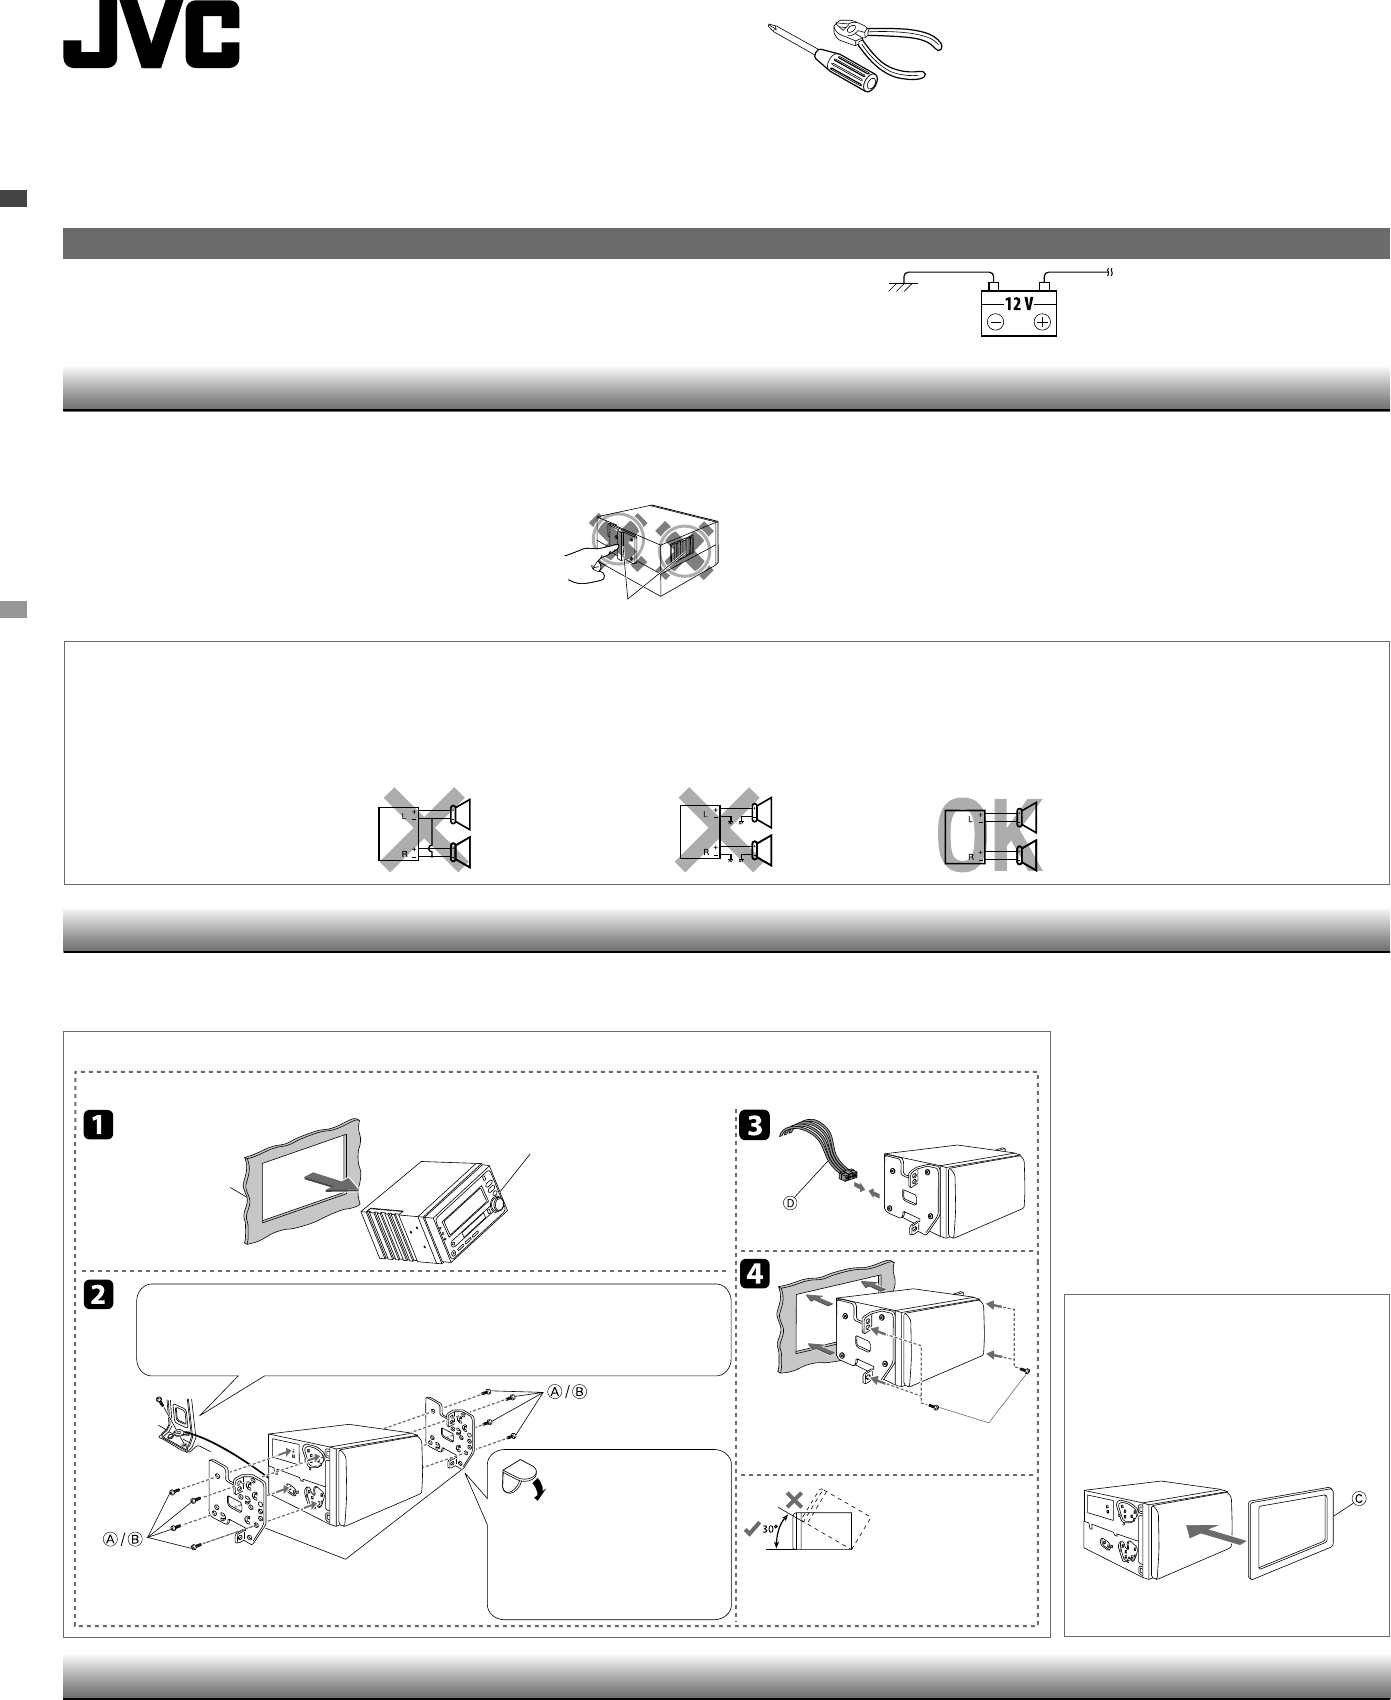
INSTALLATION / PEMASANGAN
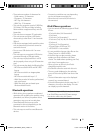
The following illustration shows a typical installation. If you have any questions or require information
regarding installation kits, consult your JVC car audio dealer or a company supplying kits.
Ilustrasi berikut menunjukkan sebuah tipe pemasangan. Jika anda mempunyai suatu pertanyaan atau informasi
yang diperlukan mengenai alat-alat pemasangan, konsultasikan pada penyalur audio mobil JVC atau sebuah
perusahaan yang mensuplai alat-alat.
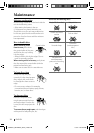
In-dash mounting / Bingkai-dalam dash
Audio system originally installed in the car /
Sistem audio yang sebelumnya terpasang di mobil
Car dashboard / Dasbor
mobil
If there is an interfering tab on the
mounting bracket, bend it flat. /
Jika ada tonjolan yang mengganggu
braket pemasangan, tekuk sehingga
rata.
Screw removed from the car /
Sekrup dilepas dari mobil
Mounting bracket removed from the car /
Braket pemasangan dilepas dari mobil
Firmly attach the ground wire to the metallic body of the car using the screw originally fixed
to the metallic body of the car. / Pasang kabel tanah dengan kuat ke bodi besi mobil dengan
menggunakan sekrup yang memang sudah terpasang di bodi besi mobil.
Installing with the mounting brackets from the car / Memasang dengan braket pemasangan dari mobil
Install the unit at an angle of less than 30˚.
Pasang penerima pada suatu sudut kurang dari
30˚.
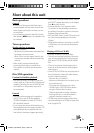
Part list / Daftar bagian
A Flat countersunk screws—M5 × 8 mm / Sekerup
benaman datar—M5 × 8 mm (×8)
B Round head screws—M5 × 8 mm / Sekerup kepala
bulat—M5 × 8 mm (×8)
C Plate for use with a Nissan car / Pelat untuk
digunakan dengan mobil Nissan (×1)
D Power cord / Kabel power (×1)
When installing the unit in a
Nissan car / Apabila memasang
unit dalam mobil Nissan
Fix the supplied plate as illustrated. / Pasang
pelat yang tersedia seperti digambarkan.
PRECAUTIONS on power supply and speaker connections
• DO NOT connect the speaker leads of the power cord to the car battery; otherwise, the unit will be
seriously damaged.
• BEFORE connecting the speaker leads of the power cord to the speakers, check the speaker wiring in
your car.
TINDAKAN-TINDAKAN PENCEGAHAN pada suplai power dan
sambungan-sambungan speaker
• JANGAN sambungkan ujung-ujung speaker dari kabel power ke baterai mobil; sebaliknya, unit tersebut akan
secara serius rusak.
• SEBELUM menyambung ujung-ujung speaker dari kabel power ke speaker-speaker, cek perkabelan speaker
dalam mobil anda.
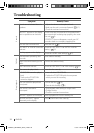
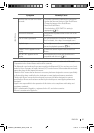
• The fuse blows.
]
Are the red and black leads connected correctly?
• Power cannot be turned on.
]
Is the yellow lead connected?
• No sound from the speakers.
]
Is the speaker output lead short-circuited?
• “PROTECT” appears on the display and no operation can be done.
]
Is the speaker output lead
short-circuited or touches the chassis of the car/head unit? ; Have you reset your unit?
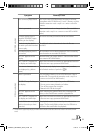
• Sound is distorted.
]
Is the speaker output lead grounded? ; Are the “–” terminals of L and R speakers
grounded in common?
• Noise interfere with sounds.
]
Is the rear ground terminal connected to the car’s chassis using shorter
and thicker cords?
• This unit becomes hot.
]
Is the speaker output lead grounded? ; Are the “–” terminals of L and R
speakers grounded in common?
• This unit does not work at all.
]
Have you reset your unit?
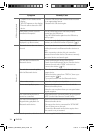
• Sekring meledak.
]
Apakah ujung-ujung merah dan hitam tersambung dengan benar?
• Power tidak dapat dihidupkan.
]
Apakah ujung kuning sudah tersambung?
• Tidak ada suara dari speaker.
]
Apakah ujung keluaran speaker terhubung pendek?
• “PROTECT” muncul di layar dan tidak dapat dilakukan pengoperasian apa pun.
]
Apakah kabel
output speaker mengalami hubungan pendek atau menyentuh casis mobil/unit kepala? ; Apakah anda sudah
reset (memasang kembali) unit anda?
• Suara terdistorsi.
]
Apakah ujung keluaran speaker sudah ditanahkan? ; Apakah terminal-terminal “–” dari
speaker-speaker L dan R sudah ditanahkan secara umum?
• Berisik yang mengganggu suara-suara.
]
Apakah terminal tanahan belakang tersambung ke casis mobil
menggunakan kabel-kabel terpendek dan tertebal?
• Unit ini menjadi panas.
]
Apakah ujung keluaran speaker sudah ditanahkan? ; Apakah terminal-terminal
“–” dari speaker-speaker L dan R sudah ditanahkan secara umum?
• Unit ini tidak bekerja secara keseluruhan.
]
Apakah anda sudah reset (memasang kembali) unit anda?
TROUBLESHOOTING / PEMECAHAN MASALAH
Install_KW-XR616_008A_f.indd 1Install_KW-XR616_008A_f.indd 1 2/1/10 10:17:24 AM2/1/10 10:17:24 AM