


8
|
English
General features
Audio Setup
Setting the Sound system, such as Volume offset
and Loudness.
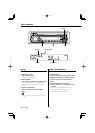
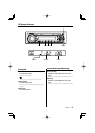
1 Select the source to adjust
Press the [SRC] button.
2 Enter Audio Setup mode
Press the [VOL] knob for at least 1 second.
3 Select the Audio Setup item to adjust
Press the [VOL] knob.
Each time you press the knob, the item to be
adjusted alternates between the items shown in
the table below.
4 Adjust the Audio setup item
Turn the [VOL] knob.
Adjustment Item Display Range
Volume offset "V-OFF" –8 — ±0
Loudness "LOUD" ON/OFF
• Volume offset: Sets each source’s volume as a
difference from the basic volume.
• Loudness: Compensates for low and high tones
during low volume.
When Loudness is ON, "LOUD" indicator
is ON.
5 Exit Audio Setup mode
Press the [VOL] knob for at least 1 second.
Speaker Setting
Fine-tuning so that the System Q value is optimal
when setting the speaker type.
1 Enter Standby
Press the [SRC] button.
Select the "STANDBY" display.
2 Enter Speaker Setting mode
Press the [VOL] knob.
3 Select the Speaker type
Turn the [VOL] knob.
Each time you turn the knob, the setting
alternates between the settings shown in the
table below.
Speaker type Display
OFF "SP OFF"
For 5 & 4 in. speaker "SP 5/4"
For 6 & 6x9 in. speaker "SP 6x9/6"
For the OEM speaker "SP OEM"
4 Exit Speaker Setting mode
Press the [VOL] knob.
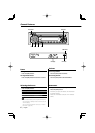
Switching Clock Display
Changing the displayed information.
Press the control knob for at least 1 second.
Each time you press the button, the display
alternates between clock display and current
source.
Theft Deterrent Faceplate
The faceplate of the unit can be detached and
taken with you, helping to deter theft.
Removing the Faceplate
Press the Release button.
The faceplate unlocks, allowing you to detach it.
• The faceplate is a precision piece of equipment and
can be damaged by shocks or jolts.
• Do not expose the faceplate to direct sunlight or
excessive heat or humidity. Also avoid places with too
much dust or the possibility of water splashing.
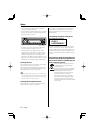
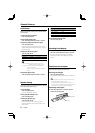
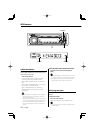
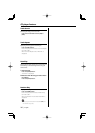
Reattaching the Faceplate
1 Align the projections on the unit with the
grooves on the faceplate.
Projections
Grooves