


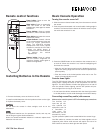


Resetting the adjustments
You can reset all of the Picture Quality and Screen Mode
adjustments to their factory settings:
Press the MENU button until “RESET” appears on the screen.
• Press the VOLUME + button to reset the adjustments to their
factory settings.
• Press the MENU button to retain the adjustments you have
made.
Changing the Dome Light Bulbs
1. Use a flat blade screwdriver to pry the dome light cover off.
2. Remove the burned-out bulb.
3. Replace the bulb with a 5-Watt (12V) Type 158 T10 Wedge bulb.
4. Snap the dome light cover back on.
LZH-70W User Manual 7
Specifications
Screen Size . . . . . . . . . . . . . . . . . . . . . . . . . . . . . . . . . . . . . . . .7.0” (diagonal)
LCD Display Aspect Ratio . . . . . . . . . . . . . . . . . . . . . . . . . . . . . . . . . . . . .16:9
LCD Display Total Resolution . . . . . . . . . . . . . . . . . . . . . . . .336,960 pixels*
Viewing Angle . . . . . . . . . . . . . . . . . .+30°/-60° (vertical), 120° (horizontal)
Minimum Brightness . . . . . . . . . . . . . . . . . . . . . . . . . . . . . . . . .>= 350 cd/m²
Typical Brightness . . . . . . . . . . . . . . . . . . . . . . . . . . . . . . . . . . . . .400 cd/m²
Video Input (Composite Signal) . . . . . . . . . . . . . . . . . . . . . . . 1Vp-p/75ohms
Audio Input . . . . . . . . . . . . . . . . . . . . . . . . . . . . . . . . . . . . . . . . . . . . .1,2VRMS
Video Output (Composite Signal) . . . . . . . . . . . . . . . . . . . . . .1Vp-p/75ohms
Audio Output . . . . . . . . . . . . . . . . . . . . . . . . . . . . . . . . . . . . . . . . . . .1.2VRMS
Headphone Output . . . . . . . . . . . . . . . . . . . . . . . . . . .0.1W/16ohms (stereo)
Dimensions . . . . . . . . . . . . . . . . . . . . . .12” (L) x 8
3
/16” (W) x 1
15
/16” (H)
Weight . . . . . . . . . . . . . . . . . . . . . . . . . . . . . . . . . . . . . . . . . . . . . . . . . . .2.75 lb
Operating Voltage . . . . . . . . . . . . . . . . . . . . . . . . . . . . . . . . . . . .DC 11V ~16V
Power Consumption . . . . . . . . . . . . . . . . . . . . . . . . . . . . . . . . .0.97A ~ 1.15A
Operating Temperature . . . . . . . . . . . . . . . . .14°F – 140°F (-10°C – 60°C)
* Although the effective pixels for the liquid crystal panel is given as 99.999% or more,
0.001% of pixels may not light or may light incorrectly.
Troubleshooting Guide
What might appear to be a malfunction in your unit may just be the result of misoperation or miswiring. Before calling for service, first check
the following for possible problems.
PROBLEM CAUSE SOLUTION
The console does not power-up The fuse has blown Replace the fuse with one of the same
rating
The vehicle’s ignition lacks an Connect the console’s ignition wire and
ACC position battery wire together
Buttons do not operate, or operate The microprocessor is malfunctioning Reset the microprocessor (see ‘Resetting The
erroneously Microprocessor’ on page 3)
No video picture Improper connection(s) to video source(s) Verify that the video sources are
properly connected
The video image is dark The screen is cold Liquid Crystal Display screens may appear
darker when they are cold. Once you turn the
console’s power on and the screen’s
temperature rises, its normal brightness will
return.
No sound from wireless headphones The headphone’s power is off Make sure the headphones’ power
switch is turned on
The headphone’s batteries are Replace the headphone batteries with
exhausted fresh ones