


Installation Instructions
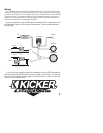
Your KICKER drivers are specifically designed for mounting in free-air applica-
tions. While the speakers do not require a sealed enclosure for optimum per-
formance, it is important to isolate the sound coming off the front of the driver
from the sound radiating from the back of the driver. This isolation is usually
accomplished by using the correct size driver in a factory speaker location.
Mounting
Cautions must be observed when mounting speakers through the package
tray of a car, watch for wiring harnesses, trunk springs, hinges, and folding seat
mechanisms. When running the wires be careful not to damage them with seat
bolts or door sill screws.
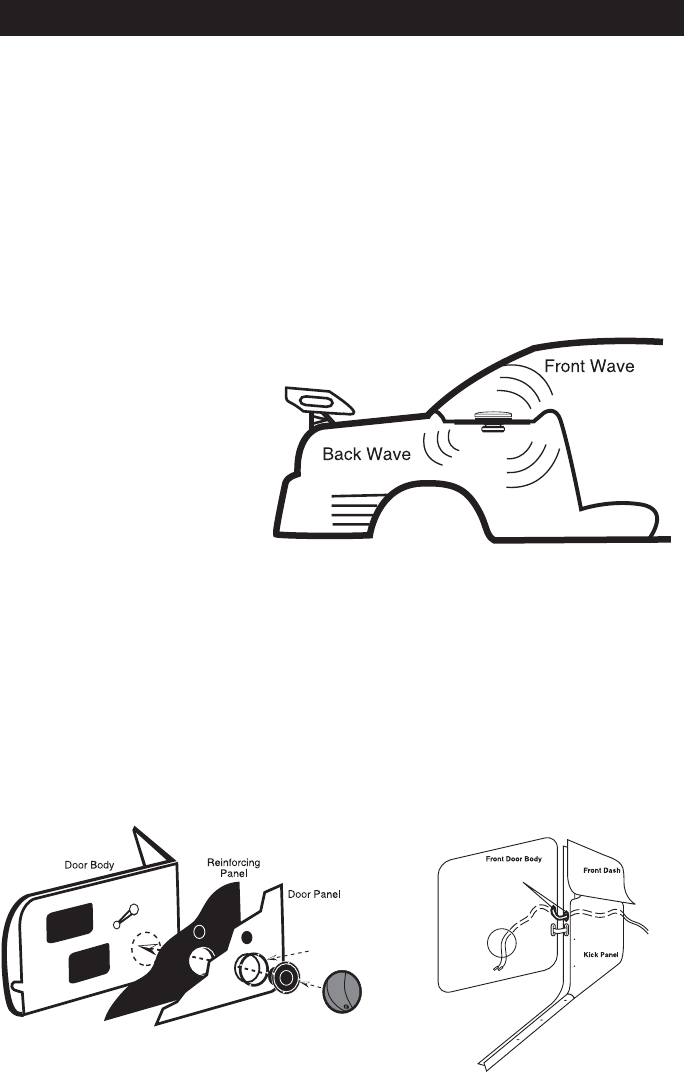
If custom door mounting
locations are desired for your
drivers, be careful to avoid
interference from window and
door lock mechanisms. The
first step is to find a location
on the door panel that will
accept the size of speaker
chosen. Then remove the door
panel from the door, and
check for the operation of the
window all the way up and
down. If metal must be cut to
mount the speakers, try to
avoid structural metal and braces. On models with grills included, mount as indi-
cated in the following diagram. Figure 1.
If factory door speaker wiring is not available to connect your speakers to, it is
necessary to run the supplied wire through the door jamb. This wire should be
kept away from sharp edges and the possibility of getting pinched. An existing
boot in the door jamb is the ideal place to run the wires, but sometimes this
does not exist or is inaccessible. Drilling holes to run wires through is very tricky,
and caution must be exercised not to drill into other wiring or mechanisms. Any
time a wire is run through a bare hole, it is necessary to insert a rubber or plastic
grommet first to protect the wire. Figure 2.
Push Grill into place
and snap into ring!
Figure 1 Figure 2
To Crossover
Stagger Holes
For Wiring &
Use Grommets
(When Factory Are Not Avail.)
2