8
Hooking up the unit
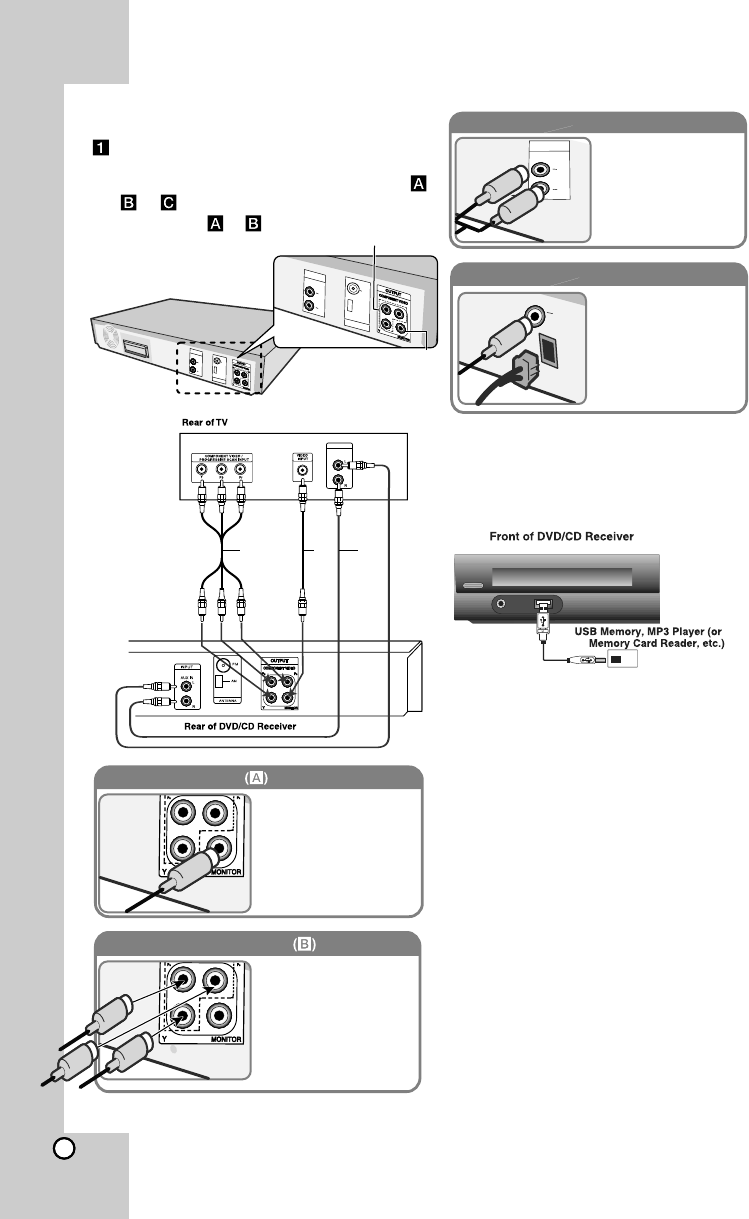
Connect jacks on the unit and your TV (DVD
player or Digital Device etc.) using the cables.
Check the jacks of your TV, and choose the ,
or connection. Picture quality improves
in order from
to
.
(A)
(B)
Video Out connection
Connect the VIDEO
OUTPUT(MONITOR) jack on
the unit to the corresponding
input jack on your TV using a
Video cable.
Component Video connection
Connect the COMPONENT
VIDEO (PROGRESSIVE
SCAN) OUTPUT jacks on
the unit to the corresponding
input jacks on your TV using
a Y PB PR cable.
Audio In connection
The unit’s Audio jacks are
colour coded (red for right
audio and white for left
audio). If your TV has only
one output for audio (mono),
connect it to the left (white)
connect it to the left ?white
audio jack on the unit.
AM FM connection
AM - Connect the AM loop
aerial to the DVD receiver.
FM - Connect the FM aerial.
The reception will be its best
when the two loose ends of
the aerial are in a straight and
horizontal line.
AB
C
ANTENNA
FM
M
A
INPUT
AUX IN
L
R
ANTEN
NA
FM
FM
INPUT
X
I
AU
N
L
R
OUTPUT
AUDIO OUT
I
N
PU
T
I
N
A
U
X
L
R
FM
AM
USB Equipment Connection
Connect the USB port of a USB Memory (or
MP3 player, etc.) to the USB port on the front
of the unit.
Removing the USB Device from the unit
1. Choose a different function mode or press
STOP(■) twice in a row.
2. Remove the USB device from the unit.
Notes:
• Don’t extract the USB device while
operating.
• Music files (MP3/WMA), image files
(JPEG) and Video files (.avi) can be
played.
• This unit can not use a USB HUB.
Pb
Pr


