OPERATIONAL NOTES
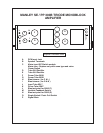
SWITCHING SINGLE-ENDED 11 / PUSH-PULL 24: This amplifier has the unique feature of
being able to choose between two circuit topologies. You are able to switch between each mode
while the amplifier is turned on and playing music. In SINGLE-ENDED mode the amplifier uses
both 300Bs in parallel. The advantage is a minimalist circuit requiring no "phase splitter",The
disadvantage is a less efficient circuit that produces a fraction of the power of PUSH-PULL. In
PUSH-PULL mode each tube works in opposite phase to the other and relies on the output
transformer to make the polarities work together. This has advantages in efficiency and in the
distortion and noise cancellation properties of a balanced circuit. Both ways are operated in "Class
A" bias throughout and both are PURE TRIODE and both modes have a similar short signal path.
SWITCHING VARIABLE FEEDBACK: The variable feedback can be changed in 1 dB steps
from zero to 10 dB above minimun. The most obvious effect of changing the amount of negative
feedback is the gain change. The more feedback - the less gain but also less distortion and a flatter
frequency response. You should be able to hear that with less feedback, the tonality is more
aggresive but the imaging may have greater detail. As you increase feedback, the amp gets
smoother and softer and slightly brighter. Towards the maximum amount of feedback, the amp may
begin to sound like a good solid state amp. Virtually all solid state amps need large amounts of
feedback in order to sound acceptable. Maximum feedback also corresponds to maximum damping
factor. This control not only affects the tonality of the amp but also of the speaker. The optimum
setting depends on the speaker, the room, and your tastes. Experimentation will be necessary but
also fun and educational.
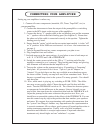
ADJUSTING BIAS : Please read the entire procedure before performing adjustments.
Bias on the 300B tubes should be checked inmediatly upon receipt of the amplifier, and once a
month thereafter. The bias was factory set on this amplifier, and the tube locations noted.Variation
between the line voltage at the factory and the final installation location can cause variation in the
tube's bias. Therefore, it is important to check this upon receipt of the amplifiers, or any time the
units change location (other than witin the same building). Proper biasing ensures longest tube
life; improper biasing can cause damage to the tubes, amplifier or both. You will need a D.C.
voltmeter (digital readout preferred) and a small straight-blade screwdriver.
1.) Attach the voltmeter black or (-) probe to the amp chassis or the black speaker terminal.
Attach the red or (+) probe to the "Read Bias" test jack ( corresponding to the left 300B tube).
2.) Switch the amp to "Push-Pull" mode, place amplifier's mute switch to the mute position, and
turn the power switch to "on".
3.) Allow the amp to warm up for two minutes, and use the screwdriver to turn the left "bias
adjust" trimmer for a reading of 500 mVDC ( 0.5 VDC ). Turning the bias controls counter-clockwise
will increase the standing current. A reading of 490-510 mVDC will be within specs.
IF the
trimmer will not adjust the bias to this reading then switch the red probe of the meter to the
right side "read bias" test jack and adjust the right bias trimmer to the read 500 mVDC . The
bias adjusment are somewhat interactive. It may be necessary to go back and forth between
the two adjusments in order to attain correct and matching output tube standing currents.
4.) Now let the amp continue to warm up for another 20-30 minutes and reset each tube for
500mVDC.


