


Installation
1) Before Installation
• Before using your monitor, make sure to read this manual carefully. In case of any problems with installation, contact Marshall Electronics.
• The monitor should be handled with caution and not be exposed to impact or shock.
• Do not expose the monitor in high temperature or in high humidity.
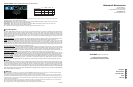
2) Connections
The rear of the unit has four BNC connectors for the video inputs and eight XLR connectors for audio. Beneath them are the S-Video,
TV, VGA, and Tally connectors
3) Tally
The V-R154P has a TALLY system that is based on a closed contact format where PIN 4 is the COMMON and tally light one is on pin
3, tally light 2 is on pin 1, tally light 3 is on pin 7, and tally light 4 is on pin 5. The light will come on by closing the two contacts
together. DO NOT GIVE POWER TO THIS CONNECTOR IT IS SELF-POWERED.
4) Mounting
The V-R154P is designed to fit in a EIA standard 19” rack. It requires 8 rack units of vertical space and is secured with eight screws.
It may be necessary to center the unit up or down so that it does not touch any adjacent units when the unit is tilted up or down.
1
QUAD SPLITTER SETTINGS
POWER
INPUT AUDIO METERS
MOUNTING
HOLES
SPEAKERS
AUDIO SETTINGS
VOLUME
TALLY
Audio Inputs
Video Inputs
TV Input
Tally
VGA Input
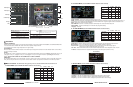
Menu Functions
2
V-R154P Users Guide
Marshall Electronics
S-Video Input
Note: MENU select will toggle through 5 menus, PICTURE, SCREEN, FUNCTION, SOURCE and TV
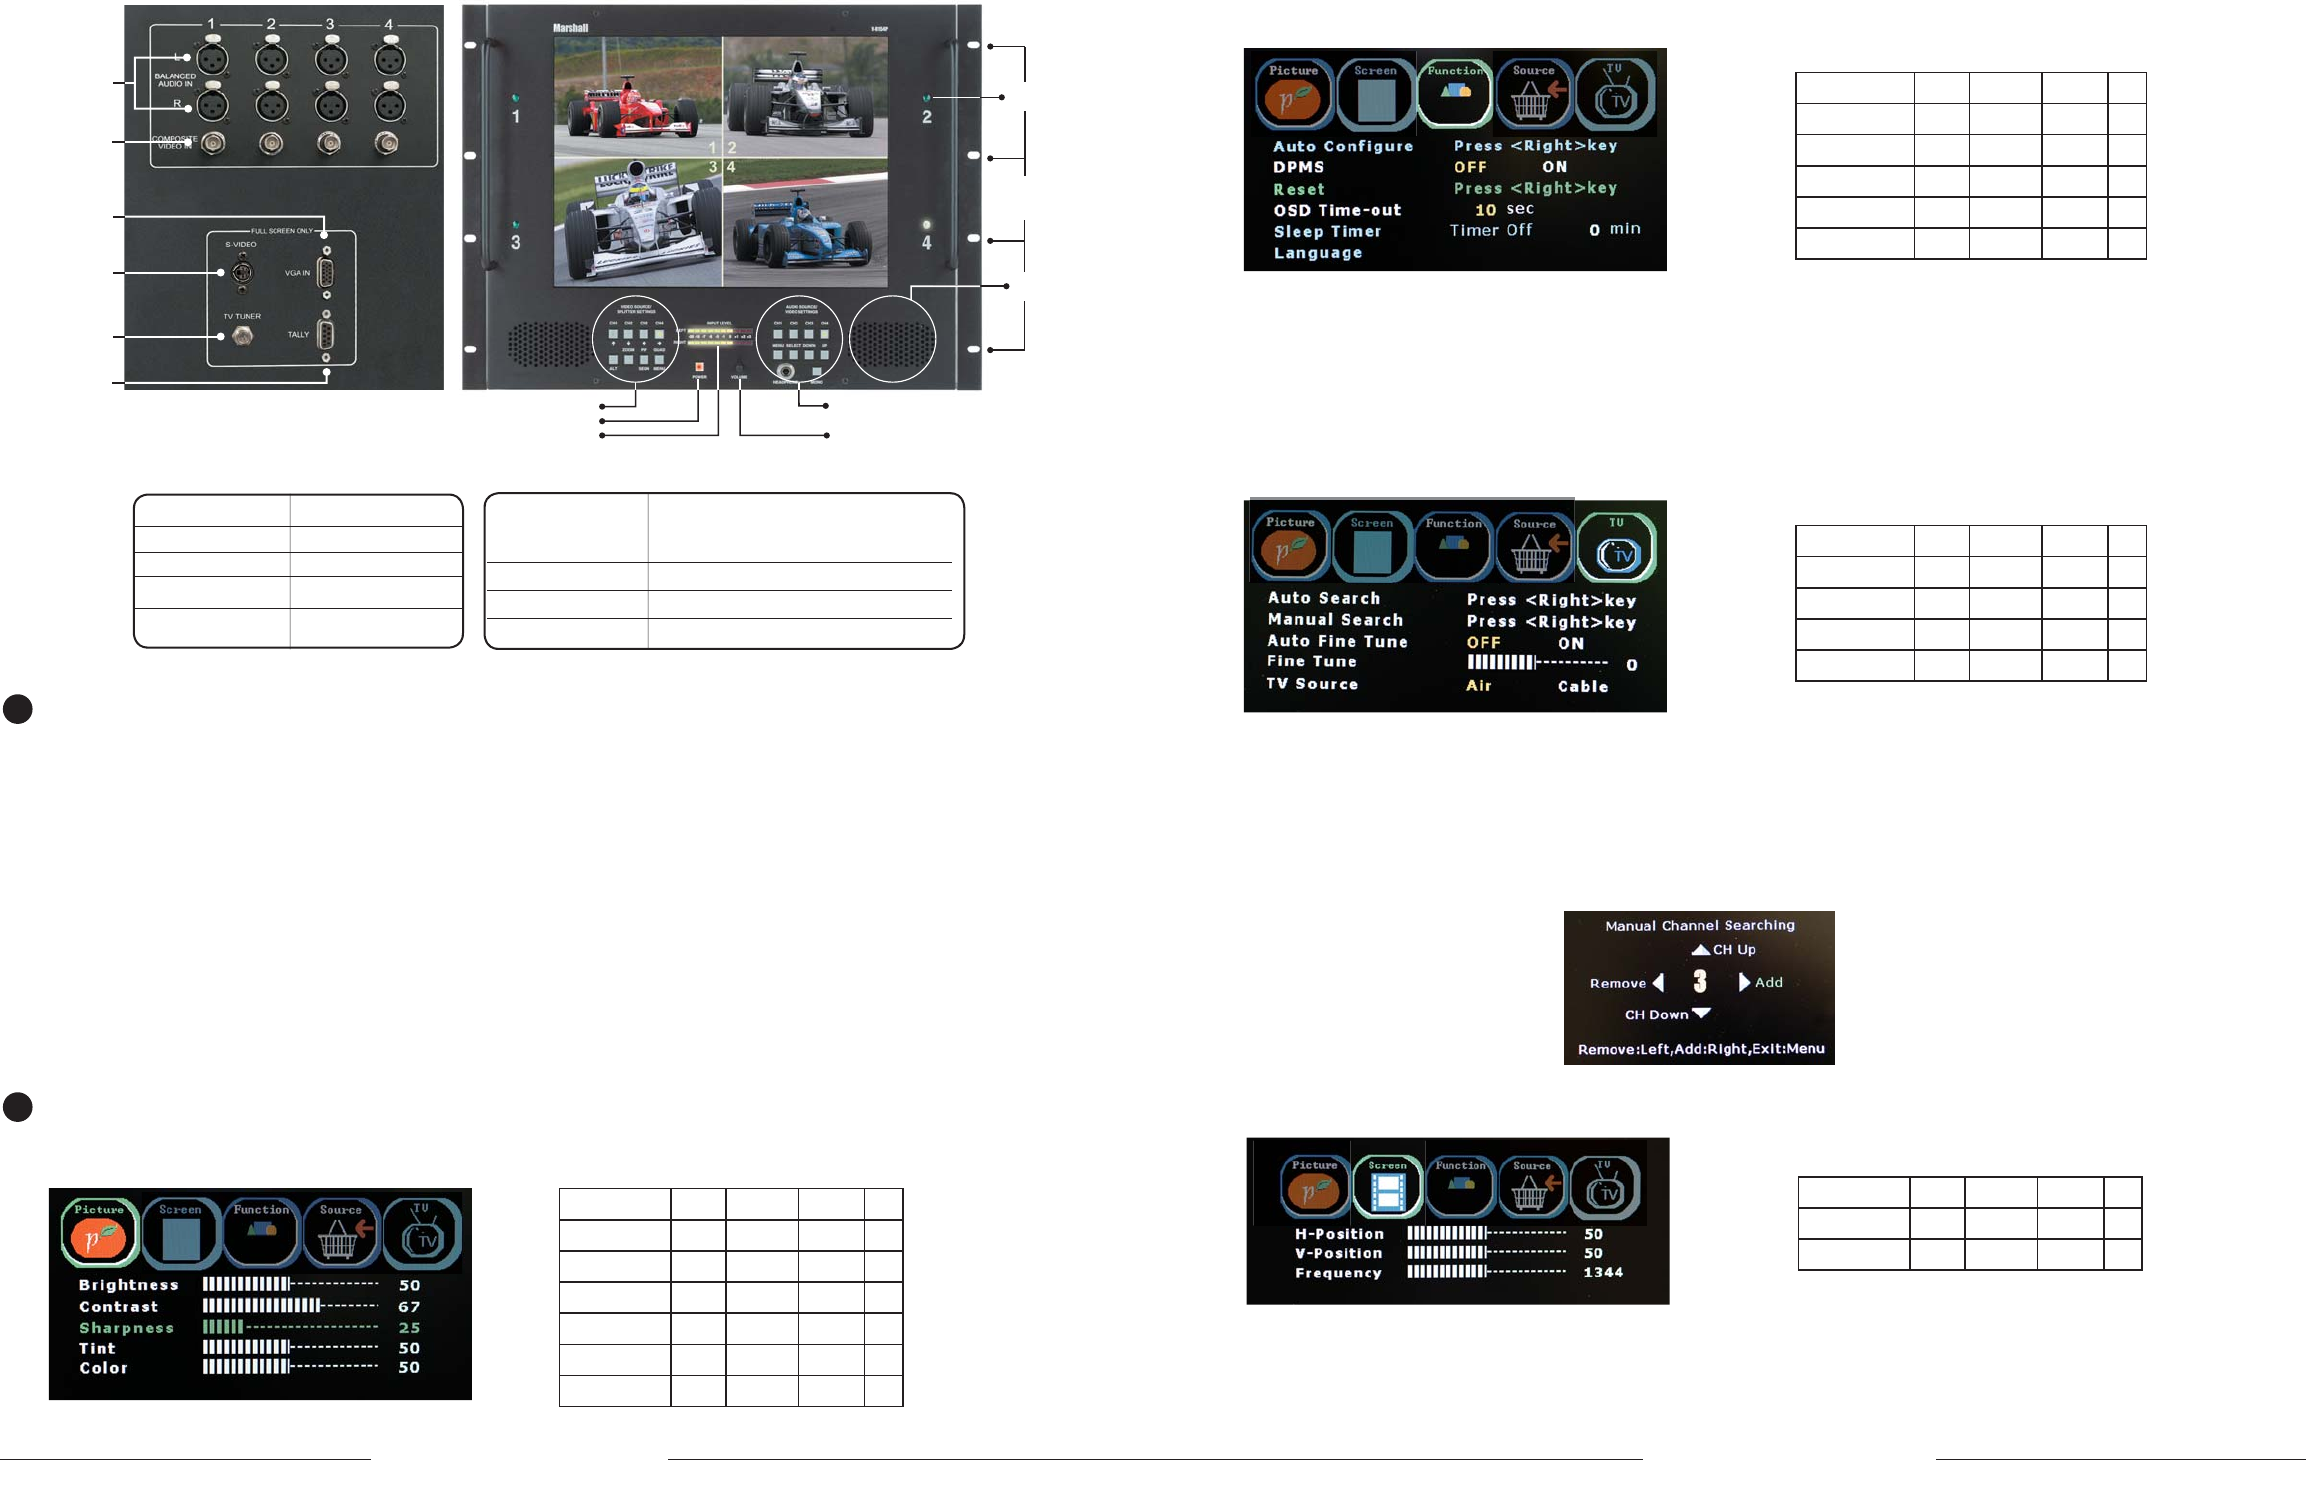
1. Picture Menu (Use UP/DOWN/LEFT/RIGHT buttons to select function)
TV S-Video Video PC
Brightness
99 99
Contrast
99 99
Sharpness
99 9
Tint
99 9
Phase
9
Color
99 9
Color temp
9
2. Function Menu (Use UP/DOWN/LEFT/RIGHT buttons to select function)
TV S-Video Video PC
Auto Confi gure
9
DPMS
999
Reset
99 99
OSD Time Out
99 99
Sleep Timer
9
Language
AUTO Confi gure – Used for PC signals to auto fi t image to screen.
DPMS – When selected to ON, the Digital Power Management System will place the monitor into standby when there is no
input signal for 12 seconds and will automatically turn on the monitor when a signal is applied to the last selected source.
Reset – Restores the monitor to factory settings
OSD TIME-OUT – Set time in seconds (0 to 60) for OSD to drop from screen after last button push
SLEEP TIMER – Used to automatically turn monitor off after programmed delay
Language – Not Used
3. TV SETUP MENU (Use UP/DOWN/LEFT/RIGHT buttons to select function)
TV S-Video Video PC
Auto Search
9
Manual Search
9
Auto Fine Tune
9
Fine Tune
9
TV Source
9
AUTO Search – Will scan through all channels to fi nd available signals and automatically program the tuner.
Manual Search – Use to scan individual channels to add or eliminate channels of the tuner
Auto Fine Tune – Set to ON for automatic adjustment of each channel to achieve the strongest signal.
Set to OFF to enable manual adjustment of the TV tuner.
Fine Tune – When AUTO FINE TUNE is off, this function will be enabled for manual adjustment of the TV tuner
TV Source – Select between off air signals (Channels 2-69) or RF Cable system (Channel 1-125)
Fine Tune Menu
4. Screen Menu (Use UP/ DOWN/ LEFT/ RIGHT buttons to select function)
TV S-Video Video PC
H-Position
9
V-Position
9
Frequency
9
V-Position – Use LEFT and RIGHT buttons to adjust horizontal position of the PC Image
H-Position – Use LEFT and RIGHT buttons to adjust wertical position of the PC Image
Frequency – Use LEFT and RIGHT buttons to adjust the pixel clock width of the PC Image
Display
(
Viewing area)
15.1” (11.69" x 9.12")
Resolution
(Pixels)
1024 H x 768 V
Dot Pitch 0.297 mm x 0.302 mm
Brightness
(in cd/m²)
250 cd/m²
System
NTSC - V-R154P
PAL - V-R154P-PAL
Inputs
VIDEO
1 S-Video, 4 Composite,1 XGA, 1 RF(TV) (NTSC only)
Audio
8 Balanced XLR, 1 RF Stereo pair (TV)
Dimensions 19.12"Wx13.80"Hx3.33"D
Power Consumption
12 VDC, 5.0 Amps
Approx. Weight 14 lbs