


4 © 2008 directed electronics—all rights reserved
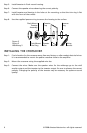
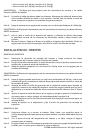
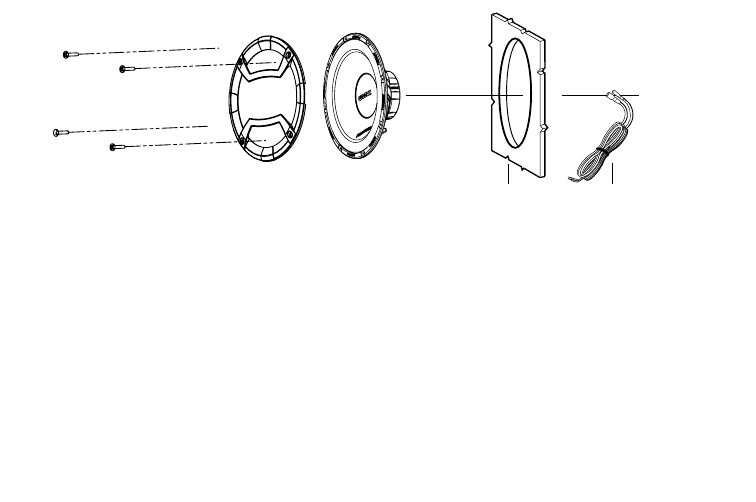
INSTALLING THE MID/WOOFERS
Step 1: Determine where the speakers will be mounted. Make sure there is a flat area large
enough for the speakers to fit properly. An uneven mounting surface can damage the
driver.
Step 2: Check to make sure the space you have chosen for the speakers will not interfere with
the operation of the vehicle.
Step 3: Using the supplied template guide, mark the mounting hole and mounting screw hole
locations with a pen for each speaker.
Step 4: Cut the holes for the speaker. When using correctly sized factory locations, this step
can be passed. A hole can be cut either with a pair of metal tin snips, an air or jig saw,
or with a hole saw corresponding to the size of the midrange listed below.
o 4-3/4" Hole Saw (5-1/4" woofer installation)
o 5-5/8" Hole Saw (6-1/2" woofer installation)
WARNING: Check for clearance of window mechanisms and electrical wires BEFORE you drill.
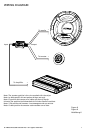
Step 5: Run the speaker wire to the speakers. Make sure to keep wires away from sharp metal
or other edges. When passing through metal, use a protective grommet.
Step 6: Pre-drill mounting screw holes using a 1/8" drill bit.
WARNING: Check for clearance of window mechanisms and electrical wires BEFORE you drill.
Step 7: Pull the wire through the speaker opening and connect to the speaker. Be sure to
observe proper mid/woofer polarity during this process.
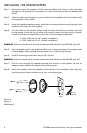
Step 8: Mount the speaker- Place the speaker and the grille in the installation hole. Align the
mounting screw holes and drive in the four mounting screws.
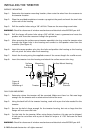
Flush Mount
Tweeter
Assembly
Tweeter
Cup
Pressure
Ring
Tweeter
Wire
Flush Mount
Trim Ring
Wiring
Harness
Panel
Wiring
Harness
Panel
Figure 3
Figura 3
Abbildung 3