


© 2007 directed electronics—all rights reserved 3
TOOLS OF THE TRADE
Listed next are the majority of the tools required to perform an installation. Having the proper
tools will make the installation that much easier. Some of these tools are necessities; some will
just make the job easier.
● Allen Wrenches (2mm, 3mm & 4mm) ● DMM or VOM
● Electric drill with assorted drill bits ● Grommets
● Heat shrink tubing ● Marking pen
● Phillips and flat blade screw drivers ● Nylon tie straps
● Pliers (standard and needle nose) ● Wire crimper
● RTA (real time analyzer) ● Wire cutters
● Soldering iron and solder ● Wire strippers
● Utility knife
● Wire brush or sandpaper for chassis grounding
● Reference CD with 1 kHz Sine Wave at 0dB level (all bits high)
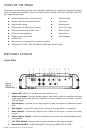
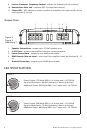
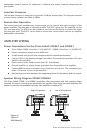
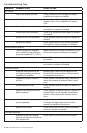
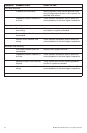
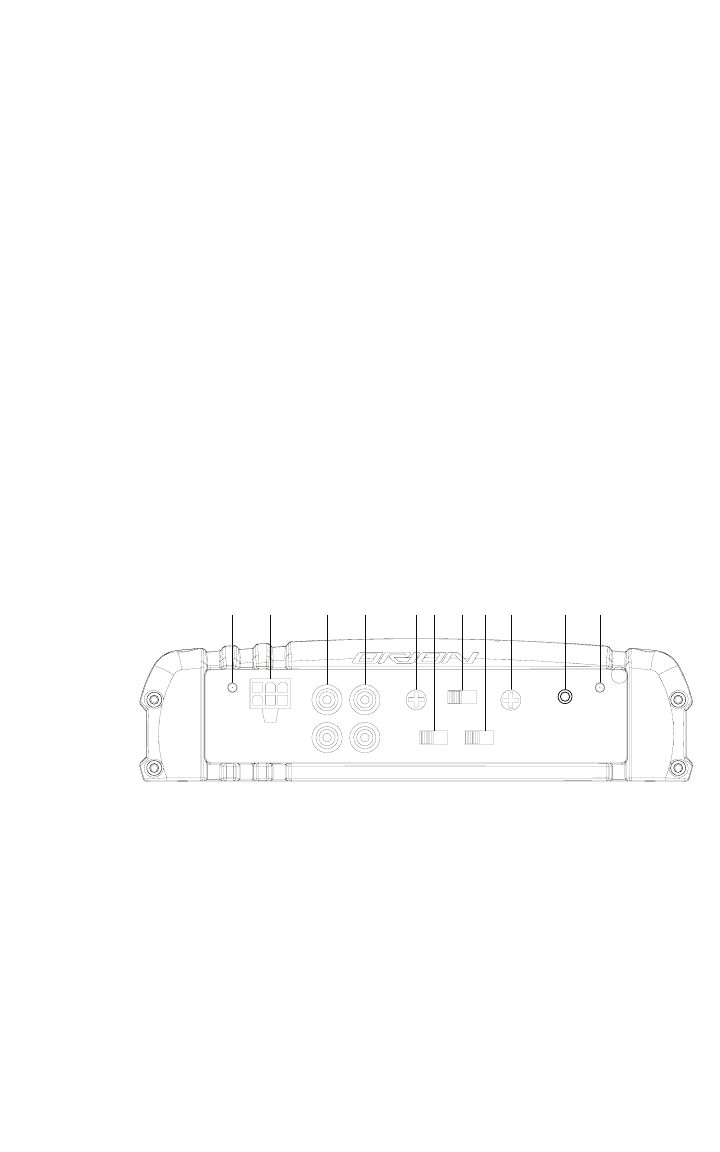
END PANEL LAYOUTS
Input Plate
Figure 1
Figura 1
Abbildung 1
2 3 4 5 6 7 8 9 10
11 13
14 15
12
1 98765432
1 98765432
1 2 32
2 321
CO600.2
CO800.1
CO500.1
CO300.2
54
4 5
CO600.4
1
1 2 32 4 5
1 111098765432
2 31 4 5
1. Power LED - When lit indicates that the amplifier is on.
2. High Level Input - Connect speaker output from factory radio to amplifier, will auto
sense signal from radio and turn amplifier on when needed, turn off after 1 minute
without signal.
3. RCA Outputs - provides a full range signal for easy connection to additional ampli-
fiers.
4. RCA Inputs - Accepts RCA input from a source unit, preamplifier, or equalizer.
5. Gain Control - Continuously adjusts from 150mV to 8V input to obtain full power
output.
6. Phase Control Switch - Allows for adjustment of phase and makes bridging ampli-
fiers possible.
7. LPF, FULL, Switch - Selects either Lo-pass crossover or full range crossover.
8. Bass Boost Switch - Adjusts bass gain in three steps (0dB, 6dB, & 12dB).