


CQ-5335U
23
Installation (Continued)
❐ Preparation ❐ Installation Hardware
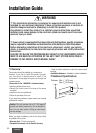
Warning: If your vehicle is equipped with air bag
and/or anti-theft systems, specific procedures may
be required for connection and disconnection of the
battery to install this product.
Before attempting installation of this electronic
component, contact your vehicle dealer or
manufacturer to determine the required procedure
and strictly follow their instructions.
FAILURE TO FOLLOW THE PROCEDURE MAY
RESULT IN THE UNINTENDED DEPLOYMENT OF
AIR BAGS OR ACTIVATION OF THE ANTI-THEFT
SYSTEM RESULTING IN DAMAGE TO THE VEHICLE
AND PERSONAL INJURY.
Caution: Various settings that have been stored in
the memory in other on-board equipment (vehicle
navigation etc.) may be lost if the battery terminals
are disconnected.
Therefore, we recommend to make a record of or to
back up the settings before disconnecting the
terminals.
After completing installation of the main unit, set the
equipment again according to the record.
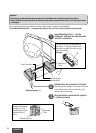
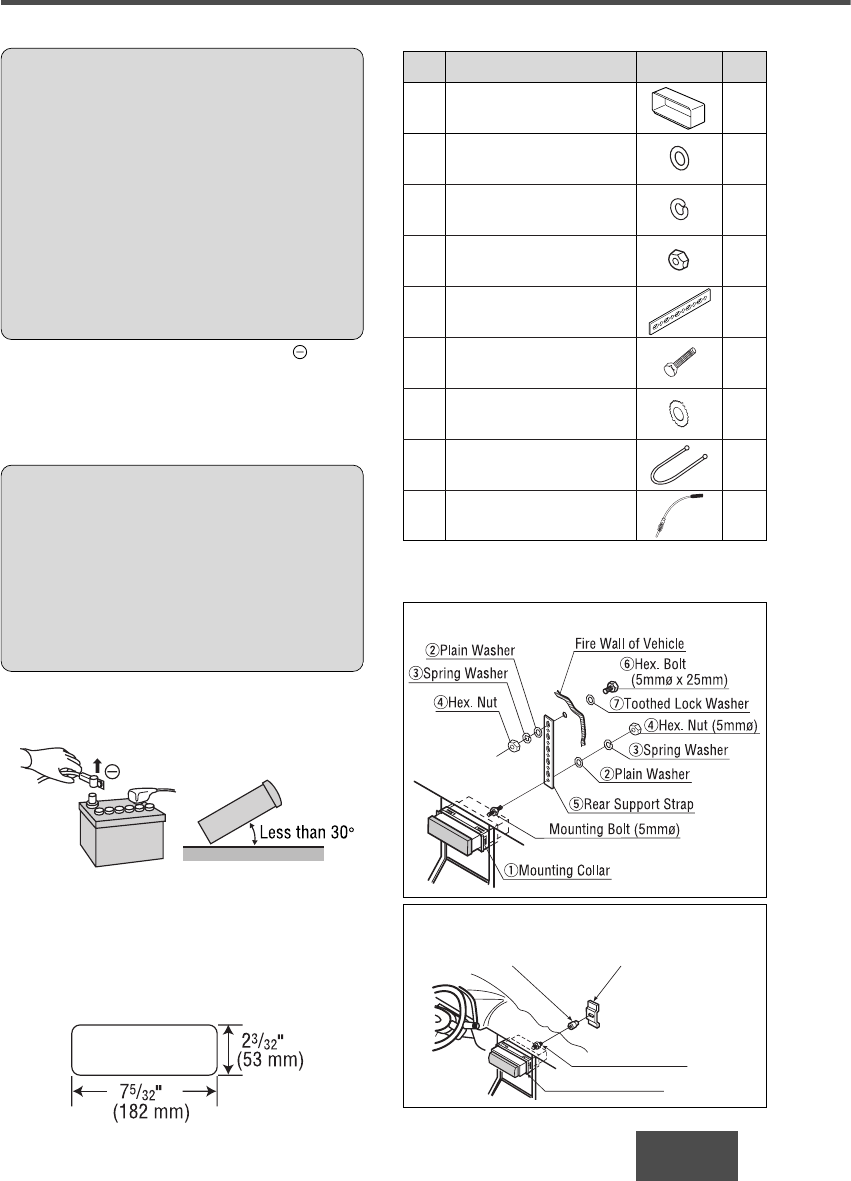
• Disconnect the cable from the negative battery
terminal (see warning and caution below).
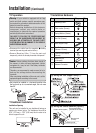
•Remove Mounting Collar
q from the main unit
temporarily, which are already mounted at shipment.*
• Unit should be installed in a horizontal position with
the front end up at a convenient angle, but not more
than 30˚.
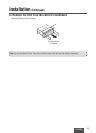
❐ Dashboard Installation
Installation Opening
This unit can be installed in any dashboard having an
opening as shown below. The dashboard should be
3/16” (4.75 mm) – 7/32” (5.56 mm) thick in order to be
able to support the unit.
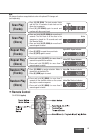
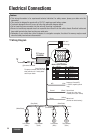
Q’tyItemNo. Diagram
q
1Mounting Collar*
Plain washer (5mmø)
w
2
Spring Washer (5mmø)
e
2
Hex. Nut (5mmø)
r
2
Rear Support Strap
t
1
Hex. Bolt
(5mmø
× 25 mm)
y
1
Toothed Lock Washer
(5mmø)
u
1
Removal Tool
(U-shaped)
i
2
Antenna Connector
o
1
Mounting bolt
(5 mmø)
q Mounting collar
Rear support bracket
(provided on the vehicle)
Rubber cushion (option)
(a) Using the rear support strap t
(b) Using the rubber cushion (option)