


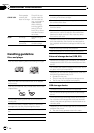

1 Push M.C. left or right to select the segment of
the clock display you wish to set.
Hour—Minute
2 Push M.C. up or down to put a clock right.
! You can match the clock to a time signal by press-
ing M.C.
! If 00 to 29, the minutes are rounded down.
(e.g., 10:18 becomes 10:00.)
! If 30 to 59, the minutes are rounded up. (e.g.,
10:36 becomes 11:00.)
EngineTime alert (elapsed time display setting)
This setting allows you to measure the length of time
that elapses from when the machine is turned on and
display the amount of elapsed time per set period.
Also, you will hear alarm.
1 Press M.C. to select your favorite setting.
OFF—15Minutes—30Minutes
FM step (FM tuning step)
Normally the FM tuning step employed by seek tuning
is 50 kHz. When AF or TA is on, the tuning step auto-
matically changes to 100 kHz. It may be preferable to
set the tuning step to 50 kHz when AF is on.
1 Press M.C. to display the setting mode.
2 Turn M.C. to select the FM tuning step.
50kHz (50 kHz)—100kHz (100 kHz)
3 Press M.C. to confirm the selection.
Auto PI (auto PI seek)
The unit can automatically search for a different sta-
tion with the same programming, even during preset
recall.
1 Press M.C. to turn Auto PI seek on or off.
USB plug&play (plug and play)
This setting allows you to switch your source to USB/
iPod automatically.
1 Press M.C. to turn the plug and play on or off.
! ON – When USB storage device/iPod is con-
nected, the source is automatically switched
to USB/iPod. If you disconnect your USB sto-
rage device/iPod, this unit’s source is turned
off.
! OFF – When USB storage device/iPod is con-
nected, the source is not switched to USB/
iPod automatically. Please change the source
to USB/iPod manually.
Warning tone (warning tone setting)
If the front panel is not detached from the head unit
within four seconds of turning off the ignition, a warn-
ing tone sounds. You can turn off the warning tone.
1 Press M.C. to turn the warning tone on or off.
AUX (auxiliary input)
Activate this setting when using auxiliary device con-
nected to this unit.
1 Press M.C. to turn auxiliary setting on or off.
Dimmer (dimmer setting)
To prevent the display from being too bright at night,
the display is automatically dimmed when the car’s
headlights are turned on. You can turn the dimmer on
or off.
1 Press M.C. to turn dimmer on or off.
Brightness (display brightness setting)
1 Push M.C. left or right to adjust the brightness
level.
0 to 15 is displayed as the level is increased or de-
creased.
! When dimmer is functioning, the brightness
level can be adjusted 0 to 10.
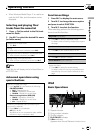
S/W control (rear output and subwoofer setting)
This unit’s rear output (rear speaker leads output and
RCA rear output) can be used for full-range speaker
(Rear SP:F.Range) or subwoofer (Rear SP:S/W) con-
nection. If you switch the rear output setting to Rear
SP:S/W, you can connect a rear speaker lead directly
to a subwoofer without using an auxiliary amp.
1 Press M.C. to switch the rear output setting.
! When no subwoofer is connected to the rear
output, select Rear SP:F.Range (full-range
speaker).
! When a subwoofer is connected to the rear
output, select Rear SP:S/W (subwoofer).
! Even if you change this setting, there is no output
unless you turn the subwoofer output on (refer to
Sub W.1 (subwoofer on/off setting) on page 14).
! If you change this setting, subwoofer output in
the audio menu will return to the factory settings.
! Both rear speaker lead outputs and RCA rear out-
put are switched simultaneously in this setting.
Mute (muting or attenuation setting)
1 Press M.C. to switch the telephone muting/at-
tenuation.
! The sound is muted or attenuated, MUTE or
ATT are displayed and no audio adjustment is
possible.
! Sound from this system returns to normal
when the muting or attenuation is canceled.
Demonstration (demo display setting)
Operating this unit
En
16
Section
02