


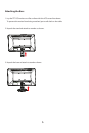

Preparing The Monitor For Wall-Mounting
1. Check the stability of the wall-mounting fixture.
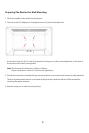
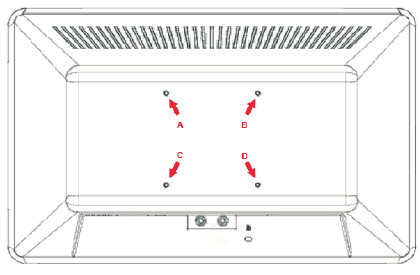
2. The rear of this LCD display has 4 integrated 4 mm, 0.7 pitches threaded nuts.
Use the four holes (A), (B), (C), and (D) to attach the swing arm or other mounting fixture to the back of
the monitor with screws (not supplied).
3. Follow the instructions included with the mounting fixture to ensure that the monitor is safely attached.
The four threaded holes that are on the back of the panel are compliant with the VESA standard for
mounting flat-panel monitors.
4. Attach a swing arm or other mounting fixture.
8
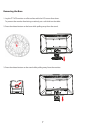
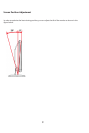
Note: The distance of wall-mount is 100mm x 100mm.
Please use M 4mm x 10mm (L) Screw for this application.