15
16
AD-C1200 Installation
Note: AD-C1200 comes pre-wired, from the factory, for transformer tap applications. To bypass the transformer see “Remove Transformer from the
AD-C1200 Circuitry” in this section.
1. Locate and remove the five-pin Euro-style connector plug included with the loudspeaker baffle assembly. Typically it is plugged into its mate (J2) on
the loudspeaker baffle assembly PCB.
2. Using a #1 Phillips head screwdriver, loosen the M3 wire retaining screws on the plug to provide enough room to insert the tinned wires.
Note: Do not remove the two-pin Euro-style connector (J1) plug with pre-attached wires.
3. Locate the wires coming from the ceramic terminal block in the AD-C1200BB back box and strip them to approximately 0.4" (10 mm).
Tin the wire ends.
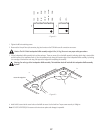
4. Insert the wires from the ceramic terminal block into the five-pin Euro-style connector in their proper connector position based on your transformer
tap requirements. The negative wire goes to the COM connection, which is marked with a black dot.
Note: Transformer settings are also labeled on the bracket for easy reference.
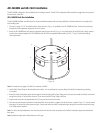
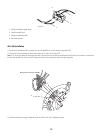
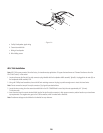
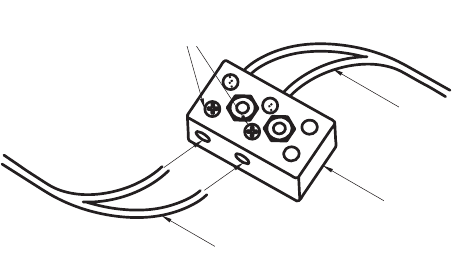
a. Facility's loudspeaker signal wiring
b. Ceramic terminal block
c. Wiring to loudspeaker
d. Wire holding screws
– Figure 24 –
c
d
a
b


