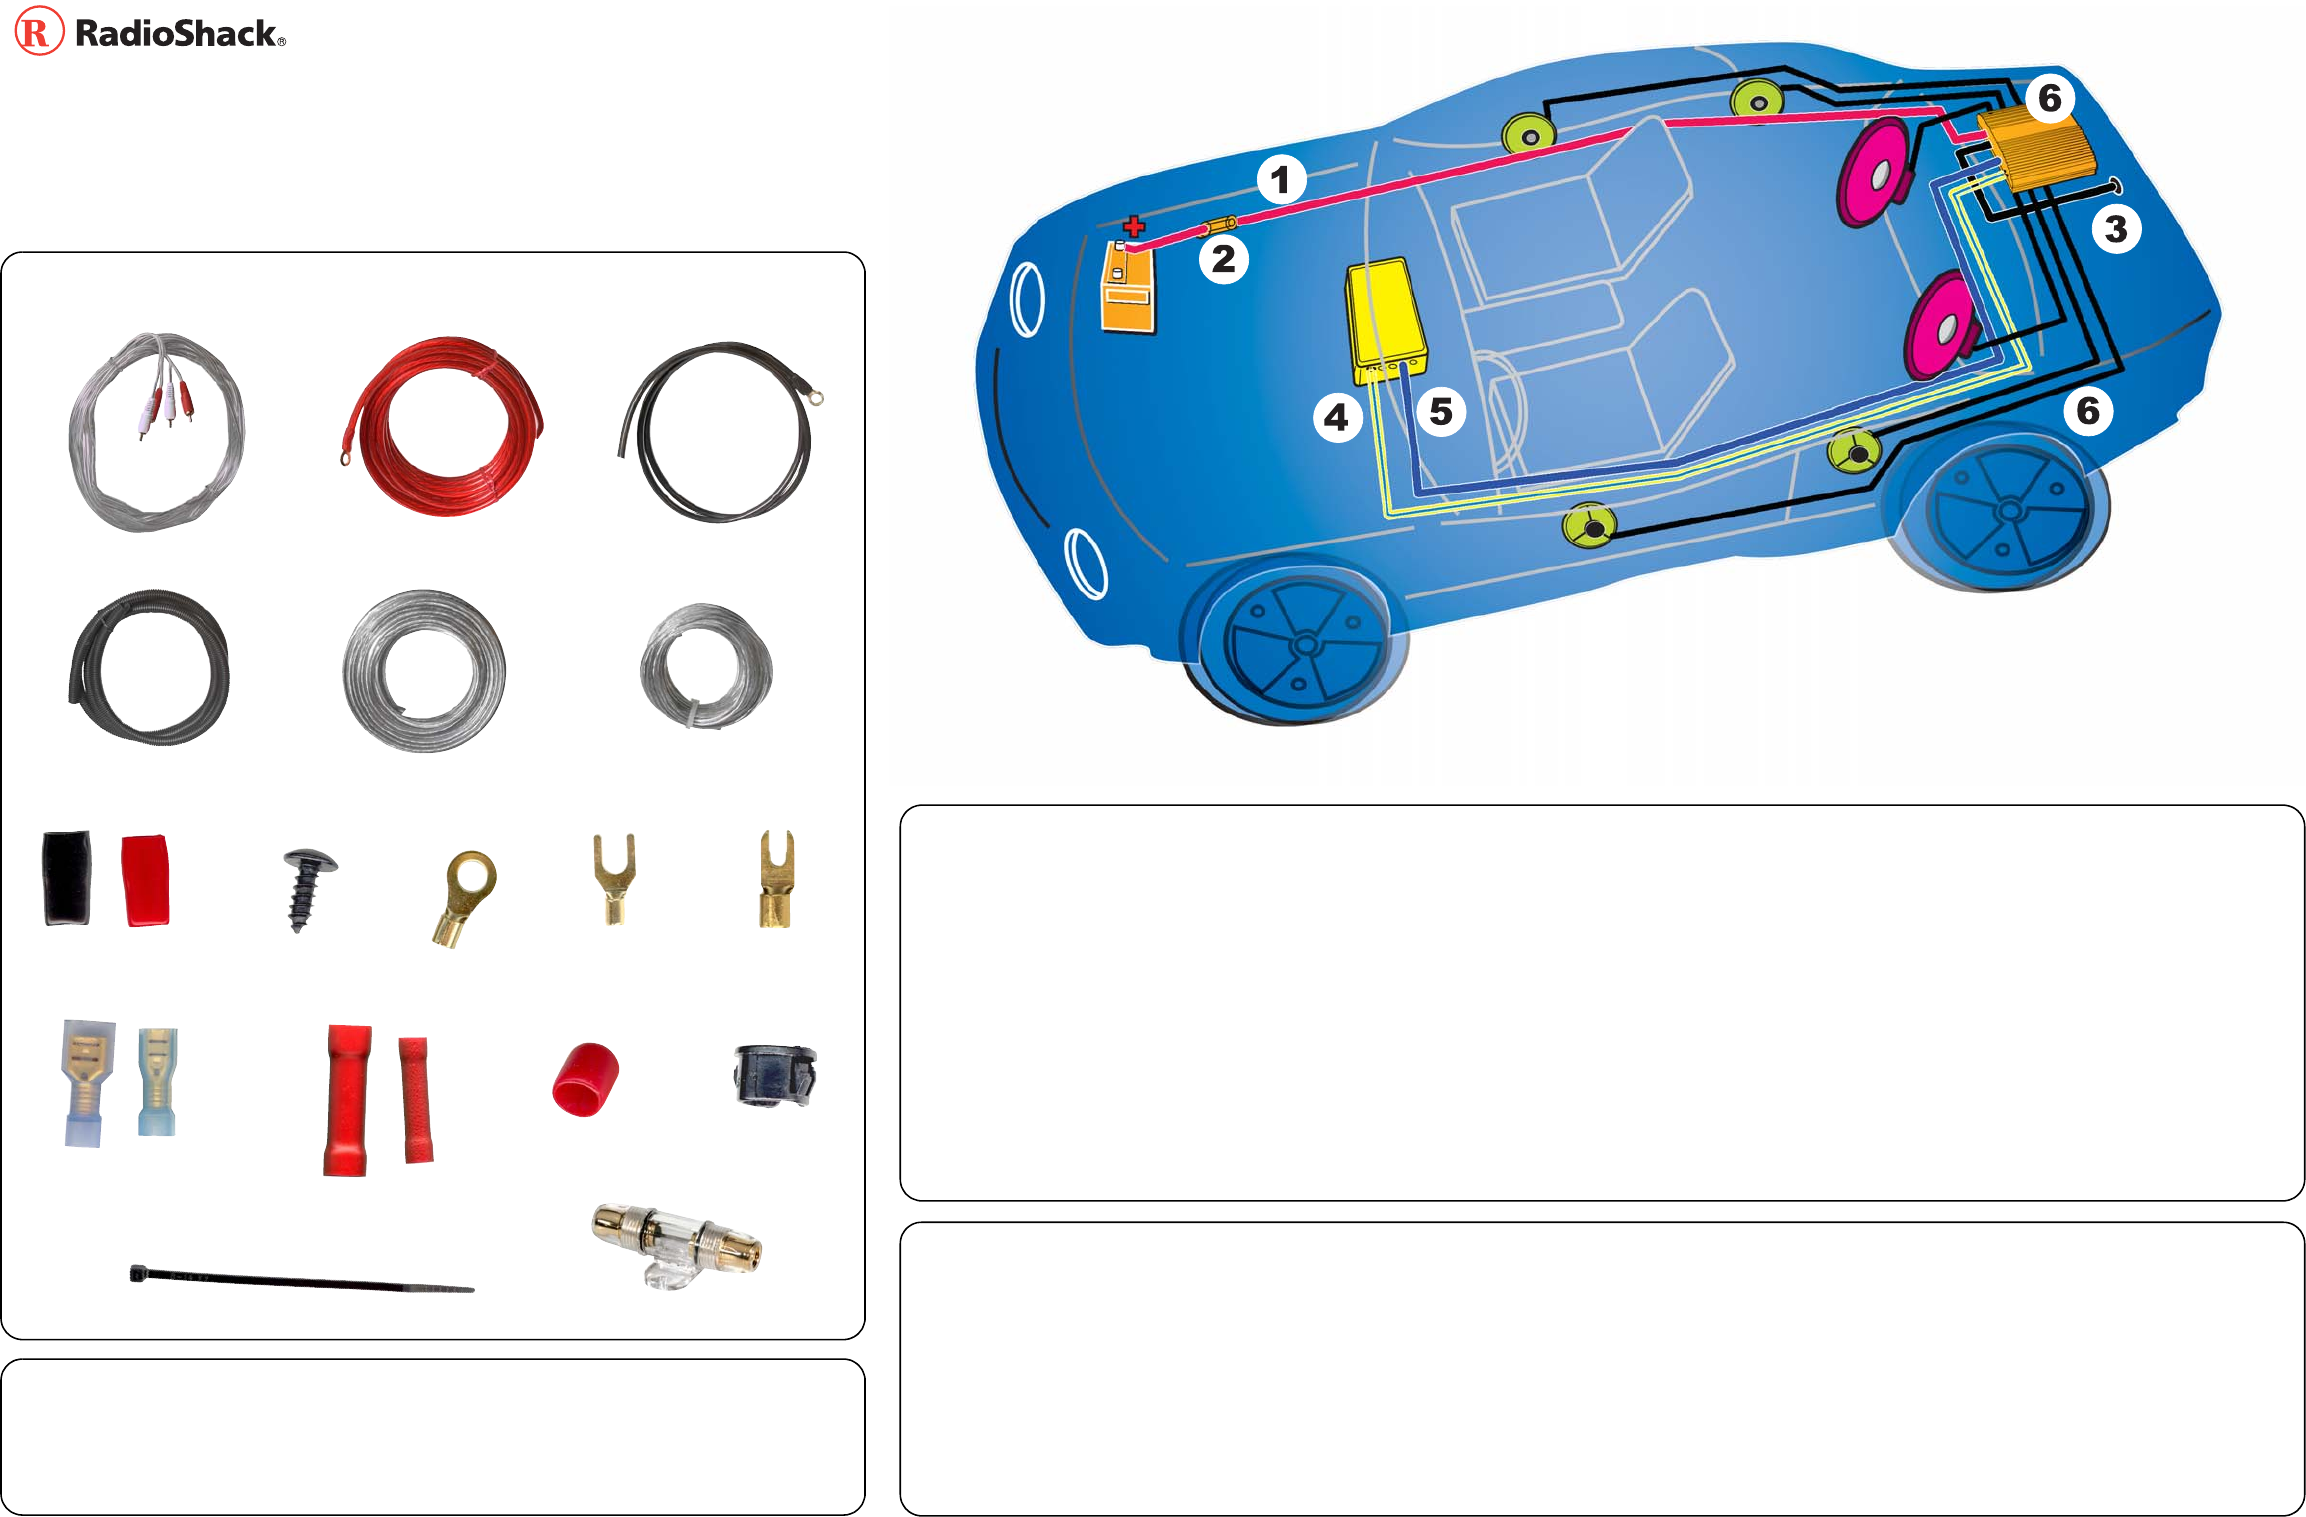
Wire Ties (10)
500-Watt Amplifier Wiring Kit
Cat. No.270-4128
What’s Included
Before You Begin
Before you use your wiring kit, read all the instructions in this user’s guide. You should be able to answer all of these questions about your vehicle’s electrical and auto sound
systems.
• Does my vehicle have an auto sound system, such as a car stereo or CD player, already installed?
• Which of the auto sound system’s wires is the power wire?
• Which of the auto sound system’s terminals are low-level and which are high-level (speaker) outputs?
• How will wires be passed through the vehicle’s firewall?
Routing Cables and Wires
To help reducing electrical noise, route the stereo interconnect cable and any power wires separately on opposite sides of your vehicle. Route all wires away from other high-
voltage areas of your vehicle such as ignition control modules or other vehicle control systems. Avoid routing the connection cables and any wires near moving parts or sharp
edges. You can usually route wires and cables along the wiring channel beneath the vehicle’s door facings by carefully removing the molding that holds the carpet in place.
After routing the cables and wires, replace the molding.
Tip: For easier installation, mark a wire you plan to connect with the name of the terminal you will connect it to.
1 — Power Cable
3 — Ground Cable
5 — Remote Turn On Cable
2 — In-Line Fuse
4 — Stereo Interconnect Cable
6 — Speaker Wires
Thank you for purchasing the RadioShack 500-Watt Amplifier Wiring Kit. This kit has almost
everything you need to connect an amplifier to your vehicle’s existing auto sound system.
Before you use this wiring kit, make sure you have these materials:
Phillips and flat-blade screwdrivers
×
a socket wrench with standard and metric sockets
wire crimper
×
wire cutter
×
wire stripper
×
hex key set
You might also need a soldering iron and solder, heat shrink tubing, and electrical tape
.
What You Will Need
Before You Make Connections
To make it easier to connect the amplifier, temporarily place it as close as possible to the selected mounting location.
Caution: For added safety and to protect your amplifier and auto sound system, disconnect the cable from your vehicle’s negative (–) battery terminal before you begin.
Notes:
• If you accidentally cut a wire or if the wire supplied with your auto sound system or amplifier is too short, you can use the supplied butt connectors to connect wires to each
other.
• If the connectors on your vehicle’s auto sound system are not compatible with the amplifier’s connectors, you might need an adapter harness to complete the connections.
• You might need additional wire, depending on your individual auto sound system, to complete the connections. Your local RadioShack store carries a full line of wire and
wire management accessories.
20-ft. Stereo Interconnect Cable
20-ft. 8-gauge Red Power Cable
4-ft. 8-gauge Black Ground Cable
6-ft. Black Split Tubing
40-ft. 16-gauge Speaker Wire
20-ft. 18-gauge
Remote Turn-On Cable
1 Grommet
6 Vinyl Insulator Boots
(2 black, 2 red large,
2 red small)
4 Tapping Screws
1 Ring Terminal
2 C-type 18-gauge
Spade Terminals
3 C-type 8-gauge
Spade Terminals
1 red Vinyl Cover
4 Butt Connectors
(2 large, 2 small)
6 Fully Insulated
Quick Disconnects
for 16-gauge Speaker Wire
(3) .205”, and (3) .110”
60-Amp AGU Fuse & In-Line Fuse Holder
270-4128 080204.fm Page 1 Monday, August 2, 2004 2:26 PM