


• Disconnect negative battery terminal before starting installation. Consult the vehicle’s
owner’s manual for proper instruction.
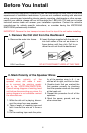
• The unit is designed for a 12 Volt DC negative ground operation system only. Before
installing the unit, make sure your vehicle is a 12 Volt DC negative ground system.
• Mark the polarity of the existing speaker wires before disconnecting the old unit.
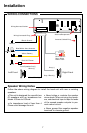
• Be sure to connect the color coded leads according to the diagram. Incorrect connec-
tions may cause the unit to malfunction or damage the vehicle's electrical system.
• Make sure all the connections are completely correct before turning on your unit.
• When extending the ignition, memory backup or ground cable, use diameter of 0.75mm
(AWG18) or more automotive grade cable to avoid wire deterioration or damage to the
wire coating.
• To prevent short circuit, never put or leave any metallic object inside the unit. If you
smell or see smoke, turn off the power immediately and consult your dealer.
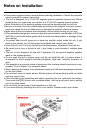
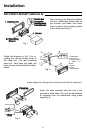
• Insert the unit until it is firmly locked into mounting sleeve, otherwise it may fall out.
•
Be careful not to drop or shock the unit, it may break or crack because it contains glass
parts.
• The unit is only designed for use with 2 speakers. Do not ground negative speaker
leads to the chassis ground.
• Do not open the top or bottom cover and do not install the unit in a place where it
is exposed to direct sunlight (including faceplate), high heat, humidity, moisture, or
dust.
• The faceplate is a precision piece of equipment that contains sensitive electronic com-
ponents. Do not subject it to excessive shock.
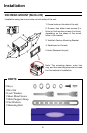
• When replacing the fuse(s), the replacement must be of the same amperage as shown
on the fuse holder.
• Do not block vents or heater panels. Blocking them will cause heat to build up inside
and may result in fire.
• After completing the installation and before operating the unit, reconnect the battery.
Then press the (RES) button with a pointed object, such as a ball-point pen to set the
unit to its initial status.
• Do not touch the terminals of the faceplate or of the unit.
• If you have difficulty installing this unit in your vehicle. Please contact your dealer.
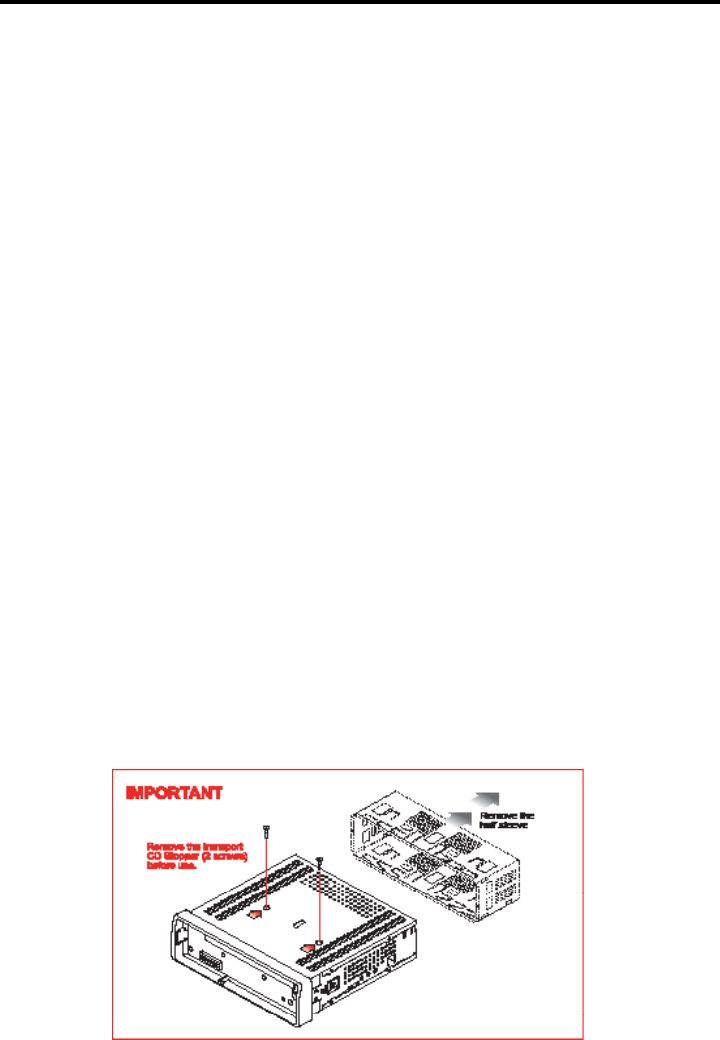
Notes on Installation
3