


Installation
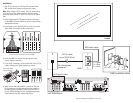
1. Run CAT-5e cable up to 300 feet (90 m) between the
VM1 and the video display locations in the zones.
Note: When running CAT-5e cables, avoid AC power wiring.
If you have to run the cables parallel to electrical wiring,
space the cable at least 12 inches (30 cm) from AC power
lines.
2. Install single-gang UL/CSA-approved plastic wall boxes
for the VMR1 receivers. Attach the boxes to the wall with
appropriate fasteners.
3. In each zone, punch down the CAT-5e cable on the back
of the VMR1 as indicated on the circuit board.
4. Insert the VMR1 into the wall box and secure it with
screws. Attach a wall plate.
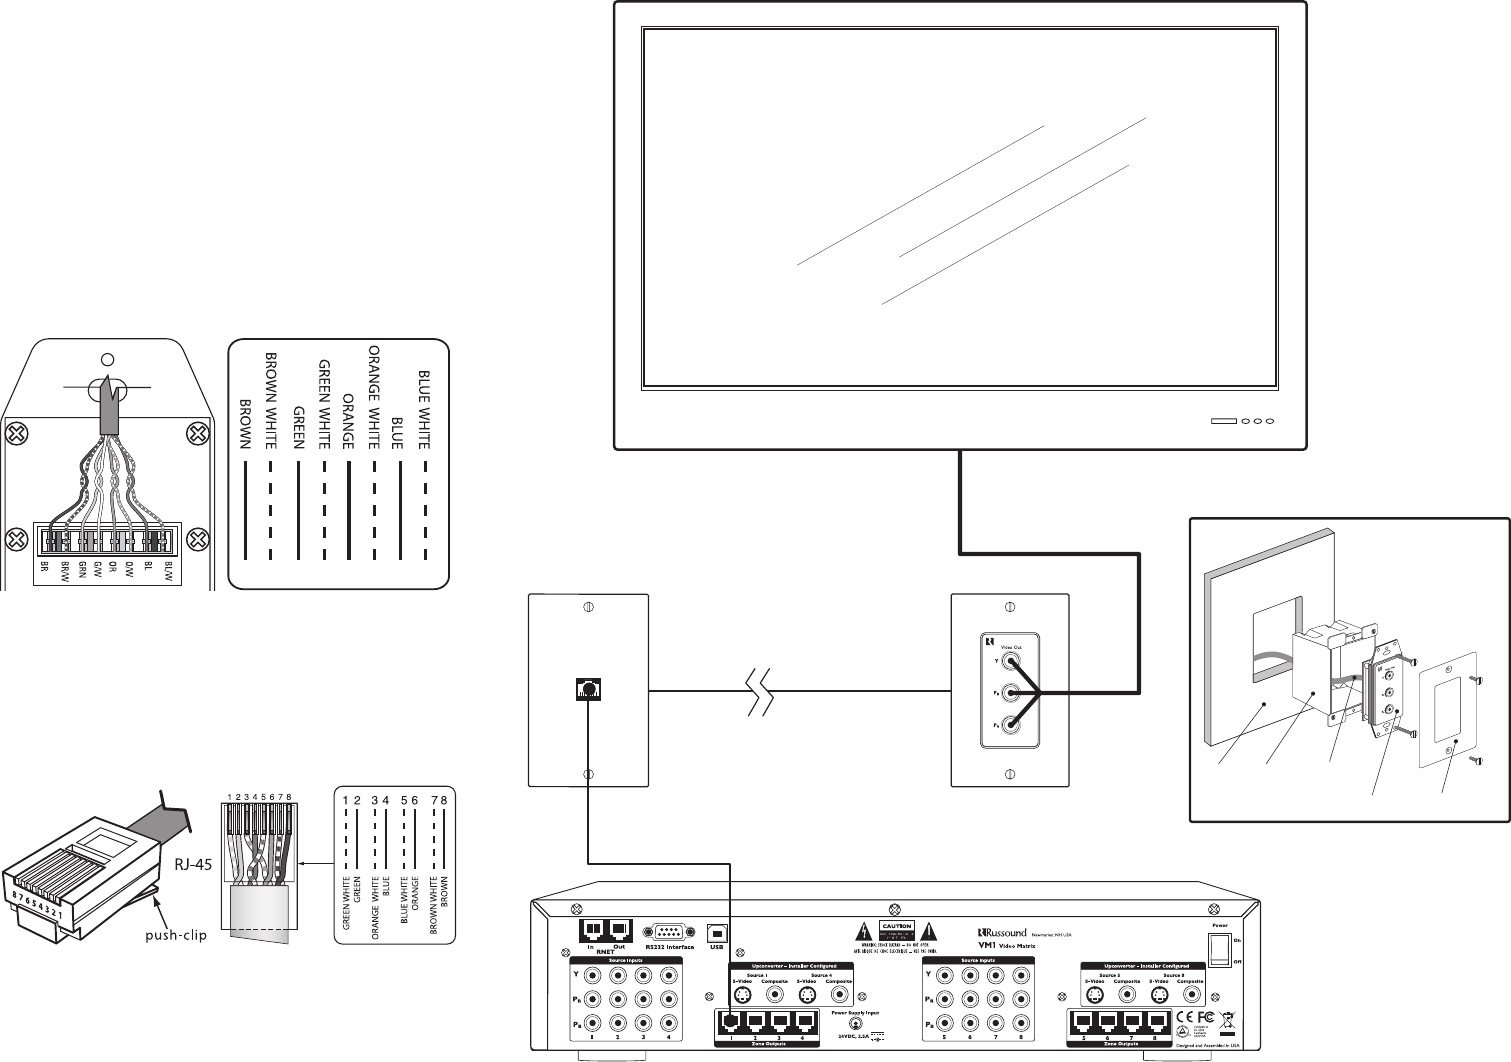
5. Crimp RJ-45 connectors on the system end of the CAT-5e
cables, following the T568A standard as shown.
6. Make sure the VM1 Video Matrix is turned off. Plug the
RJ-45 connectors into the appropriate zone outputs on
the VM1. (If using wall plates, punch down the CAT-5e
per the T568A standard and use straight-through patch
cables between the VM1 and the wall plates.)
RJ-45 Using T568A
Wiring Standard
RGB video cable
VMR1 installation detail
VMR1
RJ-45 wall plate
(optional)
VM1 Video Matrix
CAT-5e cable
up to 300 ft (90 m)
RJ-45 patch cable
Y = Green
P
B
= Blue
P
R
= Red
Wall
VMR1 Trim plate
Wall box CAT-5e
Typical connection of the VMR1 for one zone
BR BR/W GRN G/W OR O/W BL BL/W
110 punch-down connection on rear of VMR1