– 19 –
SECTION 4
MECHANICAL ADJUSTMENTS
SECTION 5
ELECTRICAL ADJUSTMENTS
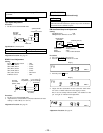
TEST MODE
This set have the test mode function. In the test mode, FM Auto
Scan/Stop Level and AM (MW) Auto Scan/Stop Level adjustments
can be performed easier than it in ordinary procedure.
<Set the Test Mode>
1. Set the “OFF” mode.
2. Push the preset 4 button.
3. Push the preset 5 button.
4. Press the preset 1 button for more than two seconds.
5. Then the display indicates all lights, the test mode is set.
<Release the Test mode>
1. Push the “OFF” button.
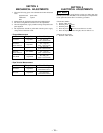
1. Clean the following parts with a denatured-alcohol-moistened
swab:
playback head pinch roller
rubber belt capstan
idles
2. Demagnetize the playback head with a head demagnetizer.
3. Do not use a magnetized screwdriver for the adjustments.
4. After the adjustments, apply suitable locking compound to the
parts adjusted.
5. The adjustments should be performed with the power supply
voltage unless otherwise noted.
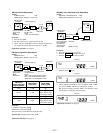
• Torque Measurement
Mode Torqu Meter Meter Reading
Forward CQ-403A
more than 90 g
(more than 3.18 oz)
Reverse CQ-403R
more than 90 g
(more than 3.18 oz)
• Tape Tension Measurement
Mode Torqu Meter Meter Reading
Forward CQ-102C
30 - 65 g·cm
(0.42 - 0.90 oz·inch)
Forward
CQ-102C
0.5 - 4.5g·cm
Back Tension (0.01 - 0.06 oz·inch)
Reverse CQ-102RC
30 - 65 g·cm
(0.42 - 0.90 oz·inch)
Reverse
CA-102RC
0.5 - 4.5g·cm
Back Tension (0.01 - 0.06 oz·inch)
FF, REW CQ-201B
60 - 200 g·cm
(0.83 - 2.78 oz·inch)


