


7
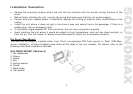
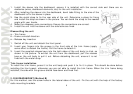
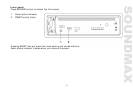
1. Select a position in which the screw holes of the brackets (3) are aligned with
the screw holes in the unit body, and screw in two screws (2) in each side.
2. Screw.
3. Factory radio mounting brackets.
4. Vehicle dashboard.
5. Lock (remove this part).
Note: The outer trim frame and mounting sleeve are not used for method of
installation.
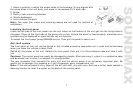
Installing the front panel
Insert the left side of the front panel into the unit locker so that lockers of the unit get into the fixing holes of
the panel. Press on the right side of the panel until a click. Ensure the panel is fixed properly, otherwise error
symbols may be displayed or some buttons will not function.
To detach the front panel, press RELEASE button. Then pull the panel to take it out.
Anti-theft system
The front panel of this unit can be stored in the included protective case when not in used and carried away
when you leave the vehicle to deter theft.
Switch off the power of the unit. Detach the front panel, then put it to the protective case and take it with
you.
Cautions: The control panel can easily be damaged by shocks. After removing it, place it in a protective case
and be careful not to drop it or subject it to strong shocks.
The rear connector that connects the main unit and the control panel is an extremely important part. Be
careful not to damage it by pressing on it with fingernails, pens, screwdrivers, etc.
Note: If the control panel is dirty, wipe off the dirt with soft, dry cloth only. And use a cotton swab soaked in
isopropyl alcohol to clean the socket on the back of the control panel.