4
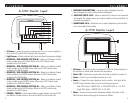
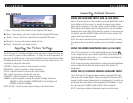
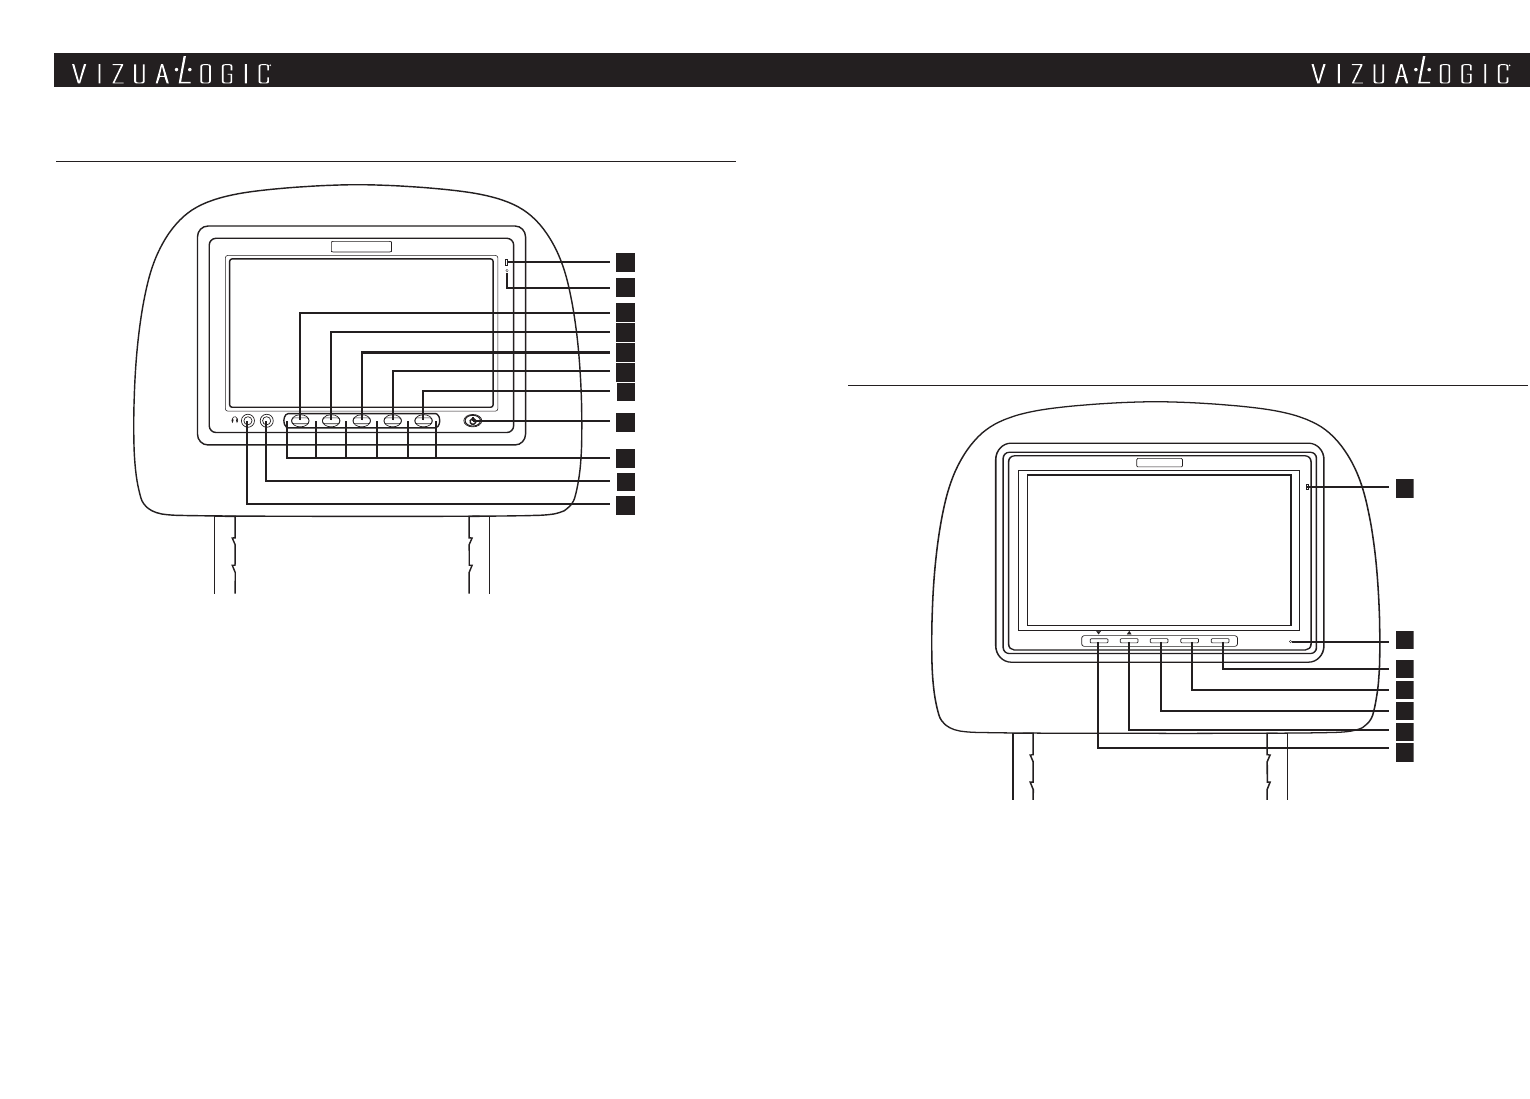
1. IR Sensor – Allows the remote to navigate the OSD (On Screen Display) on
this unit and to control other functions and accessories.
2. Light Sensor – Detects ambient light levels and dims the screen accordingly.
3. MONITOR / DVD CONTROL BUTTON #1 - When set to Monitor Control
mode, operates as the UP button. When set to DVD Control mode,
operates as the PLAY button.
4.
MONITOR / DVD CONTROL BUTTON #2 – When set to Monitor Control
mode, operates as the DOWN button. When set to DVD Control mode,
operates as the PAUSE button.
5.
MONITOR / DVD CONTROL BUTTON #3 – When set to Monitor Control
mode, operates as the MENU button. When set to DVD Control mode,
operates as the STOP button
6. MONITOR / DVD CONTROL BUTTON #4 – When set to Monitor Control
mode, operates as the SOURCE button. When set to DVD Control mode,
operates as the PREVIOUS button.
7. MONITOR / DVD CONTROL BUTTON #5 – When set to Monitor Control
mode, operates as the ZOOM button. When set to DVD Control mode,
operates as the NEXT button.
8.
POWER / TOGGLE – Press momentarily to toggle between on-screen DVD
and Monitor Control functions. Press and hold to turn the monitor off.
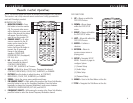
A-1250 Monitor Layout
1
2
3
4
5
6
7
8
9
10
11
AUX
5
9. INFRARED TRANSMITTERS – Transmits audio information from the
source displayed on-screen to the wireless headphones.
10. AUXILIARY INPUT JACK – Allows an external A/V source to be connected
and viewed. The external source can only be viewed on the monitor that it is
physically connected to.
11. HEADPHONE JACK – Allows the use of wired headphones (not included)
to be connected to the monitor.
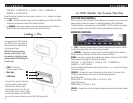
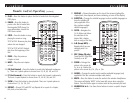
A-1150 Monitor Layout
3
4
7
1
2
5
6
MENU
MENU
SOURCESOURCE POWERPOWER
1. IR Sensor – Allows the remote to navigate the OSD (On Screen Display) on
this unit and to control other functions and accessories.
2. Power LED – Illuminates in green when the headrest monitor is turned on.
3.
Power – Press to turn the headrest monitor on or off.
4. Source – Changes the source displayed on the monitor. Each press of the
SOURCE button advances the source in the following sequence:
Dual DVD system: DRIVER DVD
PASSENGER DVD EXT AUX
Single DVD system: DRIVER DVD EXT AUX
5.
Menu – Accesses monitor picture adjustment settings. Each press of the
MENU button advances through the functions as follows:


