


4
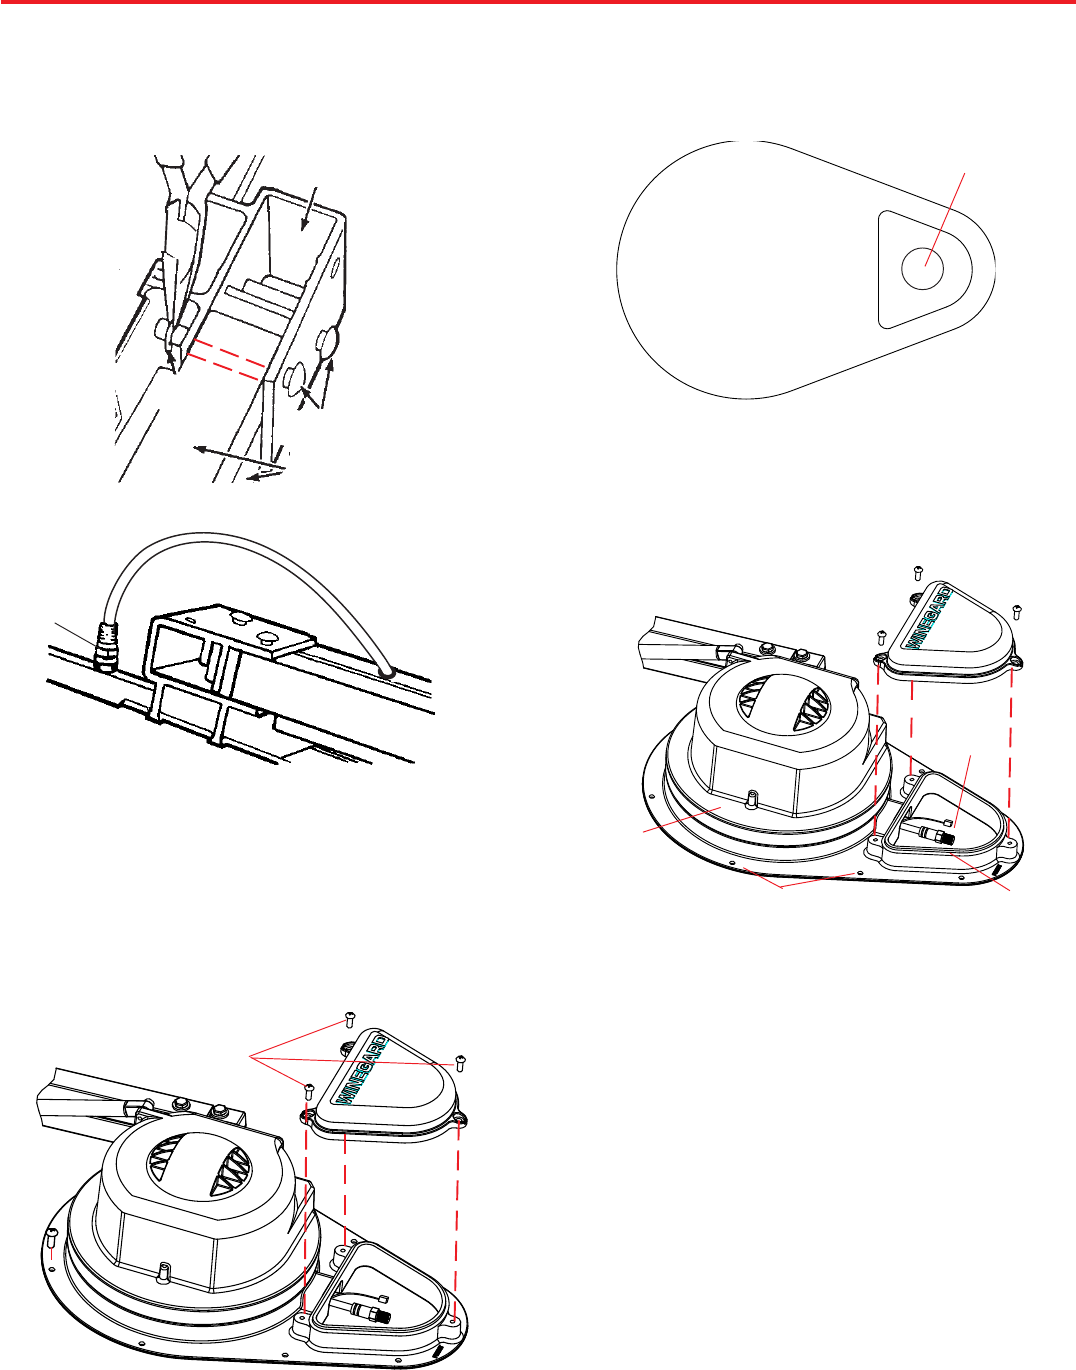
STEP 4: Place antenna system on your previously selected
traced location, and fasten in place with mounting screws.
Depending on roof construction you may need to drill pilot holes
for mounting screws. See Figure 5.
STEP 5: Make cable connections from wires on the roof, to
wires in mount. Apply approved sealant around cable entry
hole. Replace cover over cable area making sure O-Ring is in
place. Then tighten the three cover screws. See Figure 5.
STEP 6: After antenna is secured to roof, apply approved
sealant around edge of mount and over screw heads. NOTE:
Consult RV manufacturer for approved sealant.
Roof Installation
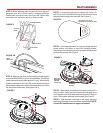
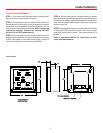
STEP 1: Attach antenna head to booms shown in Figure 2
using two pins and E-Clips found in hardware package.
Fasten coax to antenna head. See Figure 2B.Tighten coax
connection per instruction decal on antenna head.
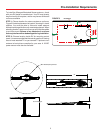
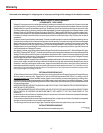
STEP 2: Remove the three screws holding triangle-shaped
cover with WINEGARD on it from antenna base. You will see
a coax cable and control cable (approx. 6" long). With antenna
system positioned on roof trace the outline of the mount and
also trace the inside wall outline of cable area. Set mount off to
the side of the traced area. (See figures 3 & 4).
Don't get
Sealant on
Painted
Turret Top
O-Ring
Cable
Connector
Leveling Bracket
(2) Steel Pins
Lift Tubes
(2) E-Clips
Antenna
Head
FIGURE 2
FIGURE 4
Drill hole 1-1/2" to 3"
Diameter for Wires on Roof
FIGURE 5
FIGURE 2B
Coax
Connector
c
c
c
c
STEP 3: In traced triangular area for cables, drill a hole (1.5"
to 3" Dia.) in roof. Route cables through roof to where you have
selected control panel to be mounted. See Figure 4.
Screws
FIGURE 3
c
c
Mounting
Screws