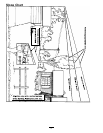
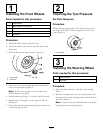
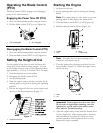
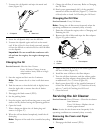
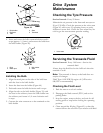
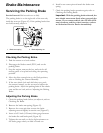
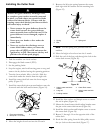
Figure 34
1. Hose clamp
3. Fuel lter
2. Fuel line
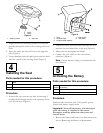
6. Squeeze the ends of the hose clamp together
and slide it up the fuel line toward the fuel tank
(Figure 34).
7. Pull the fuel line off of the fuel lter (Figure 34) and
allow petrol to drain into a fuel container or a drain
pan.
Note: Now is the best time to install a new fuel
lter because the fuel tank is empty.
8. Install the fuel line onto the fuel lter.
9. Slide the hose clamp close to the fuel lter to secure
both the fuel line and the fuel lter.
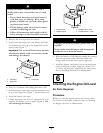
Replacing the Fuel Filter
Service Interval: Every 100 hours—Replace the fuel
lter.
The best time to replace the fuel lter (Figure 34) is
when the fuel tank is empty. Never install a dirty fuel
lter after it has been removed from the fuel line.
1. Disengage the blade control (PTO) and set the
parking brake.
2. Stop the engine, wait for all moving parts to stop, and
remove the key before leaving the operating position.
3. Open the hood.
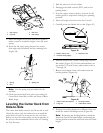
4. Squeeze the ends of the hose clamps together and
slide them away from the fuel lter (Figure 34).
5. Remove the fuel lter from the fuel lines.
6. Install a new fuel lter and move the hose clamps
close to the fuel lter.
7. Close the hood.
Electrical System
Maintenance
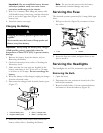
Servicing the Battery
Always keep the battery clean and fully charged. Use
a paper towel to clean the battery and battery box. If
the battery terminals are corroded, clean them with a
solution of 4 parts water and 1 part baking soda. Apply
a light coating of grease to the battery terminals to
prevent corrosion.
Battery voltage and amperage: 12 volts, 155
cold-cranking amps
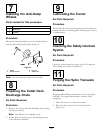
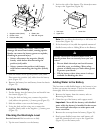
Removing the Battery
Battery terminals or metal tools could short
against metal tractor components, causing
sparks. Sparks can cause the battery gasses to
explode, resulting in personal injury.
• When removing or installing the battery, do
not allow the battery terminals to touch any
metal parts of the tractor.
• Do not allow metal tools to short between
the battery terminals and metal parts of the
tractor.
1. Disengage the blade control (PTO) and set the
parking brake.
2. Stop the engine, remove the key, and wait for all
moving parts to stop before leaving the operating
position.
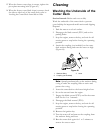
3. Tip the seat forward to see the battery.
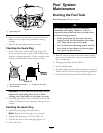
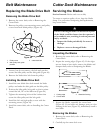
4. Disconnect the negative (black) ground cable from
the battery post (Figure 35).
29