User Manual English
- 5 -
When using the Keyboard Hotkey option all 3 keys should be pressed and held together. And
it is upon the release of all three keys, that the switching action will be executed.
Each keystroke within a hotkey sequence should be pressed within 2 seconds. Otherwise, the
hotkey sequence will not be validated.
Neither the universal hotkey, ScrLk + ScrLk, or the user hotkey, Ctrl - Alt - [command key],
will allow you to switch to an empty port that is not connected with any computer. To force
your KVM to switch to an empty port, just press the front-panel button to switch.
After switching ports, you have to wait until the KVM Switcher icon shows the target port
before you can perform next switching action.
All the hotkeys (universal/user) are only functional after your computers have booted into the
OS. If you want to switch PC in the BIOS/pre-boot stage, press the front-panel button to
switch.
KVM Switcher Software
The KVM Switcher Software allows you more advanced functions as described in this section:
Configuration
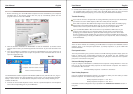
Right-click the KVM Switcher icon and select Settings or double-click the icon to bring up the
configuration dialog box.
User Hotkey
You can now specify the command key as you like by typing it in. For example, you can specify
the hotkey for switching to PC 1 as CTRL - ALT – “A” by typing an A (not case-sensitive) in the
editable field.
You can use any standard key on the keyboard as a hot key, with the exception of: Alt, Ctrl,
Shift, CAPS, Tab, Esc, Functions and Edit keys. All other keys on the keyboard, including those
number keys on the number padmay be used.
If you intend to modify the command key, you have to modify them on each and every of the
connected computers, since the hotkey setting is stored within each connected computer.
Fixing the Audio Port
Check this option and then select the computer to fix the audio/mic channel to. Once this option
is checked, the audio/mic channel will be fixed and become non-switchable, until the box is
unselected.
User Manual English
- 6 -
Auto Scan Period
Select the Auto-Scan period from 10 ~ 60 seconds with an increment of 5 seconds. The Auto-
Scan period is the time your KVM Switch will wait before switching to next computer. Once you
have selected an Auto-Scan period you can then activate/deactivate this feature from the
Operation Menu (see below).
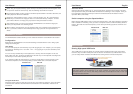
Switch computer using the Operation Menu
Right-click the KVM Switcher icon to evoke the operation menu, then select whichever computer
that is available for switching. Once you select a computer channel, it will immediately switch to
that PC. Note that the unconnected port(s) or the active port will be greyed-out and hence non-
selectable.
Other Features
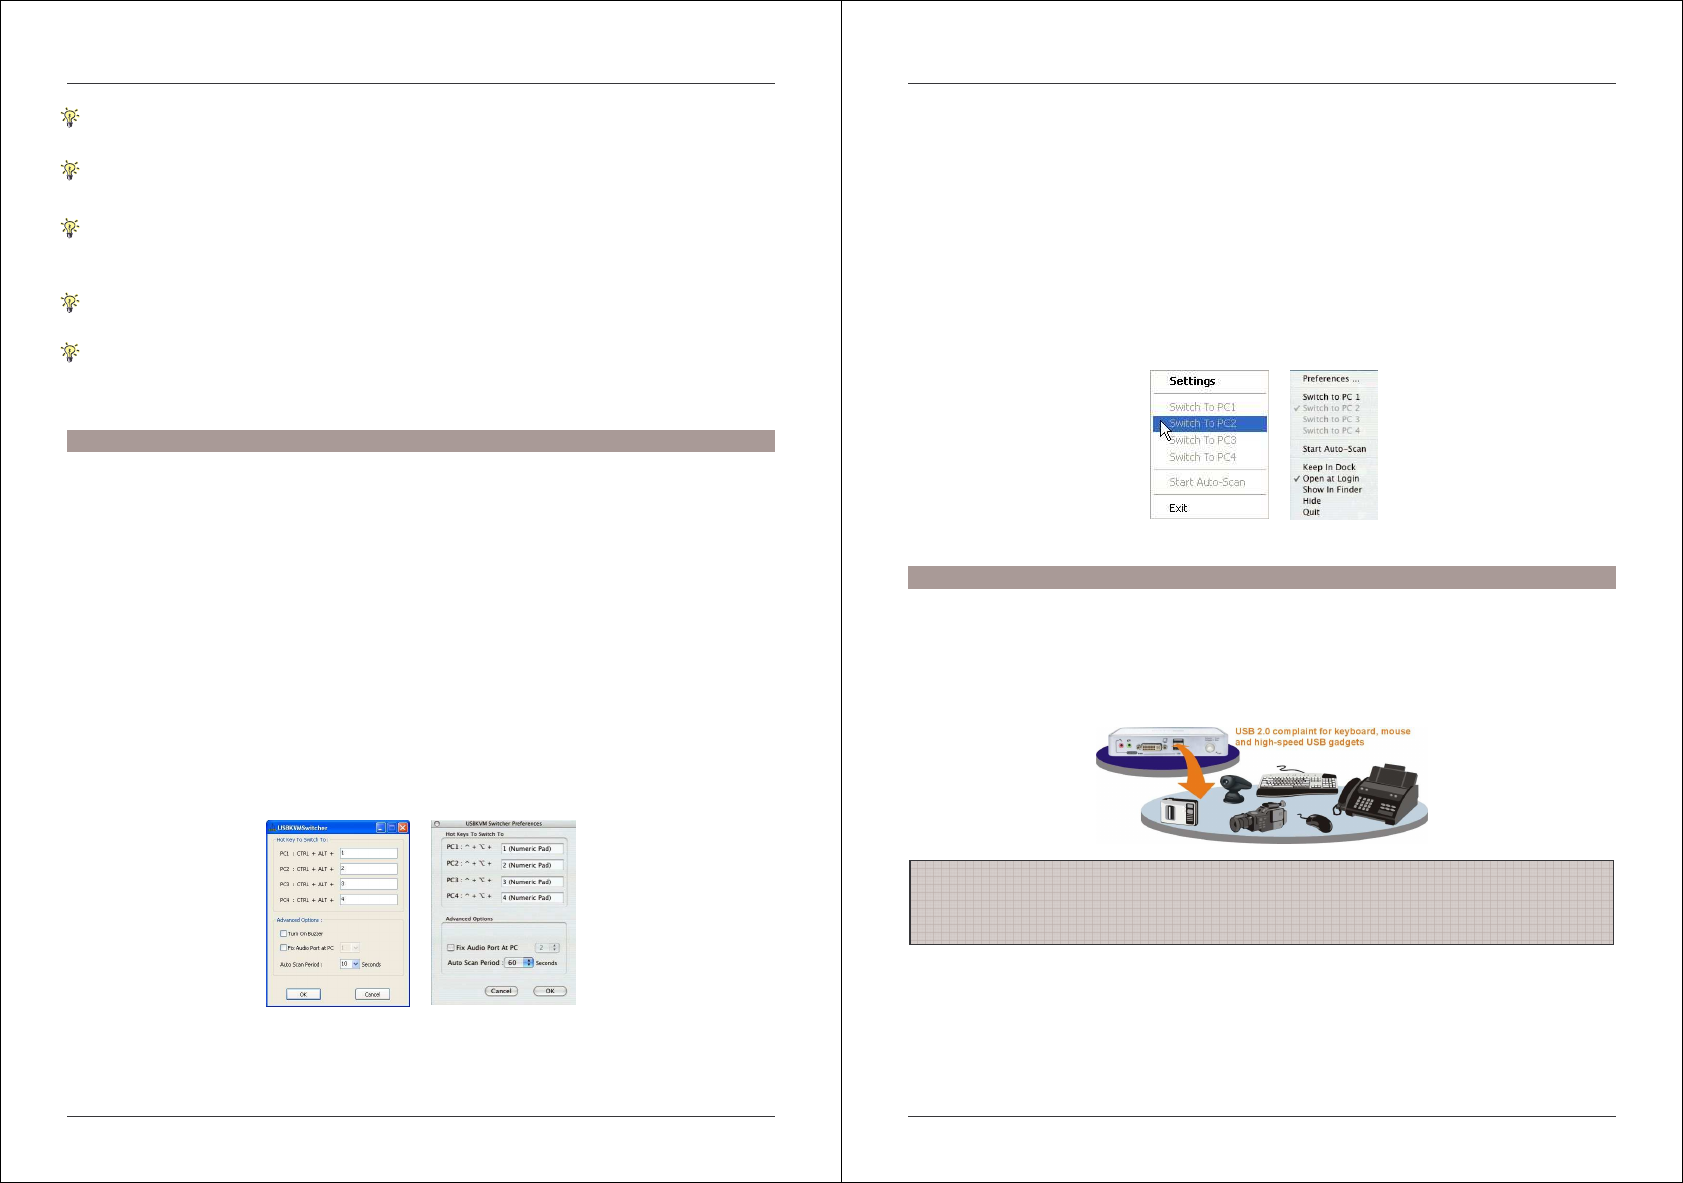
Sharing High-speed USB Device
The 2 USB ports on the front-panel are normally used for keyboard and mouse connections.
However, they are USB 2.0 hub ports and can also be connected to any USB devices so that
you can easily switch and share the USB devices among the two connected computers.
Please Note: If you share USB Storage devices please be aware