13
English
3139 115 22851
Step 4: Connecting TV
IMPORTANT!
– You only need to make one
video connection from the following
options, depending on the
capabilities of your TV system.
– Connect the DVD system
directly to the TV.
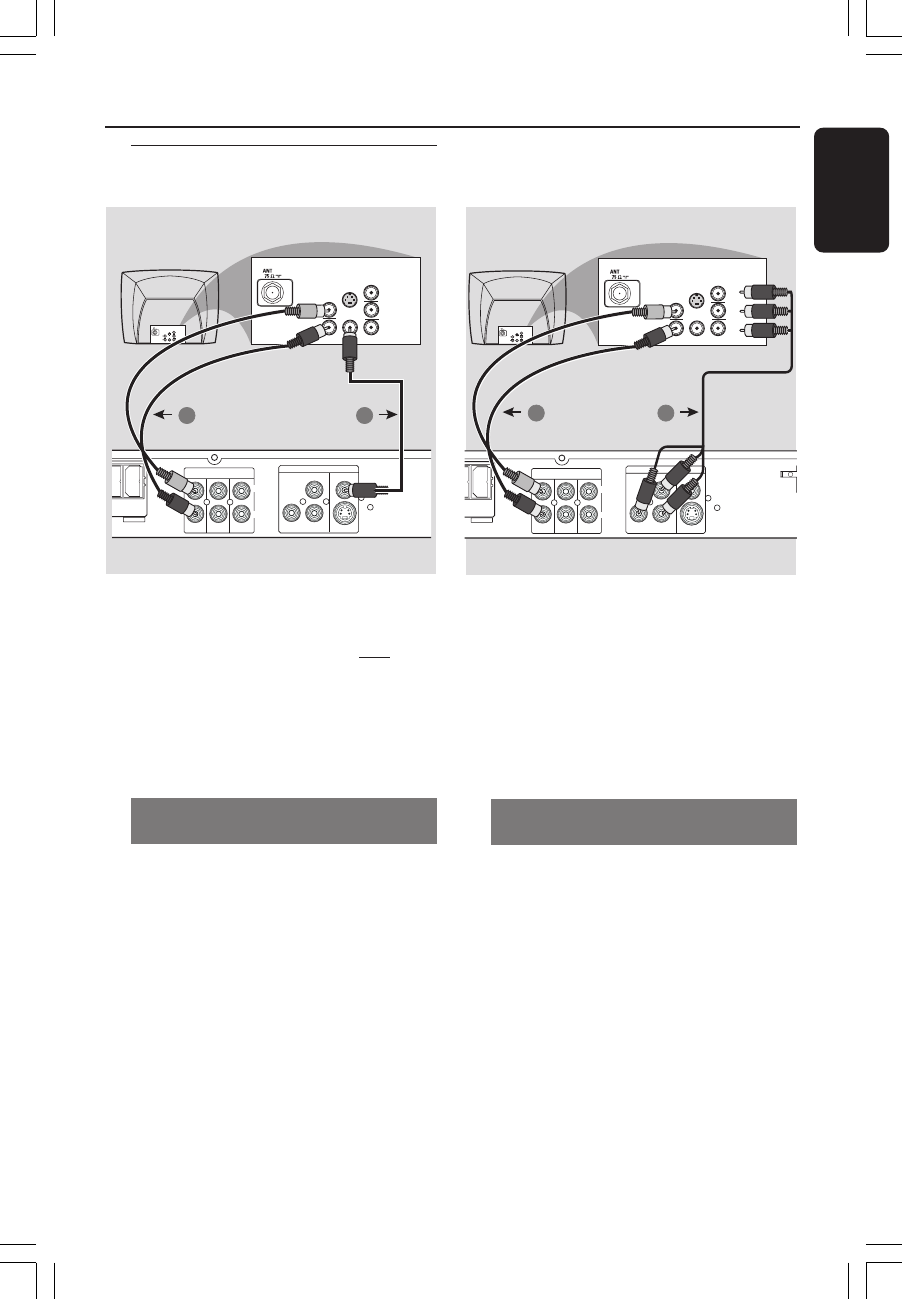
Using Composite Video jack
(CVBS)
1 Use the composite video cable (yellow)
to connect the DVD system’s CVBS jack
to the video input jack (or labeled as A/V
In, Video In, Composite or Baseband) on
the TV.
2 To hear the TV channels through this
DVD system, use the audio cables (white/
red) to connect TV IN (L/R) jacks to the
corresponding AUDIO OUT jacks on the
TV.
EAR
EFT
SUB-
W
TV IN
LINE-OUT
AUDIO
S-VIDEO
AUX-IN
L
R
VIDEO OUT
Y
PbPr
CVBS
AUDIO
OUT
Pr/Cr
Pb/Cb
Y
S-VIDEO
IN
VIDEO IN
COMPONENT
VIDEO IN
AUDIO
OUT
Pr/Cr
Pb/Cb
Y
S-VIDEO
IN
VIDEO IN
COMPONENT
VIDEO IN
Pb
2 1
Connections
IMPORTANT!
– Component Video connection
provides higher picture quality. This
option must be available on your TV.
– The progressive scan video
quality is only possible through
Component Video (Pr Pb Y) output.
Using Component Video jacks
(Pr Pb Y)
1 Use the component video cables (red/
blue/green) to connect the DVD system’s
Pr Pb Y jacks to the corresponding
Component video input jacks (or labeled
as Pr/Cr Pb/Cb Y or YUV) on the TV.
2 To hear the TV channels through this
DVD system, use the audio cables (white/
red) to connect TV IN (L/R) jacks to the
corresponding AUDIO OUT jacks on the
TV.
3 If you are using a Progressive Scan TV (TV
must indicate Progressive Scan or
ProScan capability) set the Progressive
setup to ‘ON.’ Otherwise, set it to ‘OFF’
(see page 34.).
R
T
SUB-
W
F
TV IN
LINE-OUT
AUDIO
S-VIDEO
AUX-IN
L
R
VIDEO OUT
Y
PbPr
CVBS
AUDIO
OUT
Pr/Cr
Pb/Cb
Y
S-VIDEO
IN
VIDEO IN
COMPONENT
VIDEO IN
AUDIO
OUT
Pr/Cr
Pb/Cb
Y
S-VIDEO
IN
VIDEO IN
COMPONENT
VIDEO IN
2 1
001-046_LX36_17_Eng 29/08/2003, 2:44 PM13


