10
Part Names and Functions
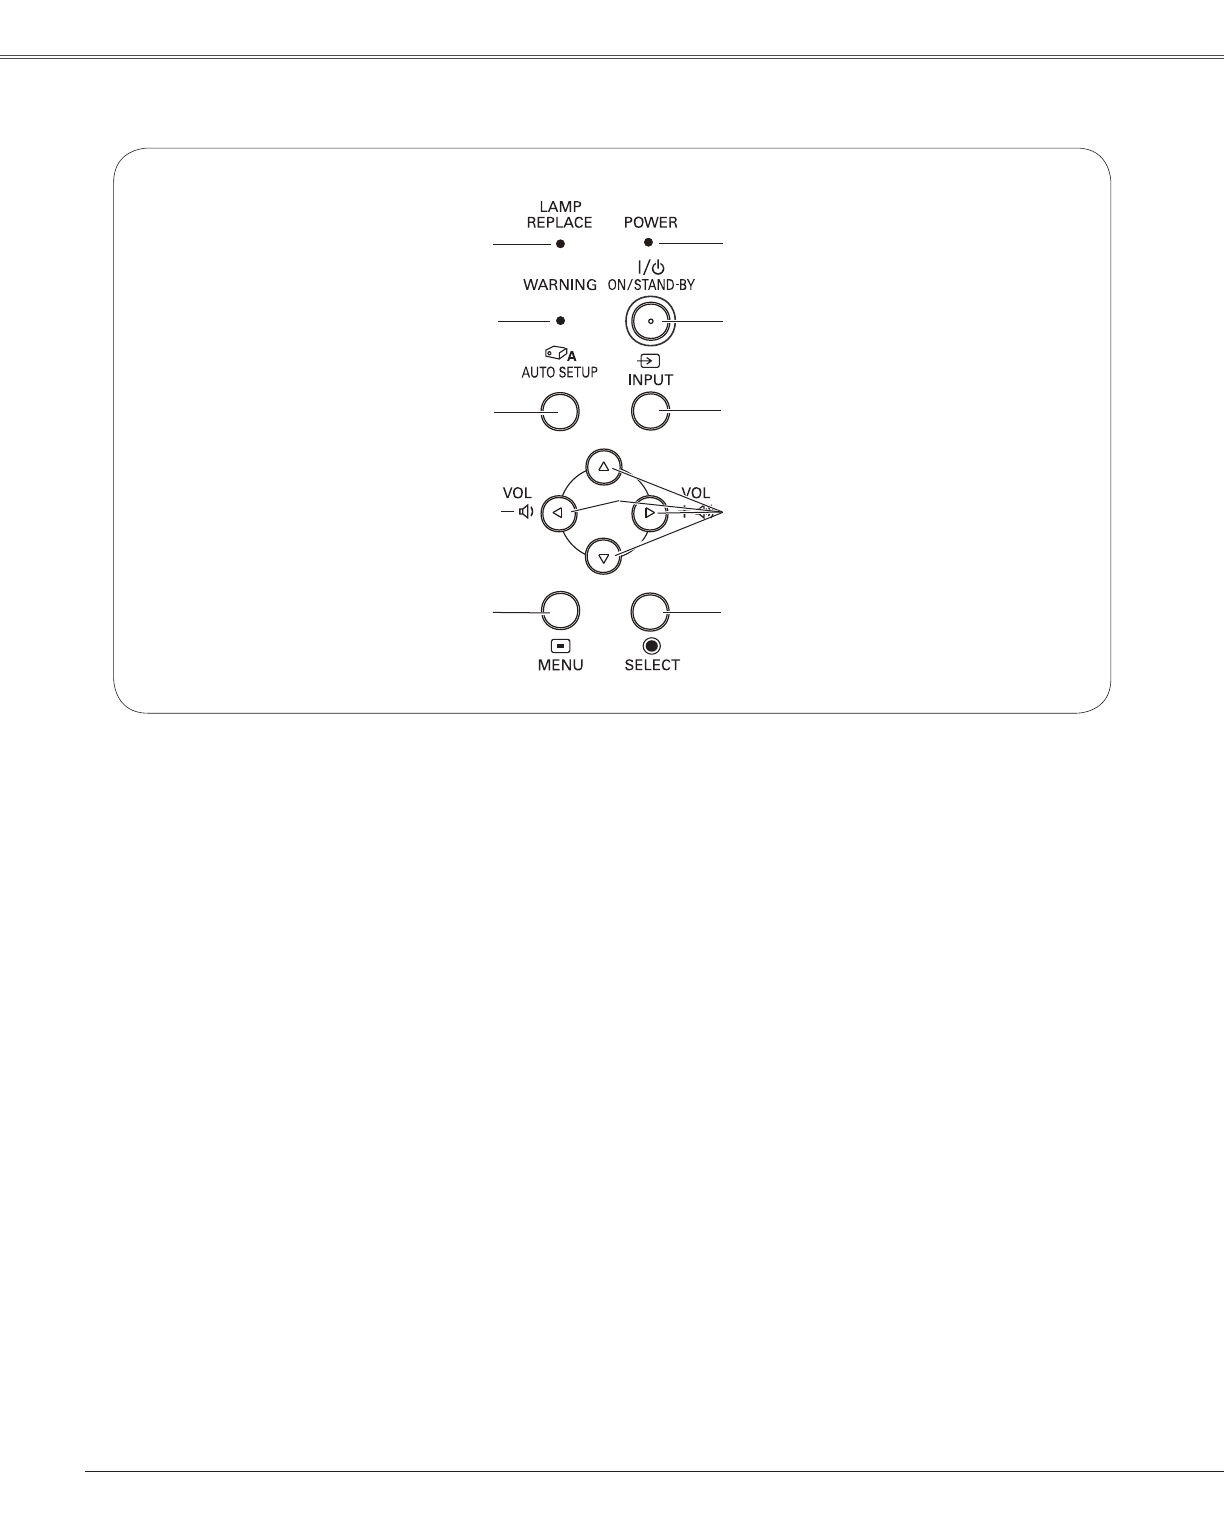
Top Control
⑨ LAMP REPLACE indicator
Lights yellow when the projection lamp reaches its
end of life (pp.62, 70).
⑧ WARNING indicator
– Lights red when the projector detects an abnormal
condition.
– Blinks red when the internal temperature of the
projector exceeds the operating range (pp.59, 70).
④ ON/STAND–BY button
Turn the projector on or off (pp.18-20).
⑤ POWER indicator
– Lights red when the projector is in stand-by mode.
– Lights green during operations.
– Blinks green in the Power management mode
(p.51).
③ INPUT button
Select an input source (pp.27-28, 37-38).
⑥ MENU button
Open or close the On-Screen Menu (p.21).
② POINT
ed 7 8
(VOLUME +/–) buttons
– Select an item or adjust the value in the On-Screen
Menu (p.21).
– Pan the image in the Digital zoom +/- mode (p.36).
– Adjust the volume level (Point
7 8
buttons) (p.24).
⑦ AUTO SETUP button
Correct vertical keystone distortion and adjust
computer display parameters such as
Fine sync.,
Total dots, and Picture position (pp.23, 45).
① SELECT button
– Execute the selected item (p.21).
– Expand or compress the image in the Digital zoom
mode (p.36).
①
②
③
④
⑤
⑥
⑦
⑧
⑨


