12 © Titan Tool Inc. All rights reserved.
Replacing the Motor Brushes (electric motor)
Perform this procedure using Motor Brush Kit P/N 978-050. The
kit consists of two brushes, two springs, and two clips.
NOTE: Brushes should be replaced when they are worn
to less than 1/2 inch. Check and replace both
brushes at the same time.
1. Remove both inspection covers on the motor.
Inspection
Cover
2. Push in the spring clip to unhook it, then pull it out.
Terminal Screw
Spring Clip
Brush Lead
3. Loosen the terminal screw. Pull the brush lead away, but
leave the motor lead in place. Remove the brush and
spring.
Commutator
4. Inspect the commutator
for burning, excessive
pitting or gouging. A
black color on the
commutator is normal.
5. Install the new brush
so its lead slides in the
long slot of the brush
holder. Push the terminal
under the terminal screw
washer. Ensure the motor
lead is still connected at
the screw. Tighten the screw.
Brush
Brush
Holder
Terminal
Screw
Spring
Spring Clip
6. Place the spring on the
brush as shown above.
Push in and hook the spring
clip. Repeat this procedure
for the other side.
7. Reinstall both inspection
covers.
If electric motor overloads and stops running,
IMMEDIATELY turn the motor off and follow the
Pressure Relief Procedure in the Cleanup section
of this manual. Wait until the motor cools
(approximately 30 minutes). Then push in the
bubble top, manual reset button, turn the motor on
and pressurize the system.
For CSA approved sprayers only: The ON/OFF switch is
also the RESET!
Maintaining the Filter Assembly (optional
accessory)
Clean the lter regularly. Dirty or clogged lters can greatly
reduce ltering ability and cause a number of system problems
including poor spray patterns, clogged spray tips, etc.
Cleaning
To clean the lter, perform the following procedure.
1. Follow the “Pressure Relief Procedure” found in the
Operation section of this manual.
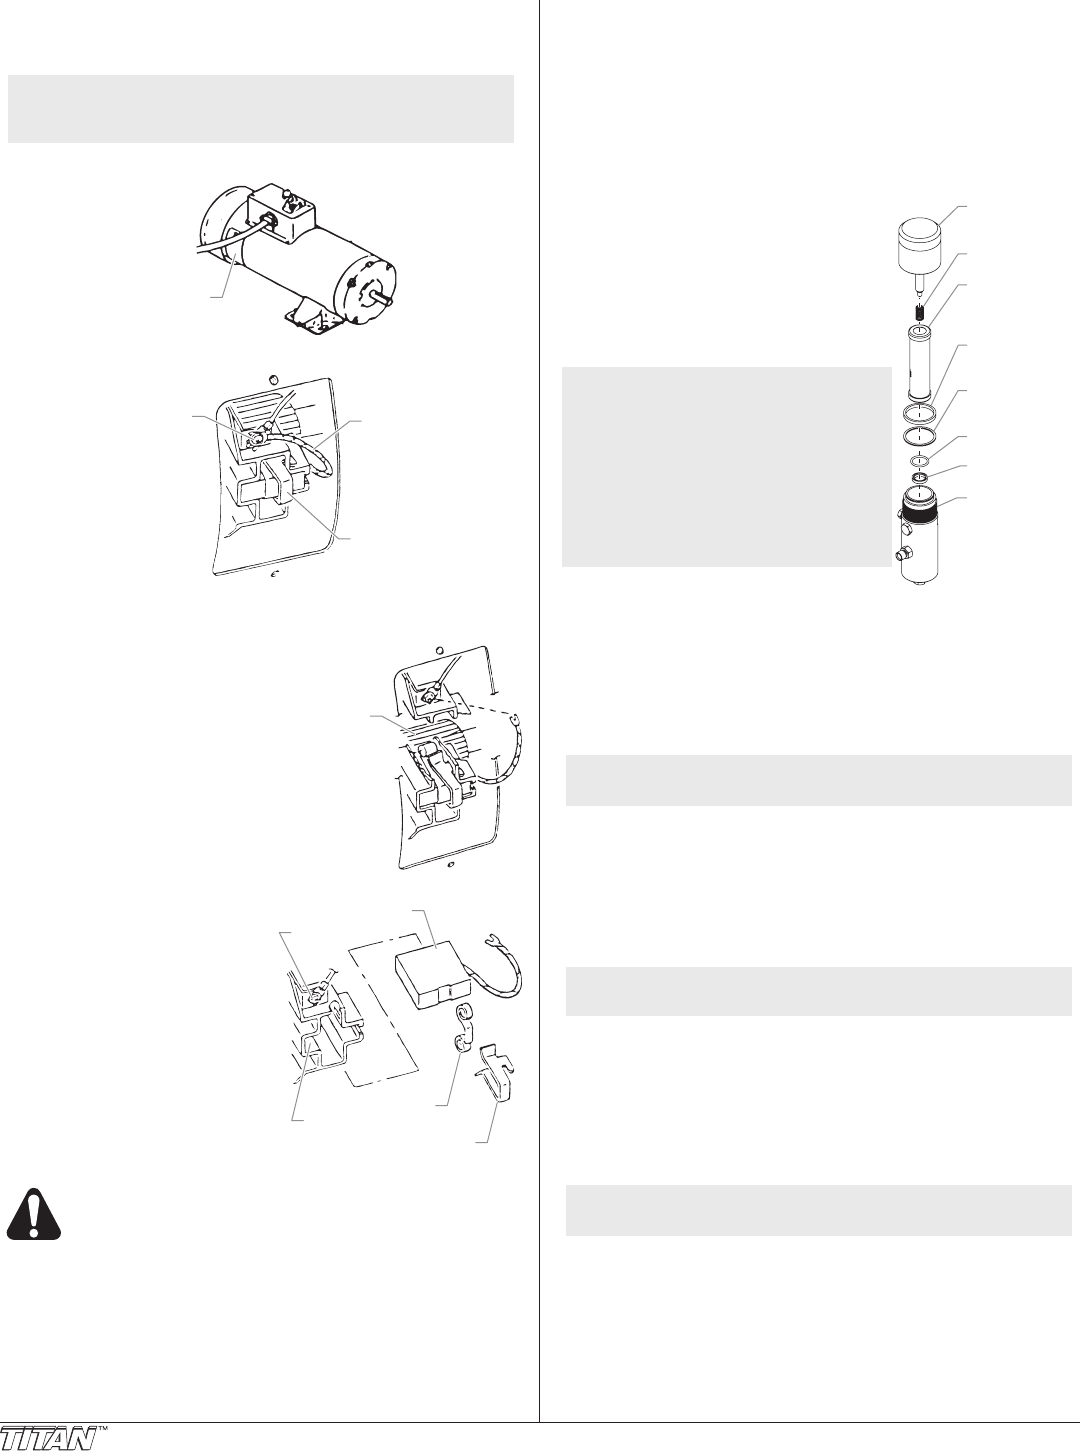
Filter Cap
Assembly
Filter
Element
w/Ball
PTFE Gasket
(thick)
PTFE Gasket
(thin)
PTFE O-ring
Carbide Seat
Filter Body
Spring
2. Remove the lter cap assembly
and spring.
3. Pull the lter element with ball
straight out of the lter body.
4. Clean inside the lter body, lter
element with ball, and lter cap
assembly using the appropriate
solvent.
NOTE: Use care in handling parts
as dirt, debris, scratches, or
nicks may prevent o-rings or
gaskets from sealing.
This lter element lters
from the inside out. Be sure
to clean the lter element
thoroughly on the inside.
Soak in solvent to loosen
hardened paint or replace.
Inspection
Inspect all parts of the lter assembly before reassembly.
1. Inspect the ball inside the lter element. If the ball has
pressure cuts or scratches, replace the lter element.
a. If the ball is cut, remove the PTFE o-ring using an o-ring
pick and remove the carbide seat.
b. Check the seat for nicks or grooves. If the seat is
damaged, replace.
NOTE: Removal of the PTFE o-ring will damage the
o-ring and require replacement.
2. Remove the spring from the spring guide on the lter cap.
a. Measure the length of the spring uncompressed. If it
measures less the 3/4” from end to end, replace.
b. Push the spring back onto the spring guide until it
“snaps” back into position.
3. Inspect the two PTFE gaskets and the PTFE o-ring for
deformity, nicks, or cuts. Replace, if needed.
NOTE: The PTFE gaskets, PTFE o-ring, and spring are
packaged in Filter Service Kit P/N 930-050.
Reassembly
After cleaning and inspecting all parts, reassemble the lter.
1. Place the carbide seat into the lter body. Make sure the
beveled side of the seat is facing up.
2. Place the PTFE o-ring into the groove on the outer
diameter of the carbide seat.
3. Place the lter element with ball into the lter body.
NOTE: The top and bottom of the lter element with ball
are identical.
4. Push the spring back onto the spring guide of the lter cap
until it “snaps” back into position, if not already done.
5. Place the thin PTFE gasket onto the step at the top of the
lter body.
6. Place the thick PTFE gasket onto the top of the thin
gasket.
7. Tighten the lter cap assembly onto the lter body.


