12 © Titan Tool Inc. All rights reserved.
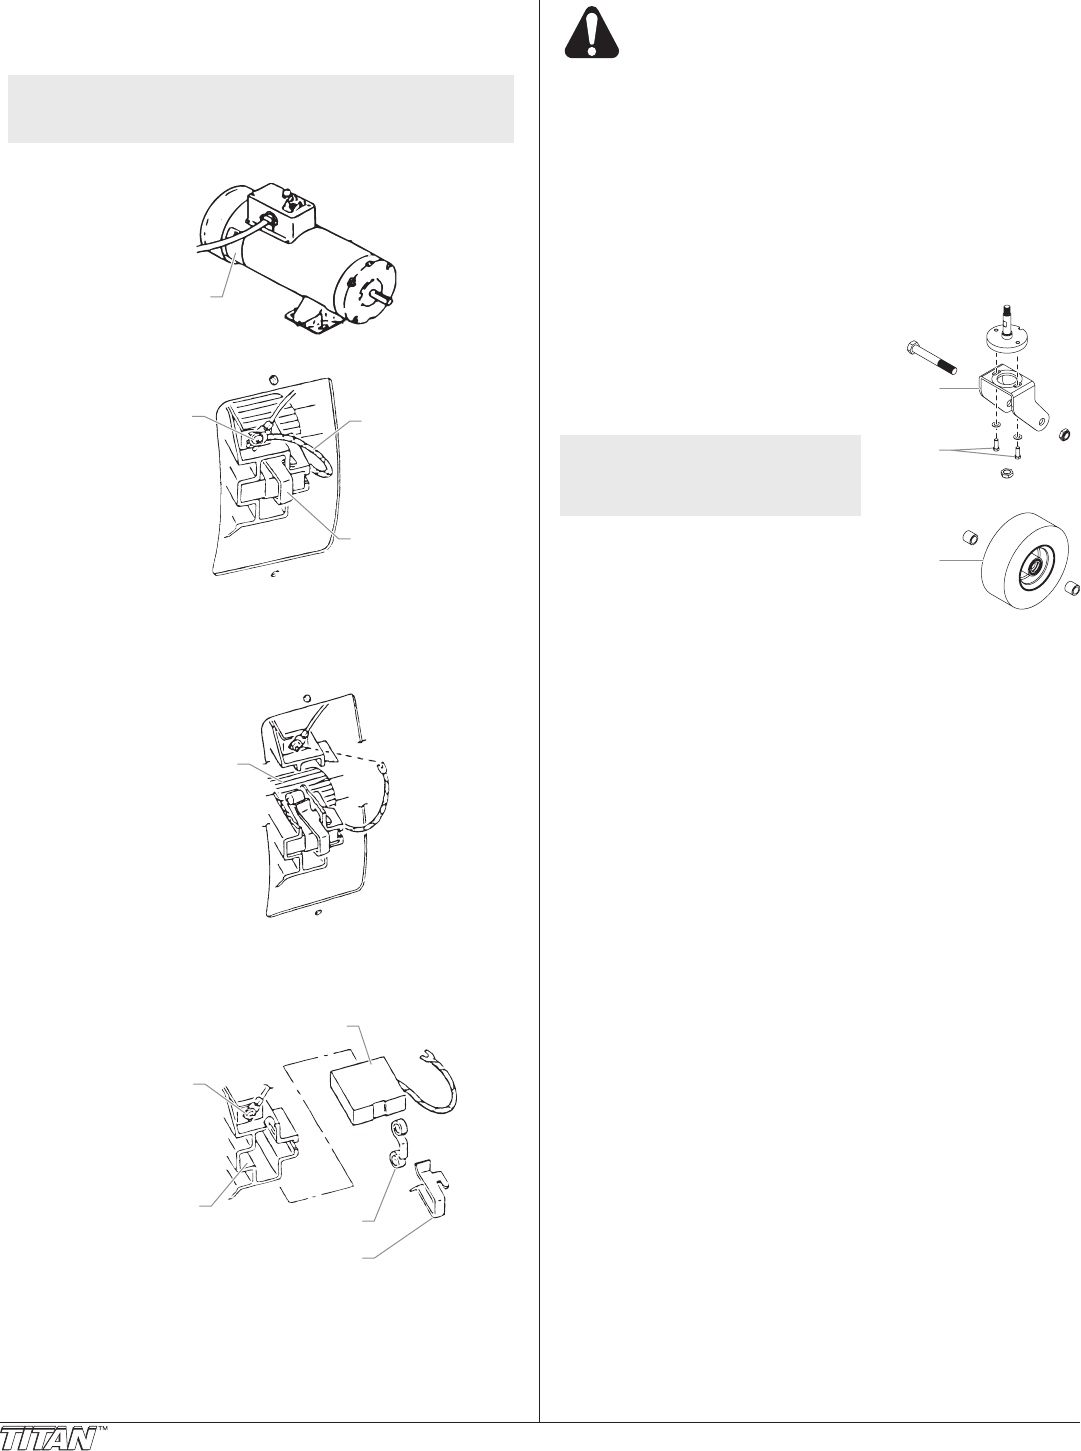
Replacing the Motor Brushes (electric motor)
Perform this procedure using Motor Brush Kit P/N 978-050. The
kit consists of two brushes, two springs, and two clips.
NOTE: Brushes should be replaced when they are worn
to less than 1/2 inch. Check and replace both
brushes at the same time.
1. Remove both inspection covers on the motor.
2. Push in the spring clip to unhook it, then pull it out..
Terminal Screw
Spring Clip
Brush Lead
3. Loosen the terminal screw. Pull the brush lead away, but
leave the motor lead in place. Remove the brush and
spring.
4. Inspect the commutator for burning, excessive pitting or
gouging. A black color on the commutator is normal.
5. Install the new brush so its lead slides in the long slot of
the brush holder. Push the terminal under the terminal
screw washer. Ensure the motor lead is still connected at
the screw. Tighten the screw.
Brush
Brush Holder
Terminal Screw
Spring
Spring Clip
6. Place the spring on the brush as shown above. Push in
and hook the spring clip. Repeat this procedure for the
other side.
7. Reinstall both inspection covers.
If electric motor overloads and stops running,
IMMEDIATELY turn the motor off and follow the
Pressure Relief Procedure in the Cleanup section
of this manual. Wait until the motor cools
(approximately 30 minutes). Then push in the
bubble top, manual reset button, turn the motor on
and pressurize the system.
For CSA approved sprayers only: The ON/OFF switch is
also the RESET!
Adjusting the Tracking of the Front Caster
The front caster is set by the factory to track in a straight line.
Use the following procedure if adjustment the caster becomes
necessary.
Hex
Screws
Caster
Mounting
Bracket
Front
Caster
1. Loosen the two hex screws in
the top of the caster mounting
bracket.
2. Turn the caster mounting
bracket slightly in the desired
direction.
NOTE: The front caster
locking pin must be
engaged during tracking
adjustment.
3. Tighten the two hex screws.
4. Check the tracking of the front
caster. If the caster does not
track straight, repeat the above
procedure.


