


6
Remote Building Wireless Access with the AP8250 and
802.11g Upgrade Kit
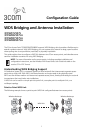
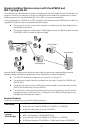
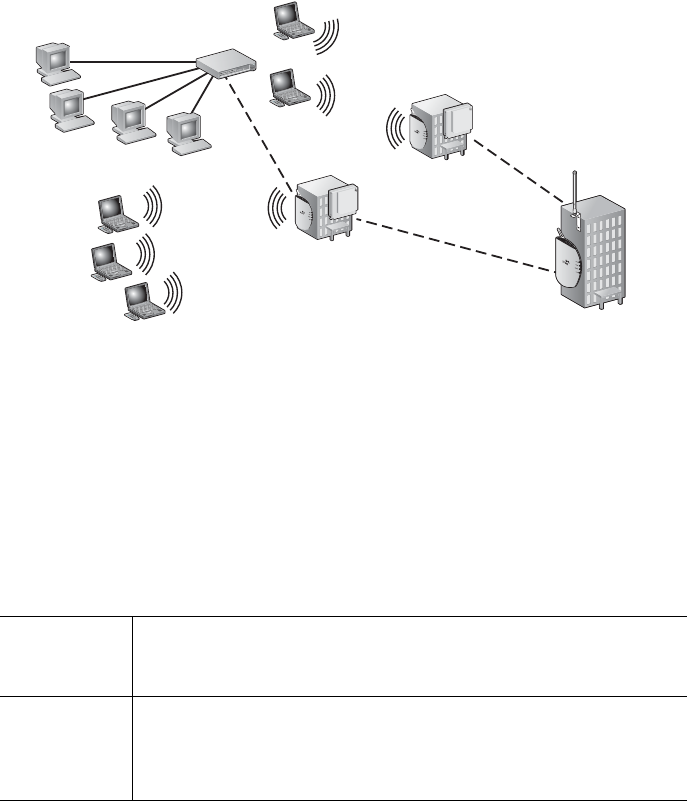
This installation scenario describes one layer of bridging with one Root-Bridge and one Child Bridge. This
scenario is common, for example, in schools or universities where students or professionals in remote
buildings need secure, high-bandwidth 802.11b or 802.11g access to the network.
In this configuration, an AP8250 or AP7250 is placed on the network and an AP8250 with the 802.11g
Upgrade Kit is placed at each of the desired remote locations.
The access point at the center of the network is configured as the Root Bridge with an
omnidirectional antenna.
The remote bridges are configured as Child Bridges and use an 8 dBi directional antenna
(3CWE495), which is aimed at the Root-Bridge.
.
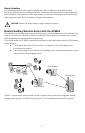
Because the WDS radio and the local access point radio are operating in approximately the same
frequency range, the following guidelines must be followed for successful installation:
The WDS link should be configured on Channel 2 or Channel 10.
The access point radio should be configured on the other Channel (for AP8250 and
AP8750 only).
The directional antenna for the WDS link must be located at least three feet from the
AP8250 and aimed away from the AP8250.
The radio that is using the external antenna must be configured to transmit from the
appropriate antenna connector (this is configured on the Radio
Settings page in the
Configuration Management System).
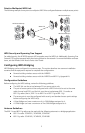
Required Products
To use this configuration, you need the following products:
Root Bridge
AP8250 or AP7250 (3CRWE825075A or 3CRWE725075A)
Ultra Low Loss Cable (3CWE580 or 3CWE581 or 3CWE582)
8 dBi Omnidirectional Antenna (3CWE491)
Each Remote
Location
(Child
Bridge)
AP8250 (3CRWE825075A)
802.11g Upgrade Kit (3CRWEGMOD75A)
Ultra Low Loss Cable (3CWE580 or 3CWE581 or 3CWE582)
8 dBi Panel Antenna (3CWE498) or 13 dBi Panel Antenna (3CWE495)
Child Bridge 1
Child Bridge 2
Root Bridge
T
M
T
M
T
M
T
M
T
M