


8
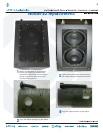
Amplifi er assembly replacement continued:
5
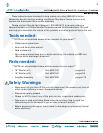
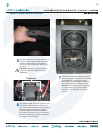
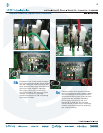
It may be easier to remove the amplifi er
assembly by gripping a ridge on each
side of the assembly using a pair of pliers.
Do not completely remove the amplifi er
assembly yet, as some cables need to
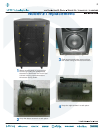
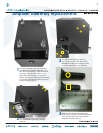
be removed fi rst. Five cables need to be
removed from the amplifi er assembly:
(1) led PCB cable, (2) solid blue, (3) solid
black, (4) red and black, and
(5) solid red. Do not force cable removal
or connection, although needle-nose
pliers may aid in loosening the crimped
cables. Notice their placement in the
following pictures, as well.
Caution: The amplifi er assembly is
approximately 22 pounds, so please
make sure to grasp it fi rmly.
Side
view
Bottom
view
4
5
1
2
3
45
1
2
3
5a
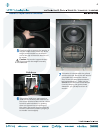
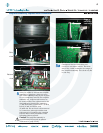
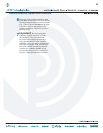
Closeups of the led PCB cable and
connector are shown above. The white
wire of the cable is closest to the edge of
the amplifi er assembly. The cable only fi ts
in one way.
1
Edge of
amplifi er
assembly
1
Edge of
amplifi er
assembly