


2-3ASUSPA249SeriesLCDMonitor
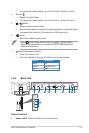
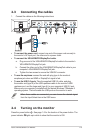
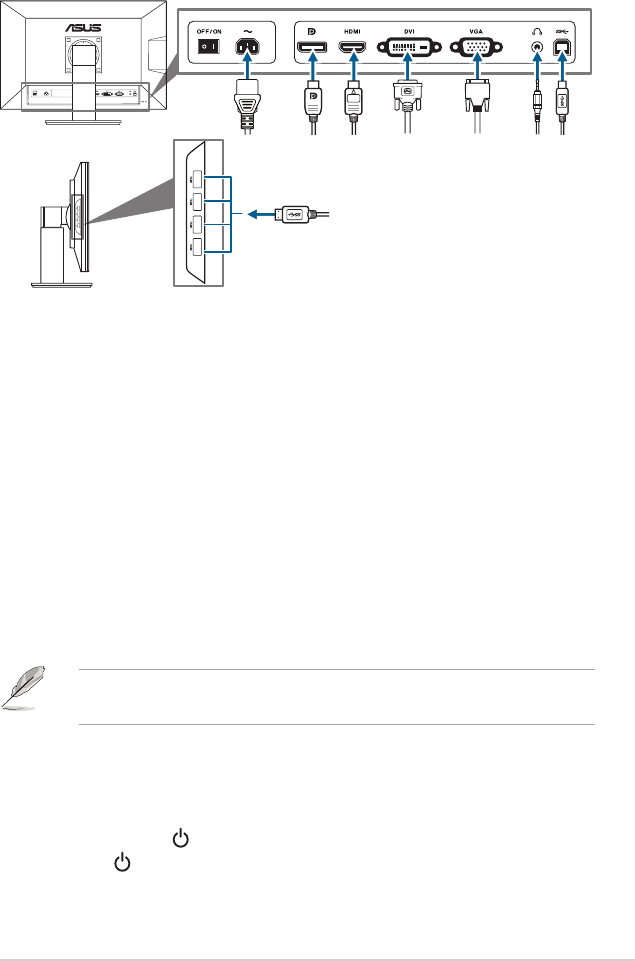
2.3 Connecting the cables
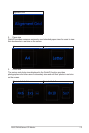
1. Connectthecablesasthefollowinginstructions:
:connectoneendofthepowercordsecurelyto
themonitor’sACinputport,theotherendtoapoweroutlet.
:
a. PlugoneendoftheVGA/HDMI/DVI/DisplayPortcabletothemonitor’s
VGA/HDMI/DVI/DisplayPortjack.
b. ConnecttheotherendoftheVGA/HDMI/DVI/DisplayPortcabletoyour
computer'sVGA/HDMI/DVI/DisplayPortjack.
c. TightenthetwoscrewstosecuretheVGA/DVIconnector.
connecttheendwithplugtypetothemonitor’s
earphonejackwhenanHDMIorDisplayPortsignalisfed.
:TakethesuppliedUSB3.0cable,andplug
thesmallerend(typeB)oftheUSBupstreamcabletothemonitor’sUSB
upstreamport,andthelargerend(typeA)toyourcomputer’sUSB3.0port.
MakesureyourcomputerisinstalledwiththelastestWindows7/Windows8
operatingsystem.ThatwillenabletheUSBportsonthemonitortowork.
Whenthesecablesareconnected,youcanchoosethedesiredsignal
fromtheInputSelectitemintheOSDmenu.
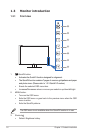
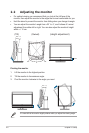
2.4 Turning on the monitor
Pressthepowerbutton .Seepage1-2forthelocationofthepowerbutton.The
powerindicator lightsupinwhitetoshowthatthemonitorisON.