


CD3720XM
3
Jensen Connector
1
2
4
1
2
3
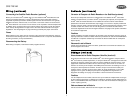
Gray/Black (-)
Gris / Negro (-)
Gris / Noir (-)
Gray / Gris / Gris (+)
8
White/Black (-)
Blanco/Negro (-)
Blanc/Noir (-)
White / Blanco / Blanc (+)
Violet / Violeta / Violet (+)
3
4
6
5
+
7
9
10
Green / Verde / Vert (+)
Green/Black (-)
Verde/Negro (-)
Vert/Noir (-)
Violet/Black (-)
Violeta/Negro (-)
Violet/Noir (-)
10A
1
2
Gray
Gris / Gris
Rear
Posterior
Arrière
11
12
13
*
**
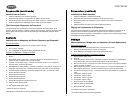
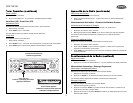
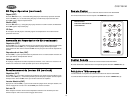
Preparation (continued)
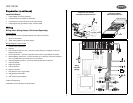
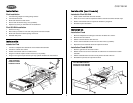
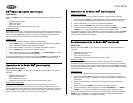
Install Half-Sleeve
1. Install adapter if necessary (optional).
2. Install half-sleeve into adapter or dashboard.
3. Push tabs out to secure half-sleeve in the radio opening.
4. Install support strap (provided) to make unit more stable.
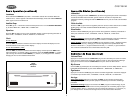
Wiring
Wiring with a Wiring Adapter (Purchased Separately)
Connect Wires
You can make all of these connections without even being in the vehicle.
1. Splice or crimp wires.
2. Attach wiring adapter to car wiring harness.
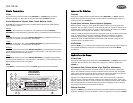
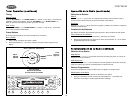
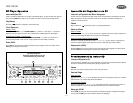
Wiring Diagram / Color Codes
1. Auxiliary input (yellow RCA)
2. Antenna
3. Power Antenna (dark blue wire) – Connect to power antenna or amplifier. (If not used,
tape bare end of wire.)
4. Ground (black wire) – Connect to ground terminal or clean, unpainted part of chassis.
5. Memory/Battery (yellow wire) – Connect to battery or 12 volt power source that is always
alive. The radio will not work if this wire is not connected.
6. Accessory/Ignition (red wire) – Connect to existing radio wire or radio fuse.
7. Left front speaker
8. Right front speaker
9. Left rear speaker
10. Right rear speaker
11. Rear RCA pre-amp out (gray RCA)
12. XM
®
Direct Connect Cable
13. XM
®
Audio Input (black RCA)
*Cables sold separately.
**XM
®
Direct Tuner and antenna sold separately.
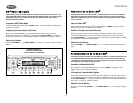
Install Half-Sleeve
Instalación de la Camisa
Installation du Demi-manchon
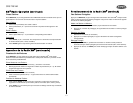
Connect Wires
Conecte los Cables
Raccordement des Fils
Wiring
Cableado
Câblage