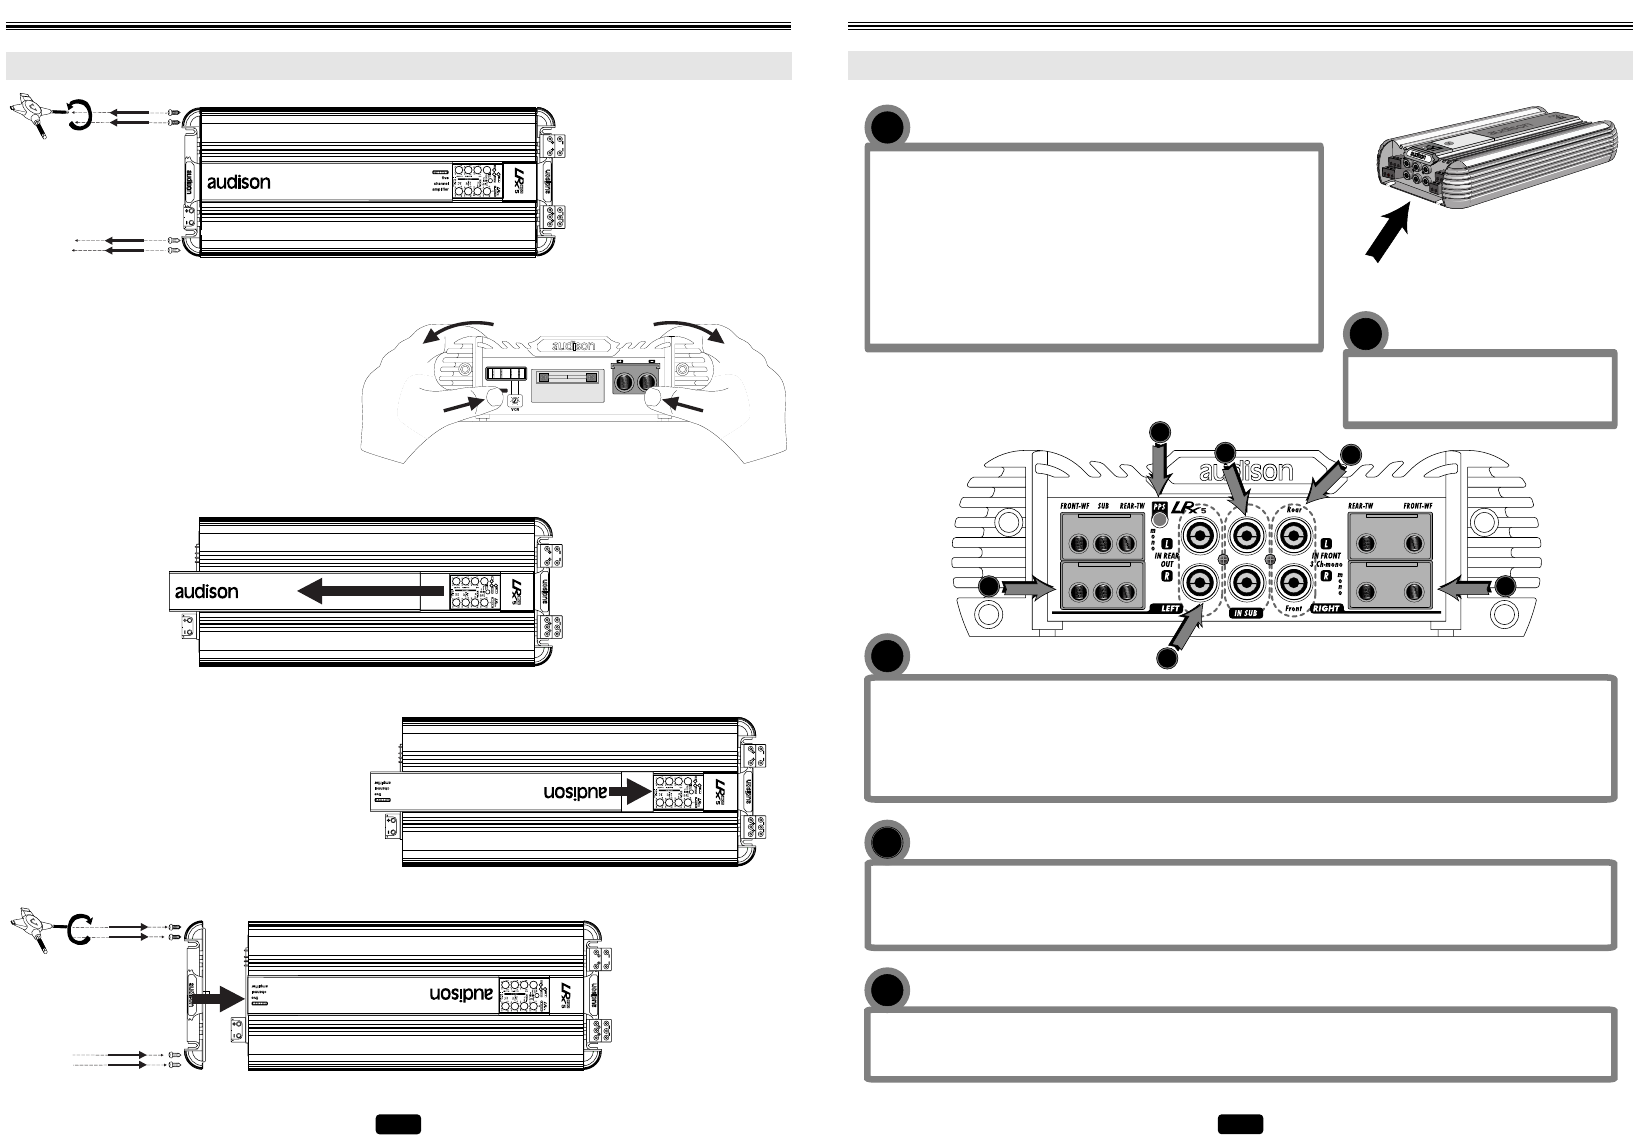
1
FRONT-WF/REAR-TW/SUB
Power outputs of the amplifier Front, Rear and Sub channels. Connect
the speakers cables to these outputs according to polarity. Terminal
blocks accept cables up to 9 A.W.G. max (see “audison cable products
for electric connections” as far as their size is concerned). We
recommend the use of audison cable products.
Please use FRONT-WF channels +L and –R terminal blocks called mono
for the right channel (R) and REAR-TW channels +L and –R terminal
blocks for the left channel (L) in order to connect the amplifier in mono
(3 Ch.) and to exploit the maximum power insured by this configuration.
PPS (Phantom Power Supply)
Power supply socket for audison external
audio accessories.
2
IN REAR/OUT
Left (L) and right (R) channels inputs of the amplifier REAR system. Rear preamplified outputs of a source (head unit, CD
player, DAT, etc.) or of an external electronic crossover must be connected to them. These inputs can also be configured
as amplifier HI-PASS preamplified outputs (see “Configurations table”).
4
IN SUB
Left (L) and right (R) channels inputs. They accept the possible subwoofer preamplified output coming from the source.
Since subwoofer output is mono, the two inputs are to be mixed when used together.
5
IN FRONT / 3 Ch-mono
Left (L) and right (R) channels inputs of the amplifier Front system. Front preamplified outputs of a source (head unit, CD
player, DAT, etc.) or of an external electronic crossover must be connected to them. In three channel configuration (3 ch),
the right channel (R) drives Front outputs in mono, while the left channel (L) drives Rear ones in mono. The subwoofer
can be driven by these two inputs together; if the source has the necessary, special output, it can be driven through In Sub
input, to select through the proper switch.
3
4
1
2
5
3
1
5
IN-OUT PANEL
FUNCTIONS
20
INSTALLATION
LOGO ROTATION
1 - Remove the transparent
cover which protects
controls and then the 4
screws which block the
metal plate by using
multispanner.
FUSE
POWER
IN OUT
REMOTE
2 - Remove the plate without damaging the
silkscreen printed panel which will have to
stay on.We suggest that you seize both plate
grips with your hands and pull them by
blocking the silkscreen printed panel with
your fingers against the amplifier chassis at
the same time.This will permit to remove the
plate from the panel without damages.
3 - Remove the strip with
audison logo.
5 - Mount the plate
back by fixing it
through the screws;
then,re-assemble the
transparent cover
which protects
controls.
4 - Put the strip back again after turning it,so
that audison logo is upside down.


