


behringer.com
6 REFERENCE AMPLIFIER A500 User Manual
Control Elements2.
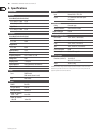
The front2.1
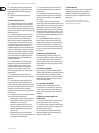
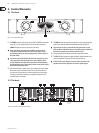
Fig. 2.1: Control elements in the front
52 43
1
The [1] POWER switch is used to power up the A500. The POWER switch should
always be in its “Off” position when you connect the unit to the mains.
POWER LED lights up as soon as you power up the A500.
Please note: Merely switching the unit off does not mean that it ◊
is fully disconnected from the mains. When not using the unit for
prolonged periods of time, please unplug the unit’s power cord from
the power outlet.
Your power amp should always be the last device you power up, since ◊
some equipment in the signal path creates strong impulses which
are then amplified in the amp and are passed onto the loudspeakers,
possibly damaging them. Consequently, always let your power amp be
the first device you power down.
Each channel features a volume control. Use it to adjust gain on your A500. [2]
Both volume controls should be turned all the way to the left whenever
you power the unit up or down. If an active signal is present on the input,
turning the volume down will protect your speakers and your ears from
unwanted “pops” or transients.
The [3] PROT LED lights up whenever the protective circuitry mutes the speaker
output. Please turn your A500 off immediately whenever this LED is lit.
The protective circuitry is activated if the amp gets too hot. Let your ◊
A500 cool down a little before you turn it on again. Besides, check if the
heat sink has enough space around it to perform its job.
The high-precision power indicator gives out current signal strength.[4]
The [5] CLIP LED lights up when the signal is distorted. Should distortion occur,
reduce the input level, so that the CLIP LED no longer lights up.
If the CLIP LED remains being lit, check the cable connection to the ◊
speakers because there might be a short on the speaker output.
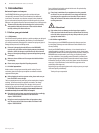
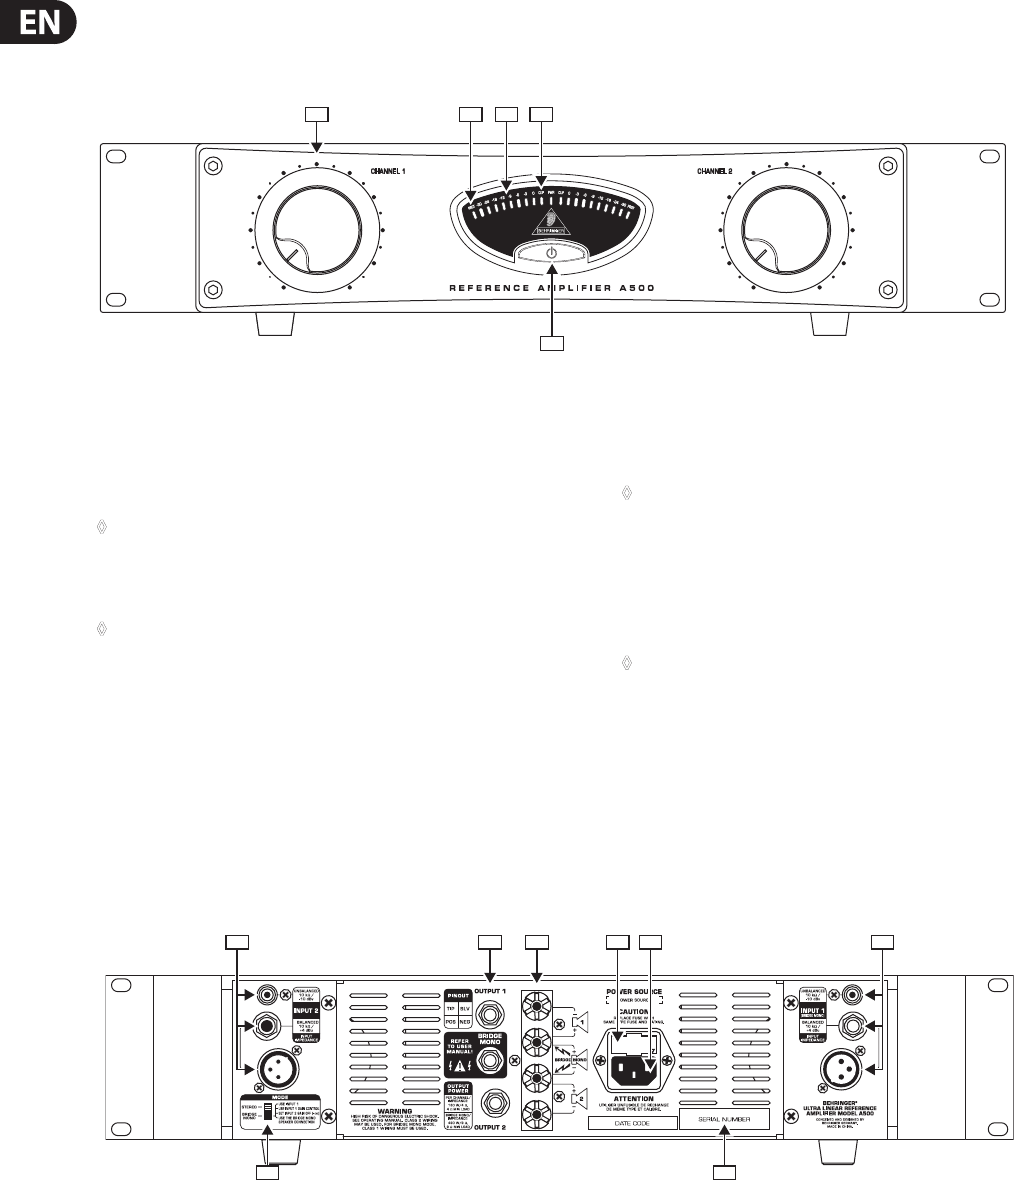
The back2.2
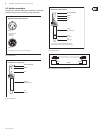
Fig. 2.2: Control elements and connections in the back
9
318
62111017