


E-5
Storing the station names
You can assign a name to each radio station and store it in
memory. As many as 30 station names can be stored, com-
posed with 8 characters each.
Storing the station names
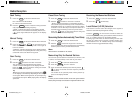
1. Tune in a station whose name you want to store.
2. Press the
DISP
for more than 2 seconds.
The “ NAME EDT ” will light then the “ _ _ _ _ _ _ _ _ ” on
the display window. The first “ _ ” flashes.
3. Enter the characters.
A. Rotate the dial in a clockwise direction to select the
desired characters.
(A➜B➜C➜...Z➜
<➜>➜∗➜+➜
′
➜−➜′➜/
➜0➜1➜2➜3...9➜“ ”Space )
B. Press the
TUN/TRK
to move the flashing cursor to
the next position. If you press
TUN/TRK
, the flash-
ing cursor moves to the left.
C. Repeat steps A and B to complete entering the
entire name 8 characters max.
Tip
To erase/correct a name, press the
DISP
for more than
2 seconds to clear the character and re-enter.
4. Press the
MUTE / SENS
to store the station name.
The station name flashes.
5. To return to the normal radio reception, Press
DISP
.
Erasing the station names
1. Tune in any station and press the
DISP
for more than 2
seconds.
2. Press the
MUTE / SENS
.
The station name or “ _ _ _ _ _ _ _ _ ” is now flashing.
3. Rotate the dial to select the name of the station that you
want to erase. To erase all the name of the station, dis-
play “ ✳ALL DEL ”.
4. Press the
DISP
for more than 2 seconds.
Repeat steps 3. and 4. if you want to erase other names.
5. To return to the normal radio reception, Press
DISP
.
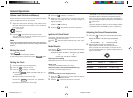
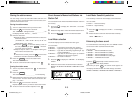
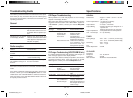
L-ch Level meter
R-ch Level meter
Direct Access to Memorized Stations via
Station Call
You can search for the memorized AM & FM station names in
the memory.
1. Press the
DISP
to display the “ STN CALL ” on the dis-
play window.
2. Rotate the large dial to select the desired station name.
3. Press the
MUTE / SENS
to tune in the desired station.
Level Meter selection
The meter displays can be selected from four types.
You can select :
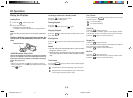
• METER 1 : Type that the level meter goes upward.
• METER 2 : Type that only the very top segment lights.
• METER 3 : Type that the remaining segments light. (op-
posite of METER 2)
• METER 4 : Type that the level meter goes up and down
dividing from the center segment.
• METER 0 : No meter is indicated.
1. Press the
DISP
to display the “ METER 1 ” on the display
window.
2. Rotate the dial to select the desired meter indication.
METER 1 ➜ METER 2 ➜ METER 3 ➜ METER 4 ➜ ME-
TER 0
Level Meter Sensitivity selection
The sensitivity of the level meter display can be switched.
You can select :
• LEVEL 1 : Normal sensitivity
• LEVEL 2 : High sensitivity
1. Press the
DISP
to display the “ LEVEL 1 ” on the display
window.
2. Rotate the dial to select the desired meter sensitivity.
LEVEL 1
ÔÔ
ÔÔ
Ô LEVEL 2
Enhancing the bass sound
For extended bass centered @ 72Hz, the XBASS function
can be set for either each band and CD mode.
You can select :
• XBASS 1 : Enhanced BASS level (low)
• XBASS 2 : Enhanced BASS level (Middle)
• XBASS 3 : Enhanced BASS level (High)
• XBASS 4 : Enhanced BASS level (Very high)
• XBASS 0 : No BASS enhanced/off
Press the
XBASS
repeatedly to select the bass sound.
“
” appears on the display window.
Each time you press
XBASS
, the current mode appears on
the display window and then the mode change as follows:
XBASS 0 ➜ XBASS 1 ➜ XBASS 2 ➜ XBASS 3 ➜ XBASS 4
HOUSTON (En)_P1-11 3/23/99, 3:06 PM5