Appendices
32 - English
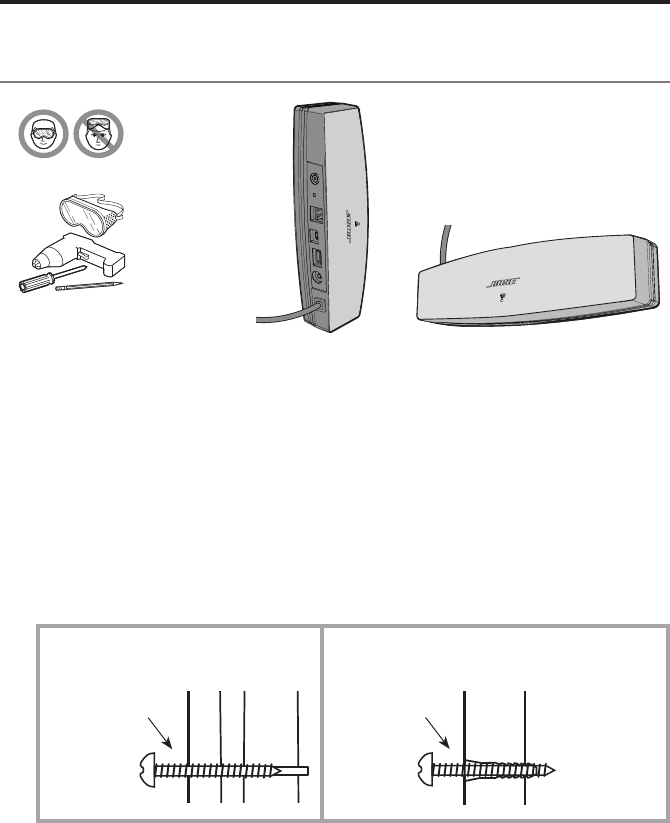
Appendix C: Wall mounting the
SoundTouch™ wireless adapter
Vertical
orientation
Connector
panel is
facing left.
Horizontal
orientation
Connector panel
is facing up.
Follow these instructions to wall mount your SoundTouch
™
wireless adapter. Install
either vertically with the connector panel facing left, or horizontally with the con-
nector panel facing up.
Note: Mounting hardware must be purchased separately. If the mounting
hardware instructions differ from these instructions, follow the mounting
hardware instructions.
• Wood Mounting: Mount to 1 in. (25.4 mm) or thicker wood. Drill hole with
a ⅛ in. (3.17 mm) drill. Use (2) #8x1¼ in. (32 mm) pan-head wood screws.
• Wallboard Mounting: Mount to ⅜ in. (9.5 mm) or thicker wallboard. Drill
pilot hole with a ³/
16 in. (4.76 mm) drill. Use (2) #6-8x1 in. (25.4 mm) plastic
wall anchors, and (2) #8x1¼ in. (32 mm) pan-head wood screws.
¼ in. (6.35 mm)
above surface
Wood
¼ in. (6.35 mm)
above surface
Wallboard
1. Mark holes on the wall 6¼ in. (158.7 mm) center-to-center.
2. Drill holes. Insert anchors (if used).
3. Install screws. Leave the screw heads ¼ in. (6.35 mm) above wall surface.
4. Position SoundTouch
™
wireless adapter onto screws. Press firmly into place.


